Hawaiian Fabric

Recently, I was delighted to escape from the cold snow to Hawaii with the family, (including my 4½ year old, and 15 month twin grandchildren). We stayed at the Aulani Disney Resort on Oahu, by the ocean, for a wonderful sunny week of playing outdoors.

We visited the Dole Pineapple Plantation which had gorgeous lush gardens and a nice patio to eat lunch and delicious Dole whips, (vanilla ice-cream swirled with pineapple syrup). At the back of the enormous store, I found a fabric vendor selling cuts of Hawaiian cotton prints. How could I resist?! I bought two yard chunks of each of these two fabrics, (see below), with no specific project in mind. With a large fabric stash at home, I try to be disciplined about my fabric purchases, but made an exception here since I was on vacation and needed souvenirs! There can always be some justification for fabric purchases and perhaps just liking it is enough….

Organizing your fabric

How do you organize your fabric stash? There are so many possibilities. The trick is to find a system that works for you, so that at any time you can locate the fabric that you want. Here are some ideas: by color, by project, by theme. I seem to use a whole combination of these. I like to use mono-chromatic prints, so I have piles of colors. I also have many multicolored fabrics, so there’s a stack of striped fabric and another with dots. I have floral prints, assorted animal prints, miscellaneous prints. The batiks are in a separate section, as I usually don’t mix batiks with other quilting cottons. I also have a different section for hand-dyed fabrics. Possible fabrics for my current project are strewn all over my cutting and sewing table until I’ve made my selections. They usually stay out because I never make all the decisions up front and my projects tend to evolve. Every now and then, I will stack them so that I have space to use my cutting table.

Part of my stash

One advantage of tidying up and sorting is that you can actually see what you have. I often come across fabrics that I had forgotten that I have, and I get excited and inspired. I try to tidy up after I finish a major project, or if I’m going away for a while. If my workplace is uncluttered, it is more enjoyable being in it and I feel more creative. Most of us have more than one project going at once, so there’s usually one of two piles of projects on hold, or new ideas. My studio doubles as my office, so there are bits of paper to contend with and I’m not always very good at keeping them all organized. Once I get into a project, I like to work pretty intensively, so the room gets pretty messy. Then, I’ll get frustrated by the chaos and have a go at cleaning up. I’m fortunately to have a room to devote to my quilting and office needs. The storage places are utilized to the full, so if new stuff comes in, I really need to clear out some of the old stuff. I need to apply this principle to my clothing too….

Japanese Kimonos

Last month, I taught in the Fort Worth area of TX and was fortunately to be able to visit the Kimbell Art Museum where there was a special exhibit, Lands of Asia, featuring items from the Sam and Myrna Myers Collection. Most of these sumptuous silk kimonos were made for use in the Japanese theater from the early 1600’s to late 1800’s.

The kimono has been worn by both women and men in Japan since the sixteenth century. The T-shape is made from four strips of fabric folded in half and sewn together to form the sleeves and body of a robe that opens in the front. It makes an ideal garment for embellishment with elaborate decorative motifs.

The weavers in Kyoto produced large quantities of brocade with colorful designs and gold and silver thread. Much of it went to the Noh theater where masked actors performed rituals and dance of scenes of mysterious tales to melancholic music. The costumes replaced the stage decoration and needed to evoke the condition and moral qualities of the characters by their colors and their motifs. They are stunningly beautiful with both woven and embroidered designs.

The picture on the right, immediately above, is an exception. This is a fireman’s coat which is reversible. It is made rather like a quilt with layers of padded cotton (batting) between the outside and inside fabrics, all stitched (quilted) together. These thick kimonos were soaked in water when used in fire-fighting and would have been tremendously heavy when saturated.The design on it is a magic feathered cape, which flies in the sky above a stream like a phoenix. This image is drawn from mythology to evoke the notion of rebirth from the embers.


Quilt Artist, Kathleen Bond, AZ (3), Quilt Backs

In October, I taught at the Thumb Butte Quilters’ Guild in Prescott, AZ. I stayed at the lovely home of the Programs Chair, Kathleen Bond. Kathleen has an impressive body of work including many hand applique quilts. Her fabric choices and combinations are unusual and often very busy, but she has a way of pulling them altogether to make stunning quilts. I’ve already written two posts highlighting some of Kathleen’s quilts. This post shows a couple of her imaginative quilt backs. Many of us have been tempted to purchase pre-printed fabrics for making stuffed animals, dolls or Christmas ornaments. Here’s a way to use up those fabrics to make your quilt backs more interesting. I love the striped binding too.


A Work in Progress

My current major quilting project is a commissioned bed-quilt. My client is reasonably local, so we have met several times. I have been to her house to get a feel for the ambiance and her color pallet and she visited me to look at my quilts and tell me what she liked. She wants something traditional and geometrical in purple, magenta, orange and turquoise, and was drawn to my Feathered Star quilts. We decided on a large 28″ Radiant Feathered Star for the center of the quilt with a 9″ compass in the middle.

I fussy-cut the Paula Nadelstern fabric for the star arms. As shown in the photo on the right, the triangles making the feathers are foundation paper pieced and are in a color gradation of oranges. Next, I made four 16″ diamond star blocks, strip-pieced with fussy-cut center diamonds from the same Paula Nadelstern fabric.

I’m now working on four compass blocks and have completed two of them. These are 14″ compasses with 32 points. For these, I am using Robin Long’s strip-piecing method and special ruler. Her technique is really slick and very accurate. It took me about eight hours to make this compass including hand-appliqueing the center circle. Check out Robin’s website. Once all the compasses are finished, I will work out how to put it all together and will be adding smaller Ohio Star blocks between these compass and diamond star blocks. The finished quilt will be in the 80-85″ square size range. In two or three months, I hope I’ll be posting a picture of it!


Quilt: Serenade for Anne and Denise

I’ve recently completed a quilt that I’ve been working on for a few months, just in time to take it to Italy to give as a gift for dear friends who moved there in April. I’m so excited about going to visit them and the quilt is a surprise. By the time this blog posts, I will be in Italy. This busy design includes very personalized fabric choices. Anne is an accomplished musician and Denise is an electrical engineer. There’s beer for Denise and prosecco for Anne. The grand pianos and piano keys are a major feature along with the flowers for these avid gardeners.

The large flowers are the new ones in Italy, (Anne and Denise and the flowers they will plant) and the small classical flowers are the Italian ones. Here’s a closer shot for more details. They love cats and have one which traveled with them from US to Italy. After completing the quilt, I realized that I omitted any reference to their sporting allegiances, so I added the Seattle Mariners compass, appliqued on and visible close to the center of this picture. The Seattle Seahawks label appears on the back of the quilt (see below).

In this picture it is a little easier to see the three different blocks in the quilt: Snowball, Jacob’s Ladder and Shoo-fly. The detailed shots below show the corner blocks in which I used technology fabric for Denise. Denise generously gave many hours of her time to completing all kinds of technical projects at our church, St. Barnabas Episcopal Church on Bainbridge Island. She made tremendous improvements to the lighting, so the fabric with light bulbs seemed most appropriate. The shots also nicely illustrate the grand pianos. One of my students brought some of this grand piano fabric to my Bargello Quilts with a Twist workshop and fussy-cut the pianos for her blocks. They looked great and I loved the fabric, so I found it on-line and ordered it for this quilt.

I long-arm machine quilted the quilt with the help of my good friend Wanda Rains, using her long-arm machine. Wanda helped me with the set-up on the machine and advancing the quilt after each pass of stitching. I quilted in a watery meander pattern. The back of the quilt is yellow and sunny; sunshine and water to nurture these new flowers in Italy.


Fussy Cut Wonders

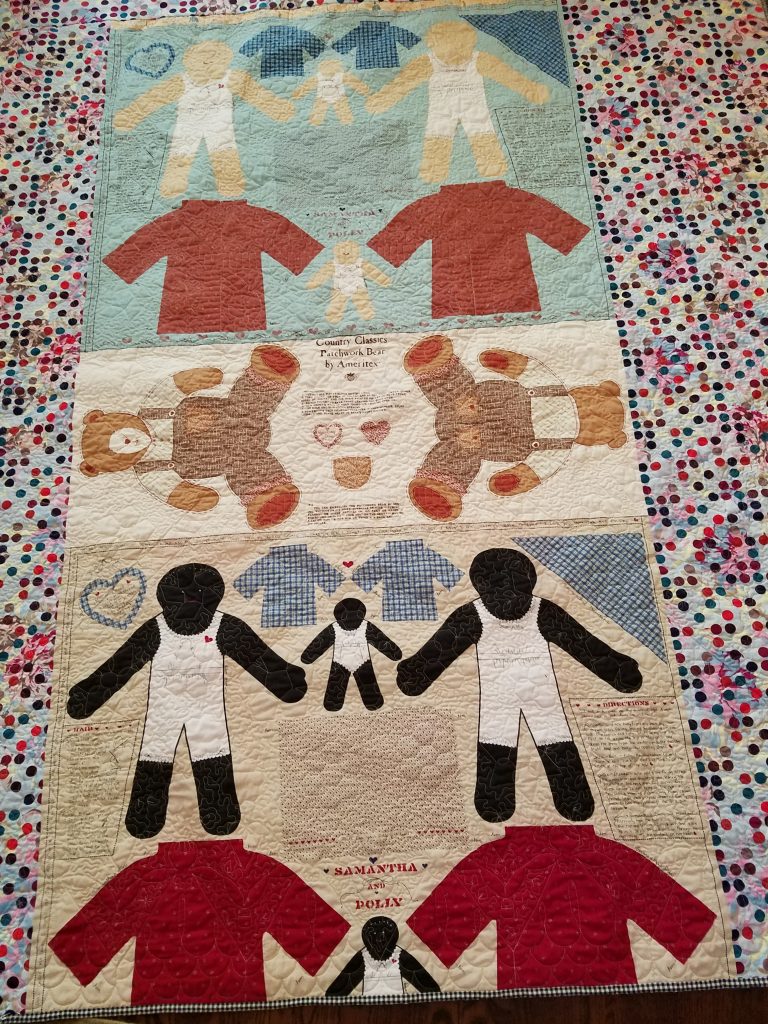
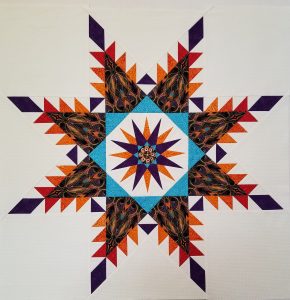
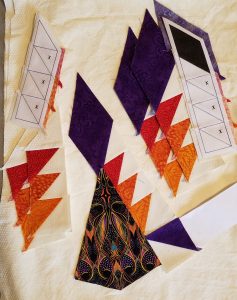
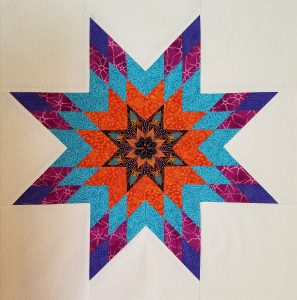
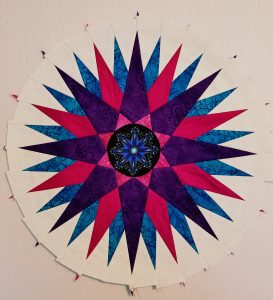
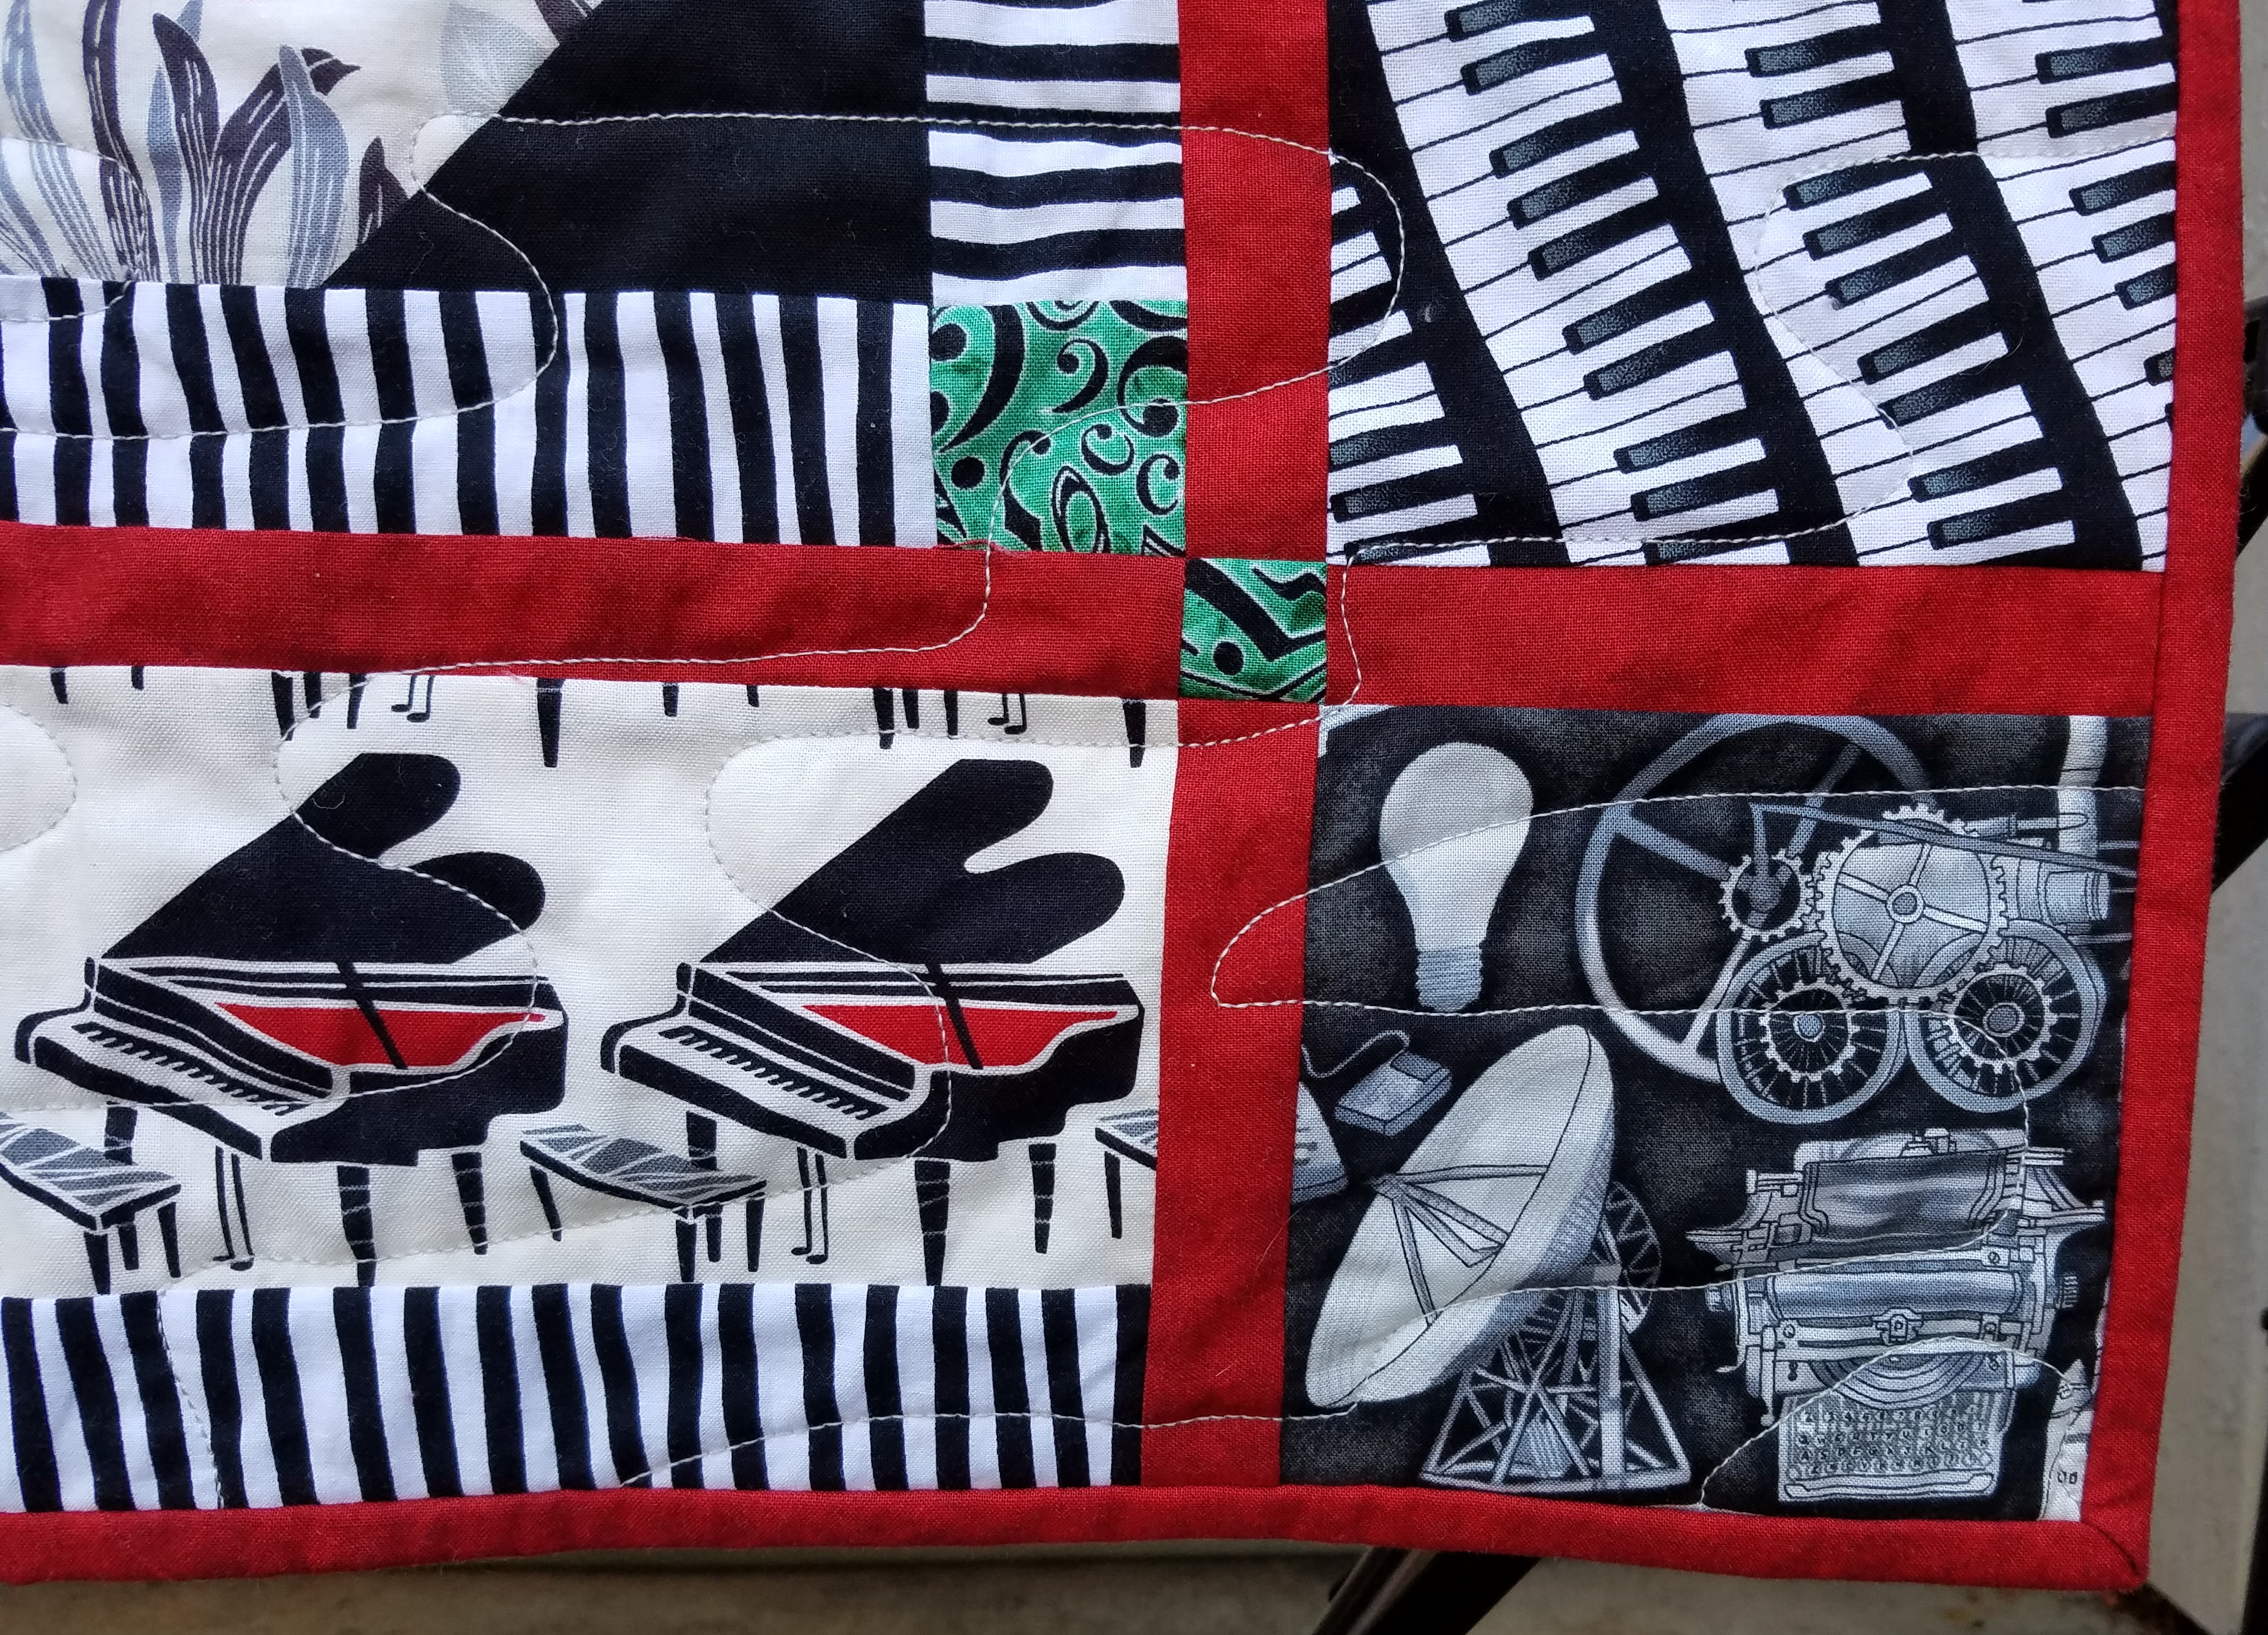
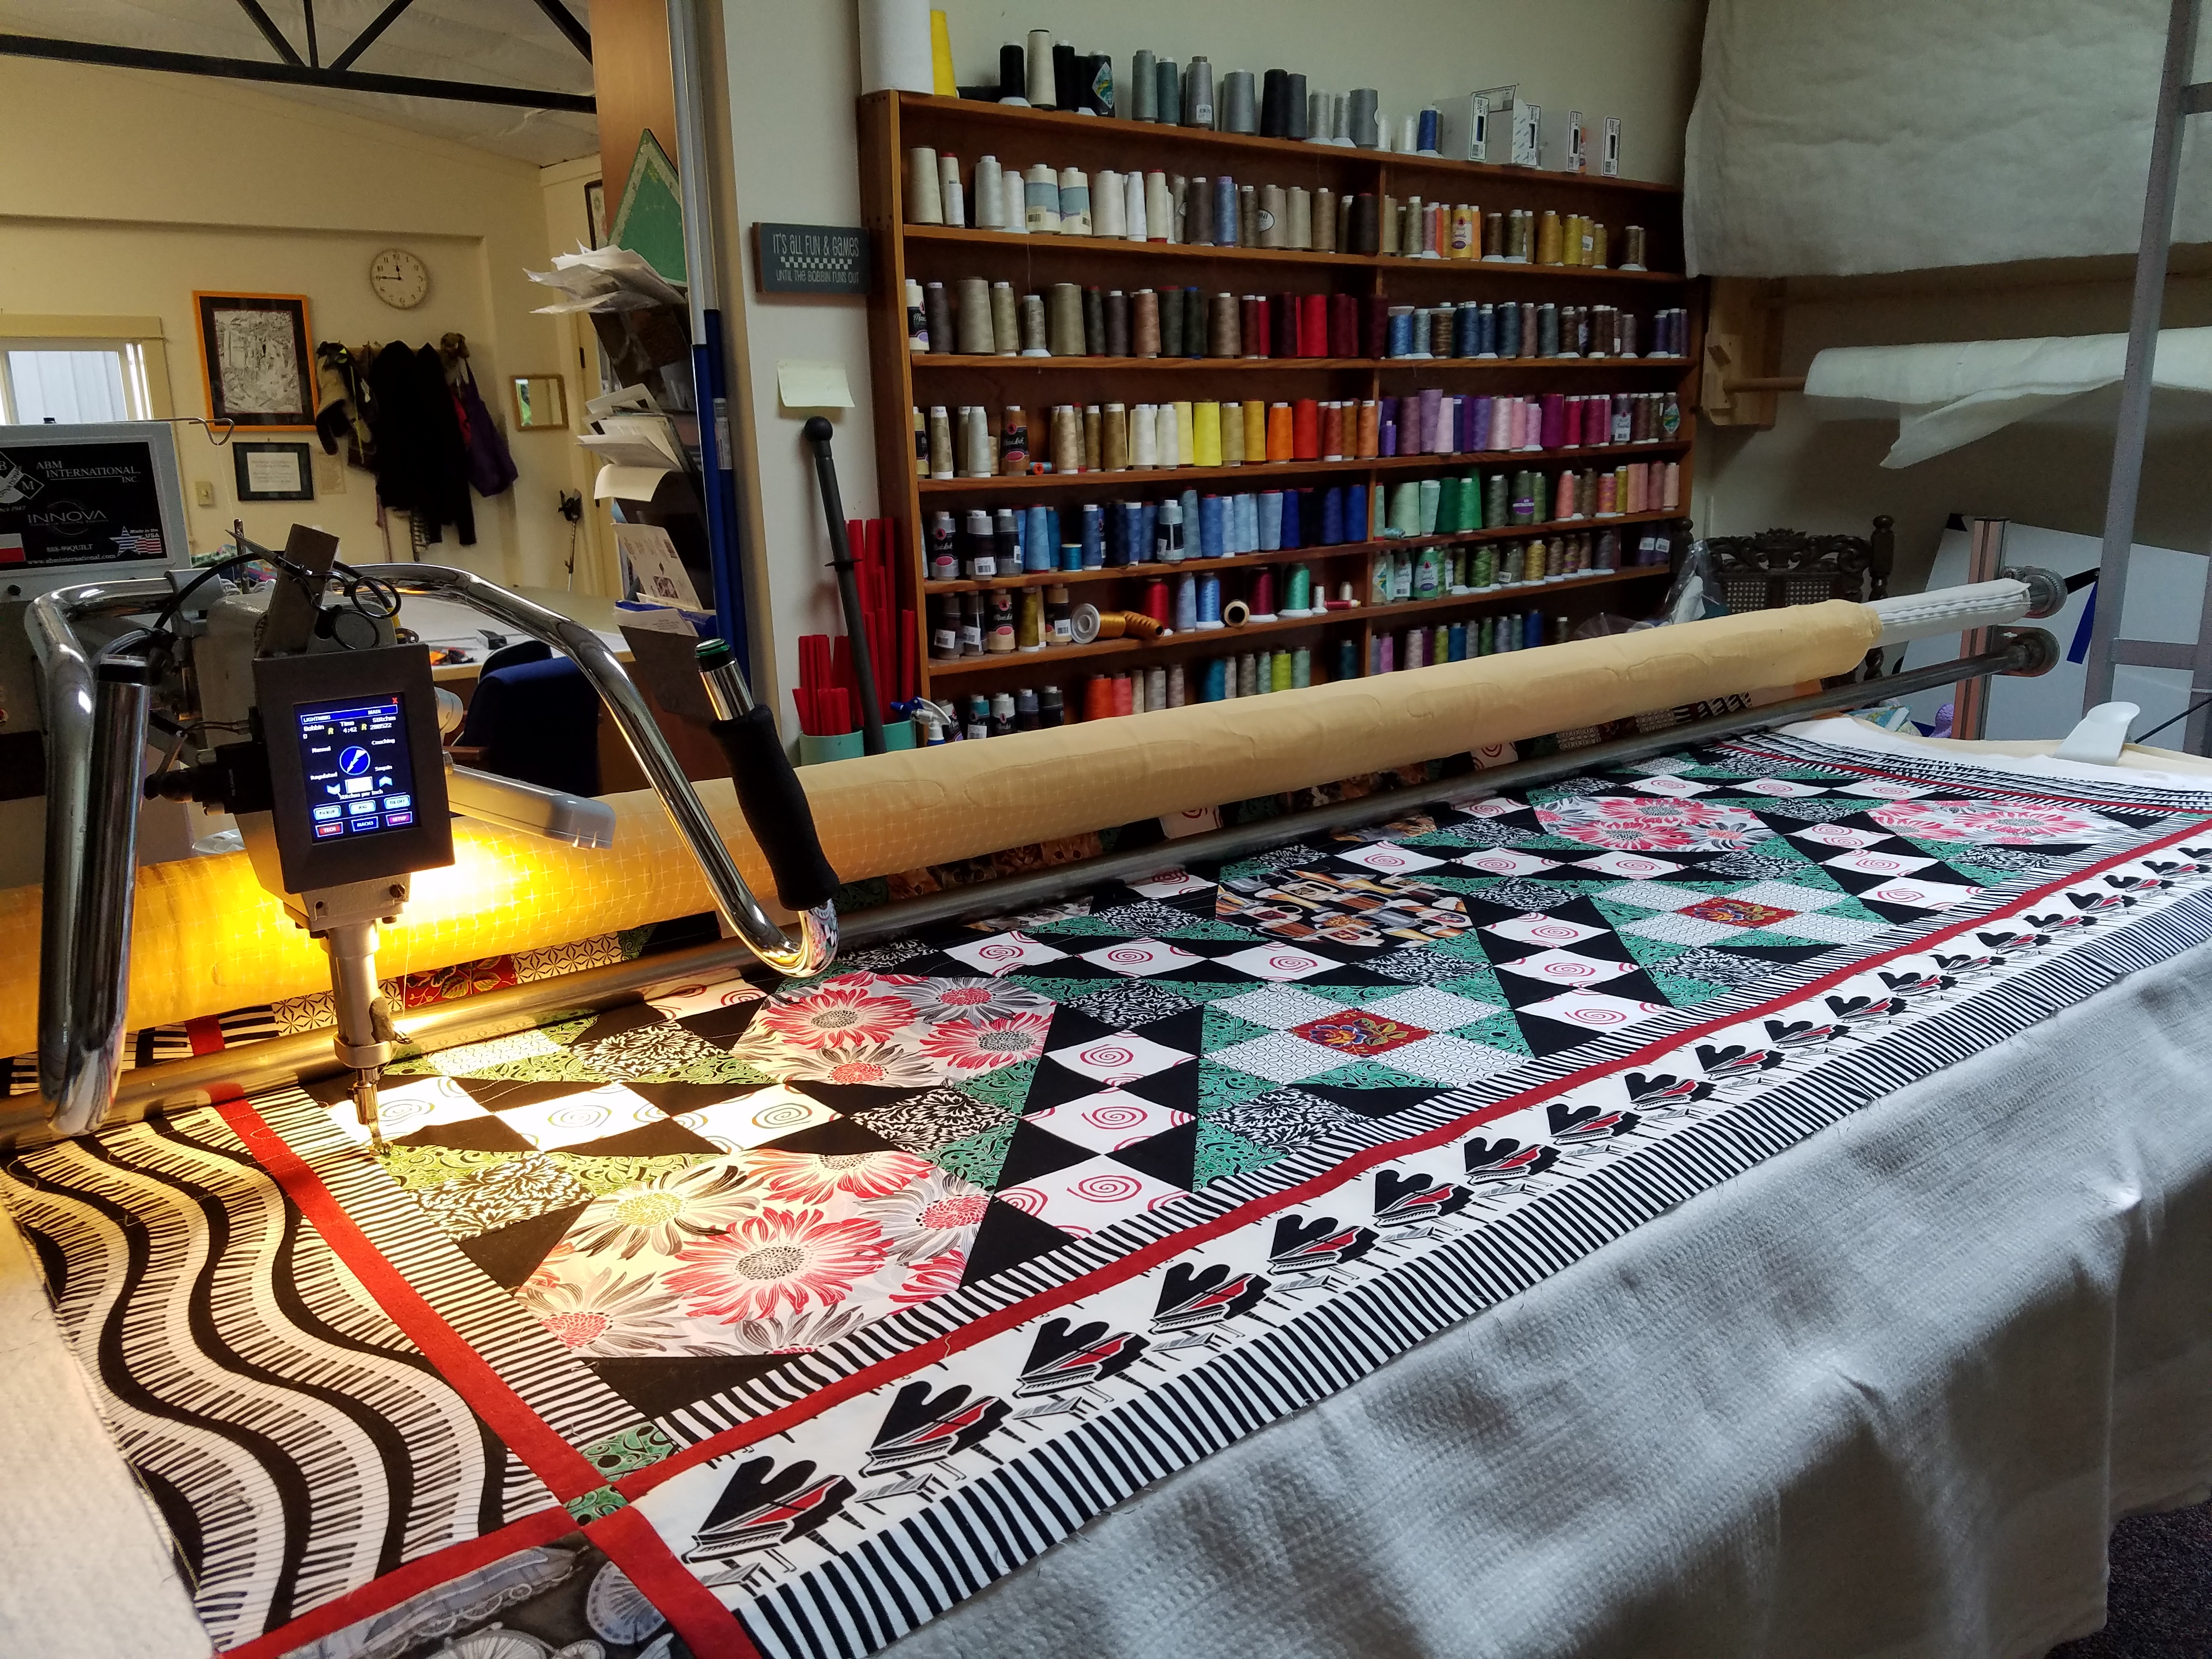
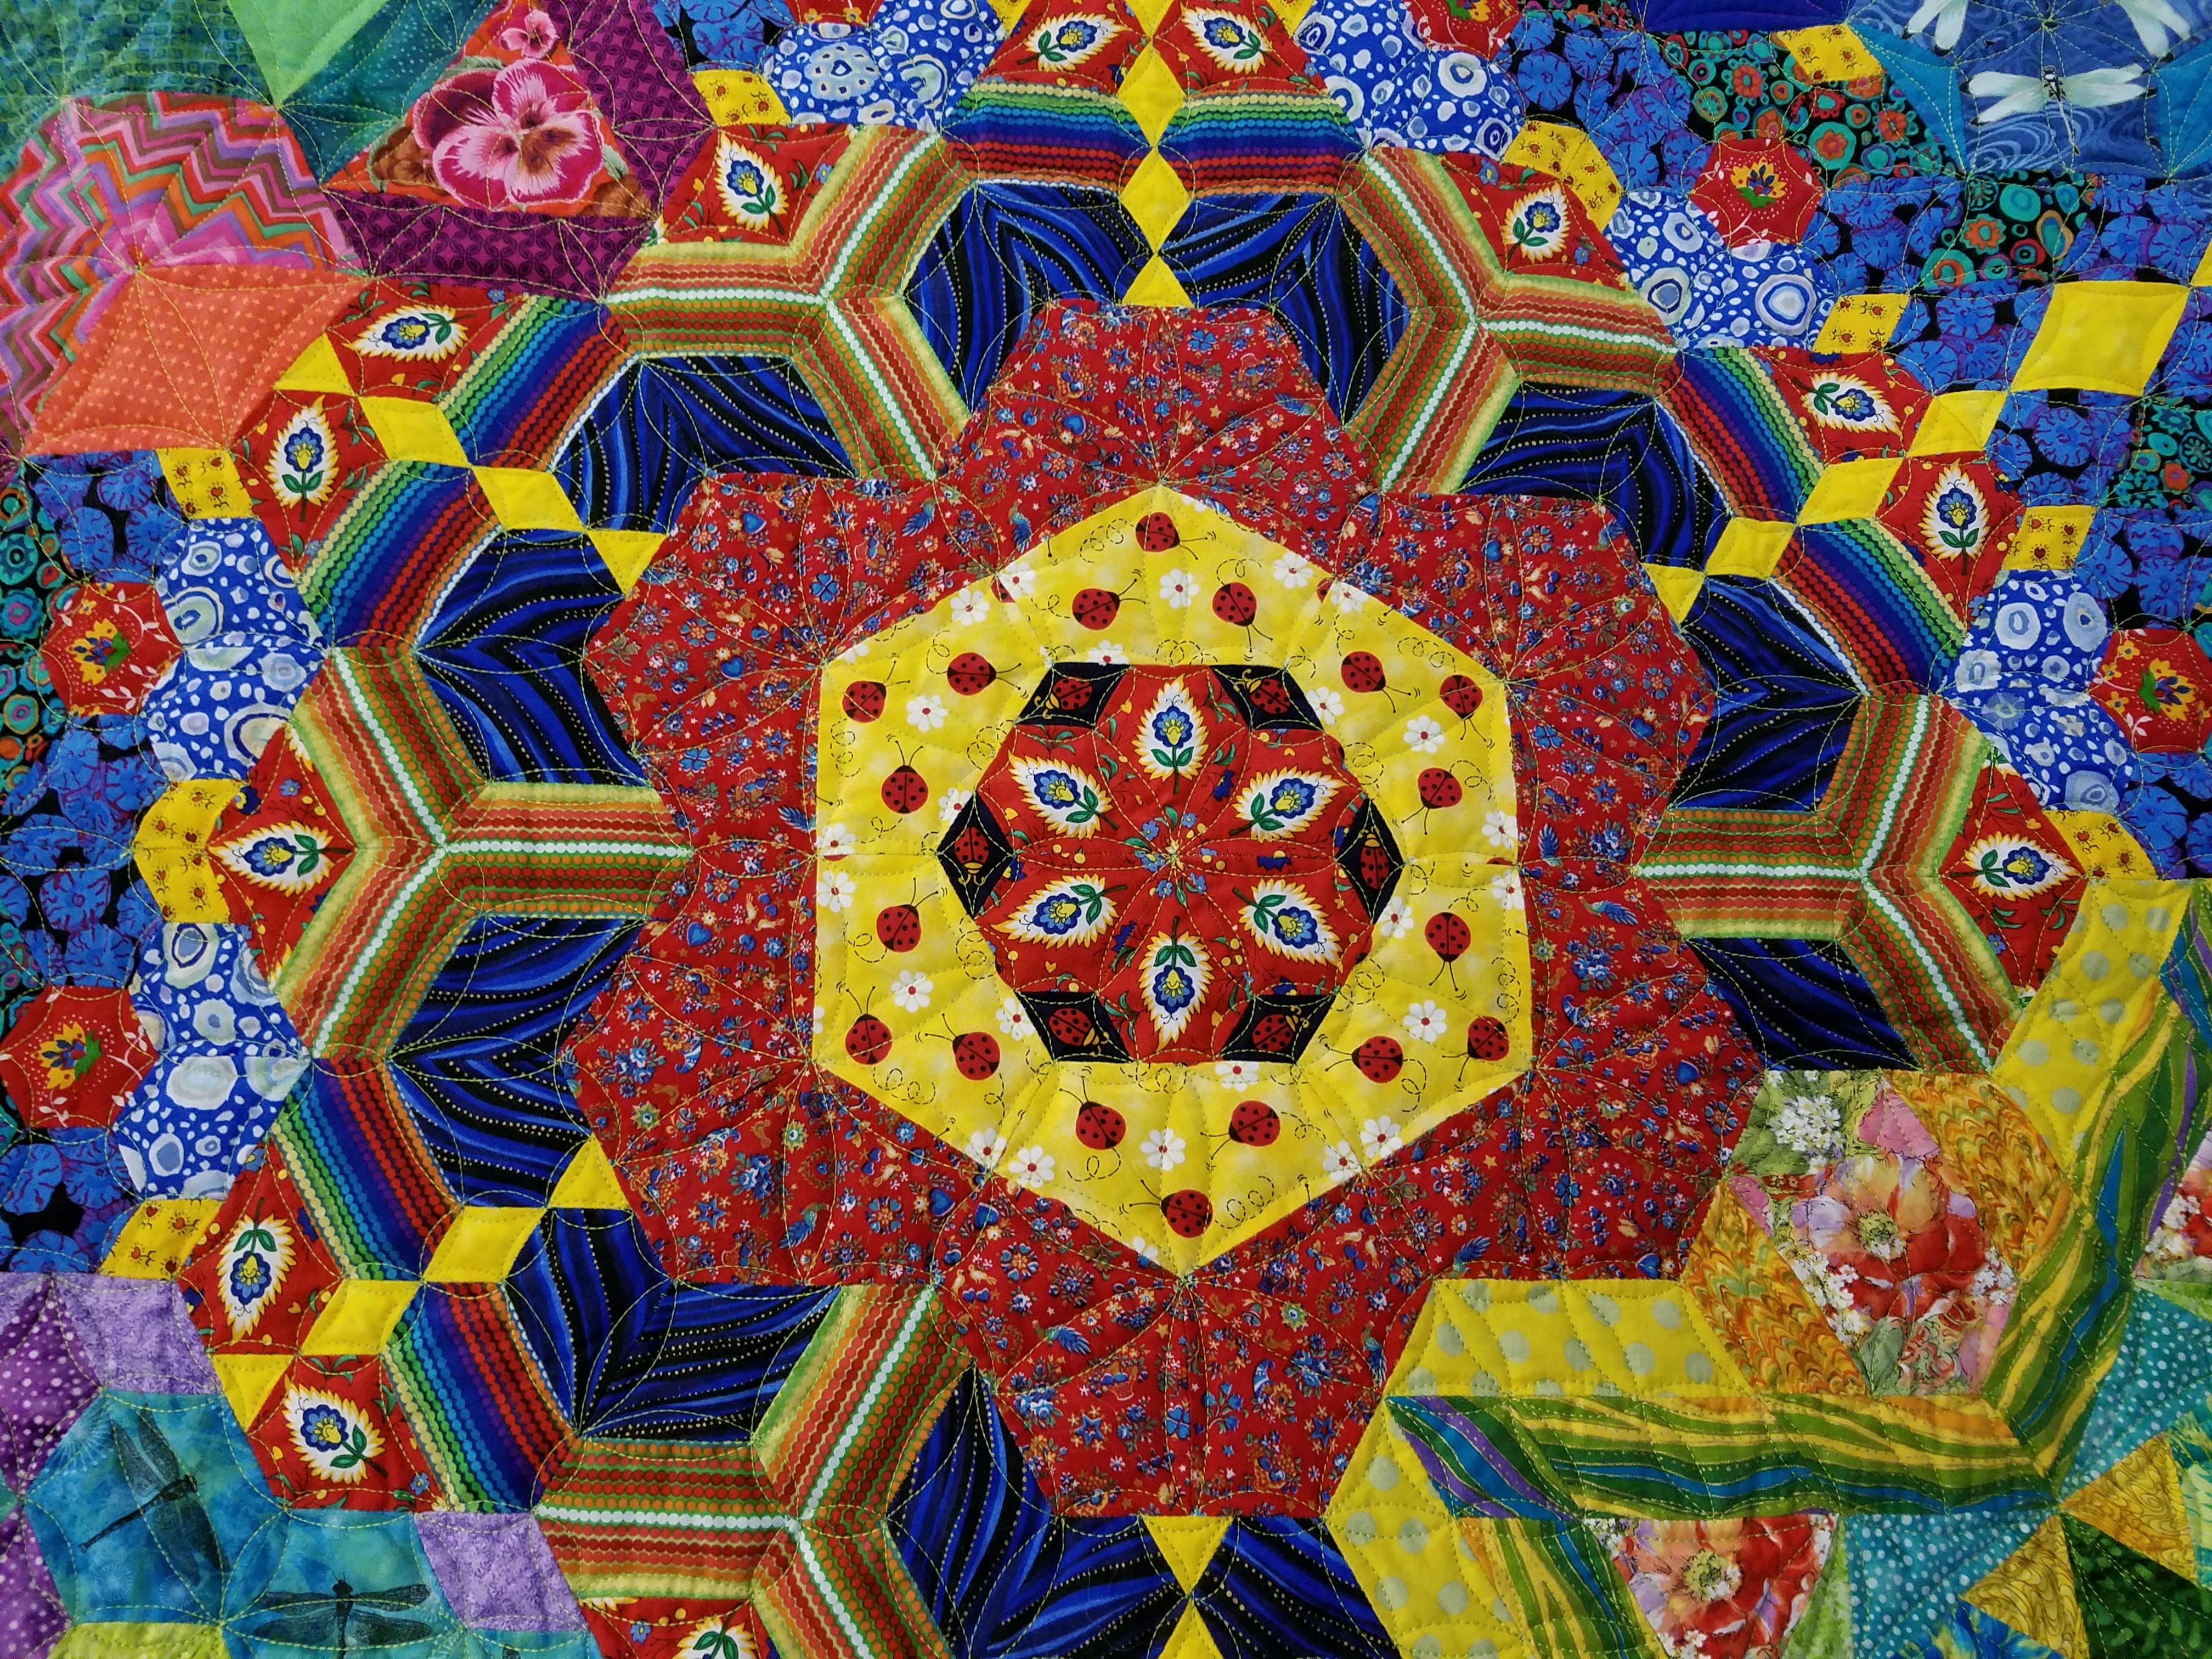
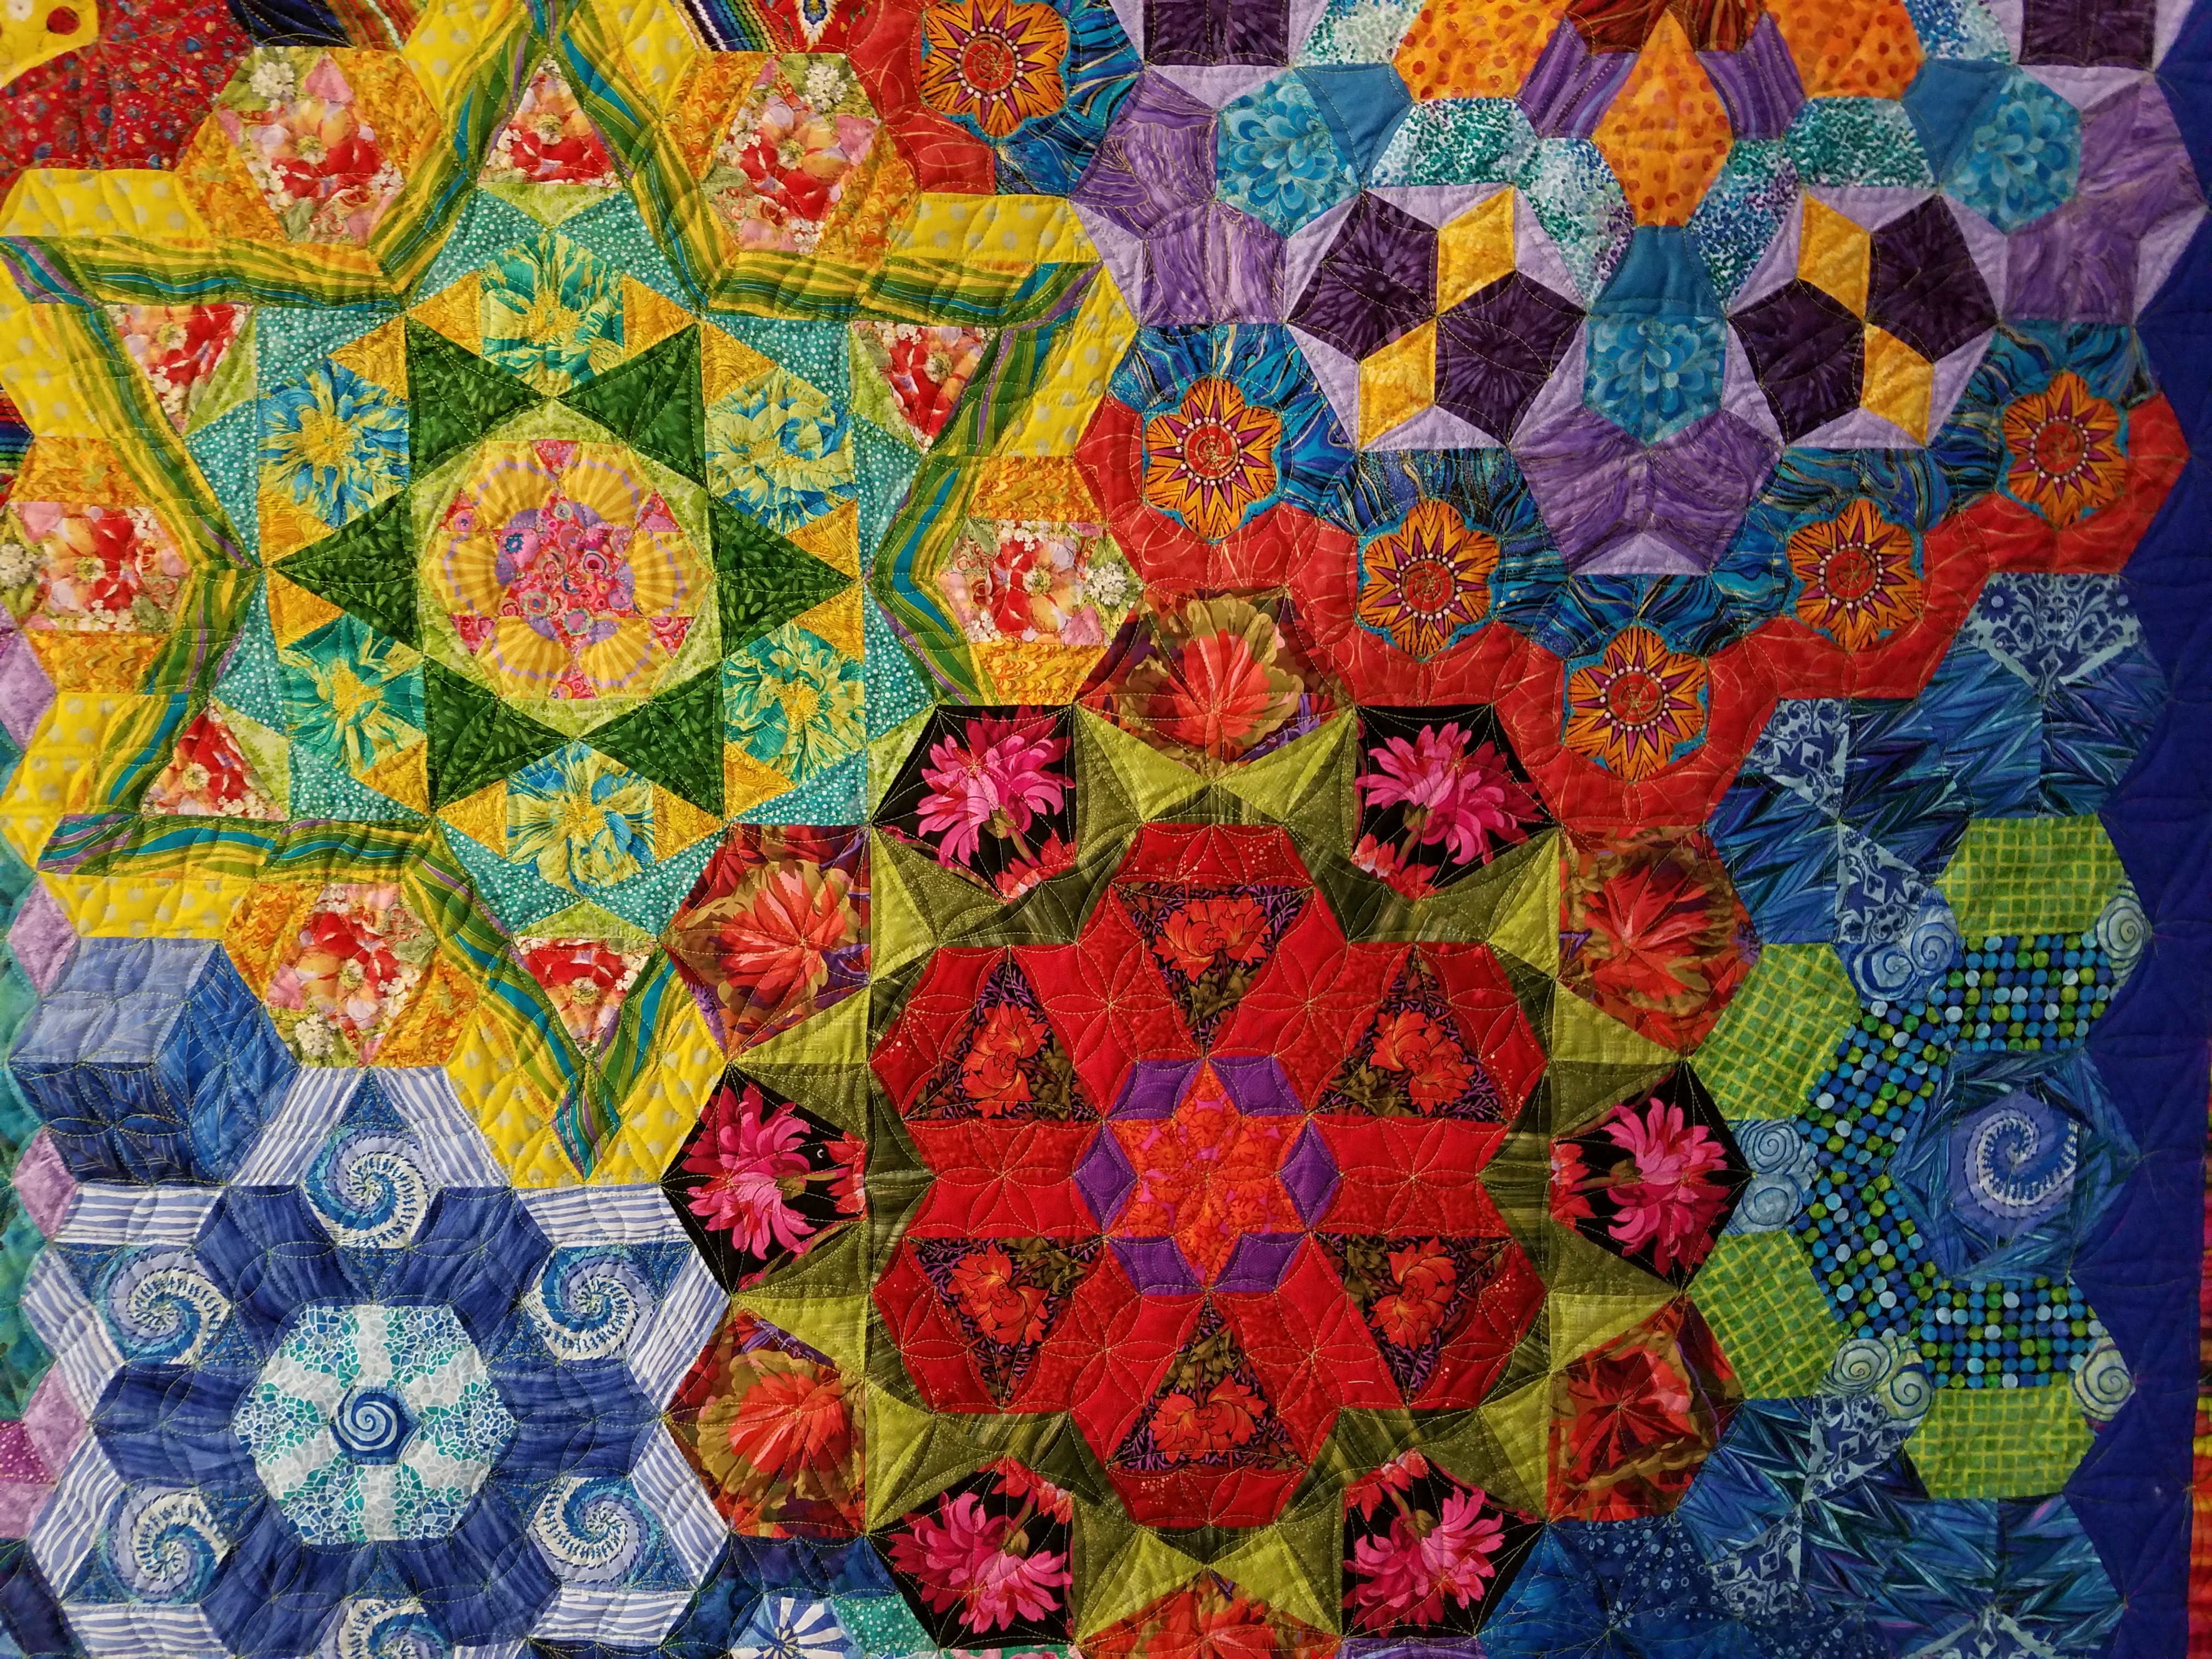
Last week my blog featured a quilter, Ann Trujillo, whose beautiful quilts were show-cased in a special exhibit at our Kitsap Quilters’ Guild show. Two more quilts displayed at the show and illustrated here were also made by Ann, who thrives on complex, detailed projects. Millefiori-style quilts have become popular recently. Their amazing kaleidoscopic designs are made up of several English paper piecing shapes in which the fabric is often fussy cut to create spectacular results. When fabric is fussy cut, a particular motif or section of pattern is selected for the patchwork piece. Repeated identical pieces used in stars, hexagons, or other shapes generate wonderful patterns. Millefiori (Italian: [milleˈfjoːri]) is defined as a glasswork technique which produces distinctive decorative patterns on glassware. The term millefiori is a combination of the Italian words “mille” (thousand) and “fiori” (flowers).

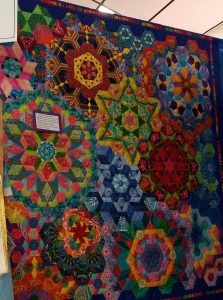
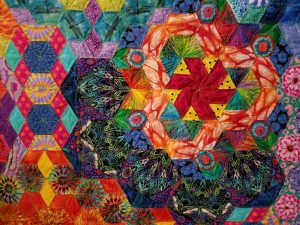
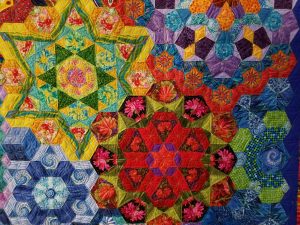
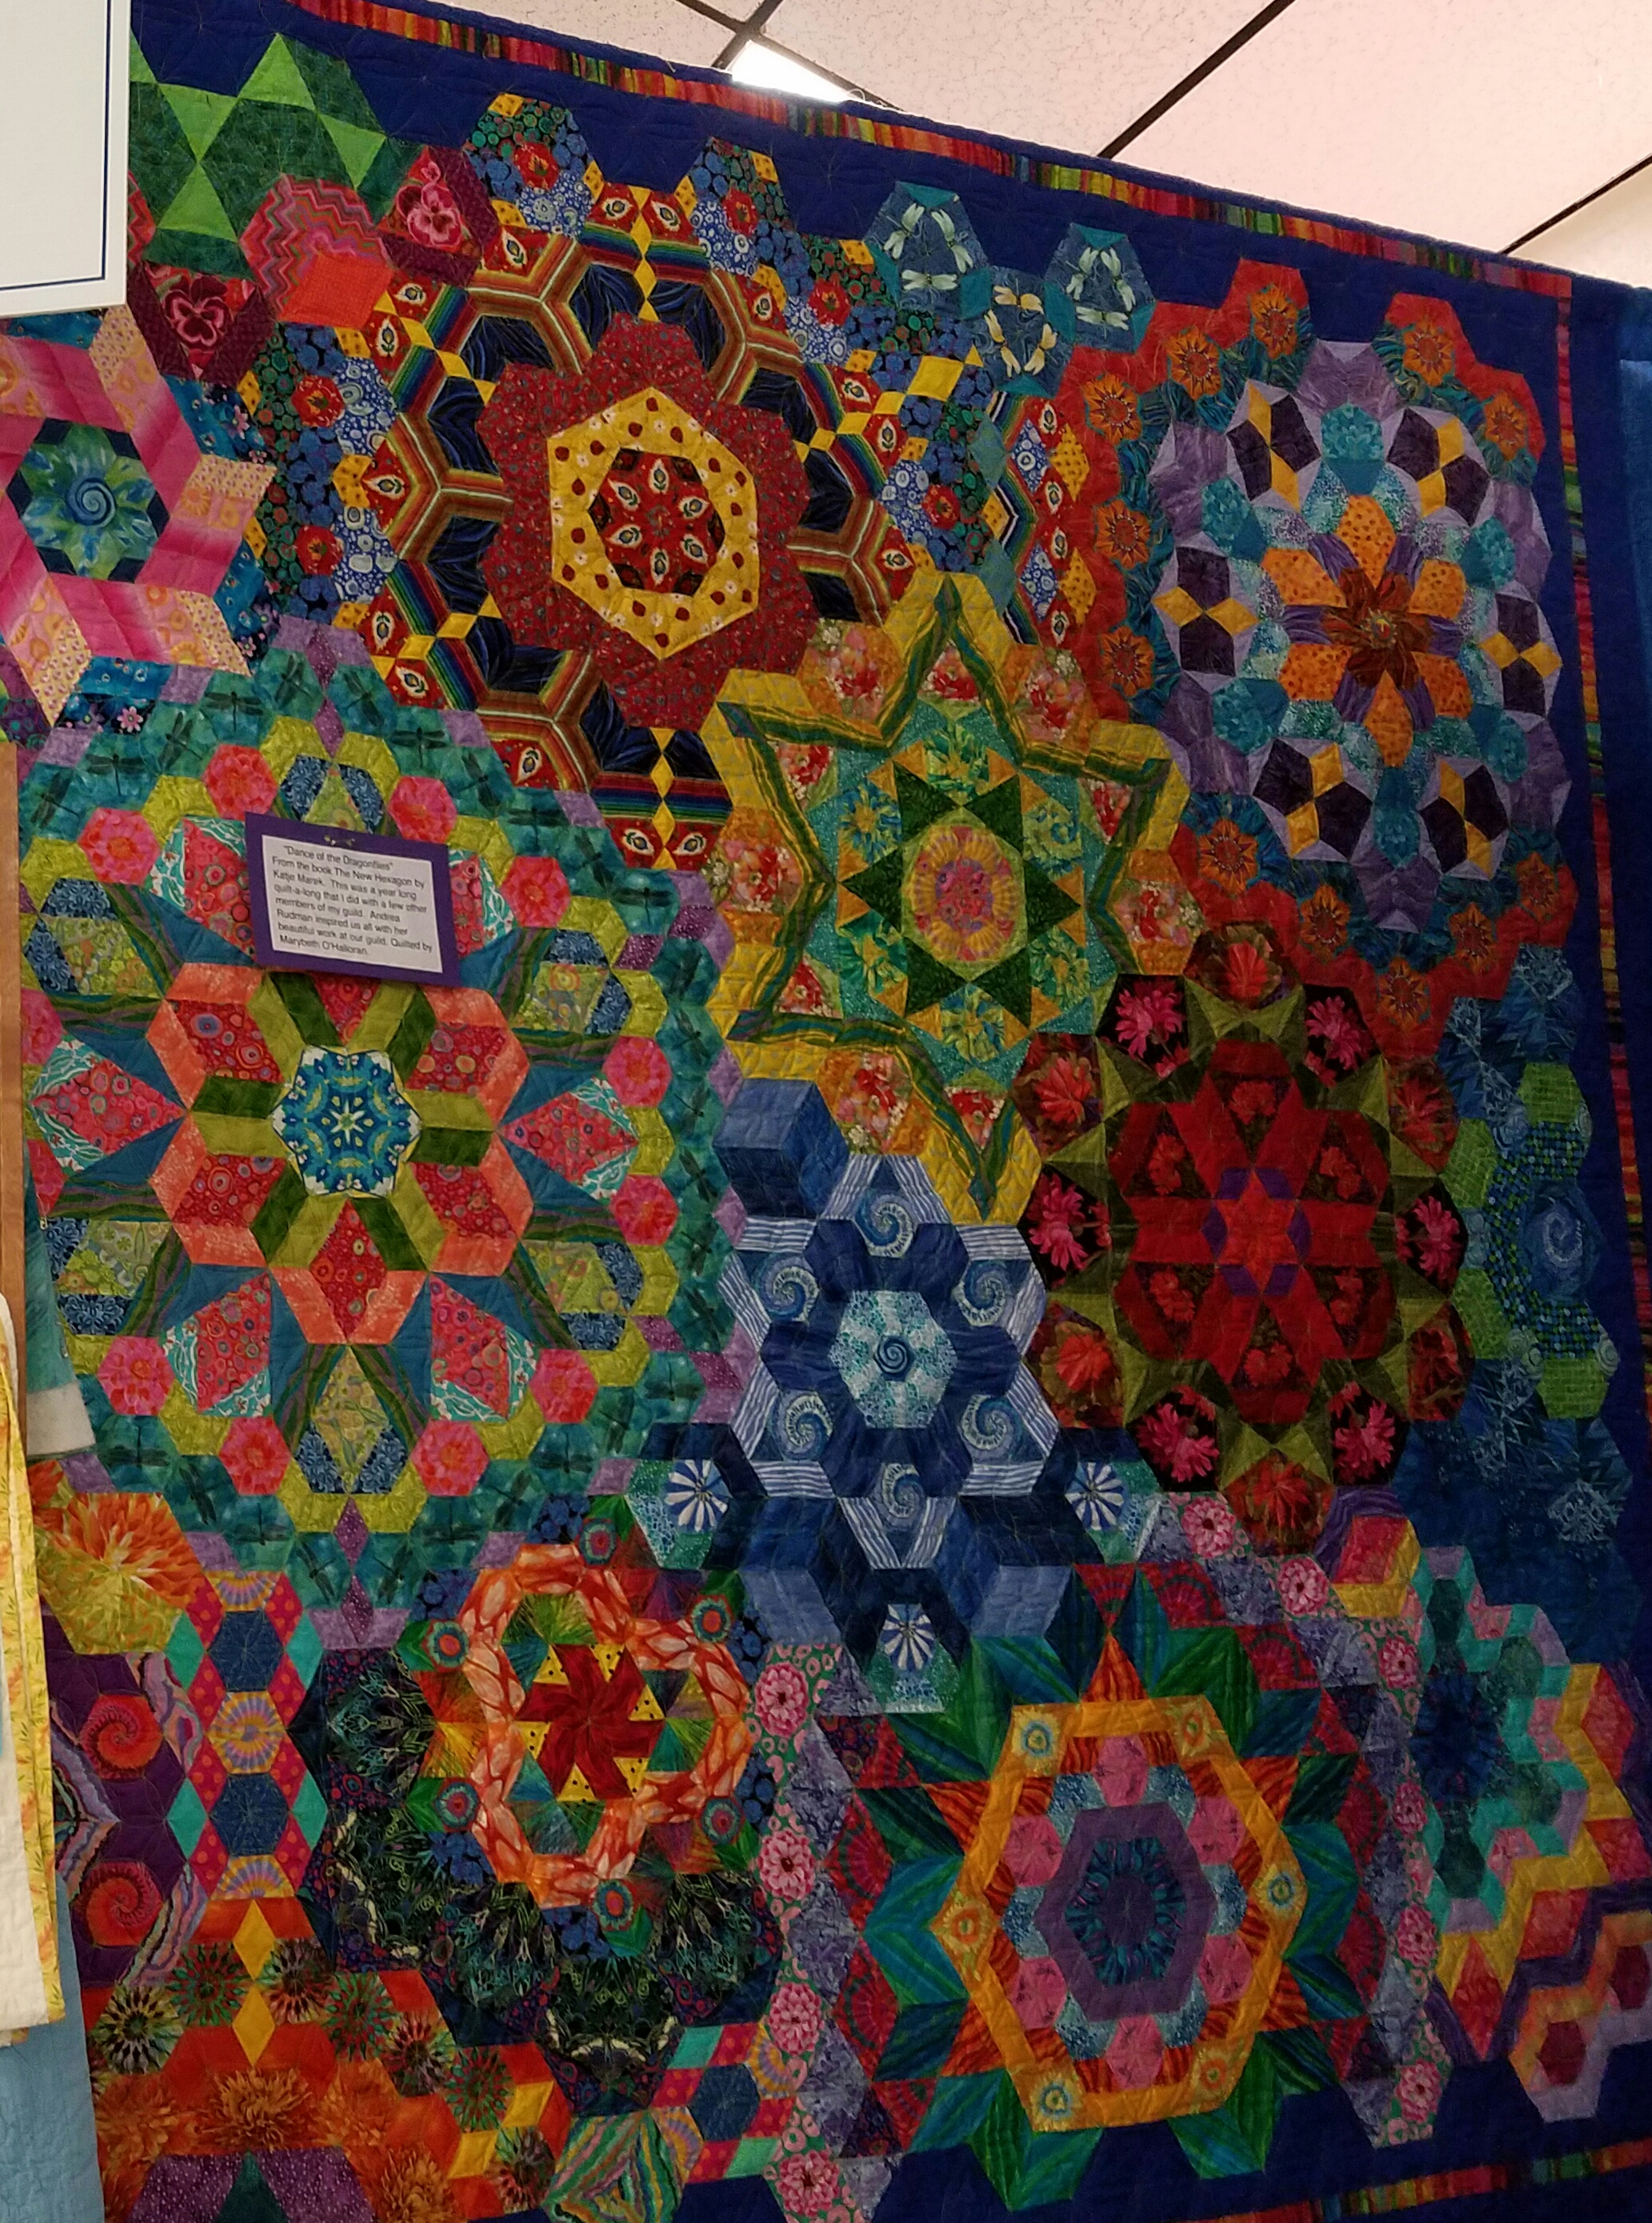
This quilt, Dance of the Dragonflies, took Ann a year to hand-piece and was quilted by Marybeth O’Halloran. The quilt is stunning from a distance, (the overall photo doesn’t do it justice as it was located in a dark spot), but there is so much more when you get up close to look at the all the detailed work. The designs formed by the combinations of the fabrics, many with fussy-cut motifs, are awesome. The pattern came from the book, New Hexagons, by Katje Marek and Ann was inspired by another guild member, Andrea Rudman, who was piecing beautiful sections and started a small group of quilters who met to share this passion.

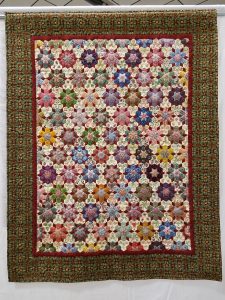
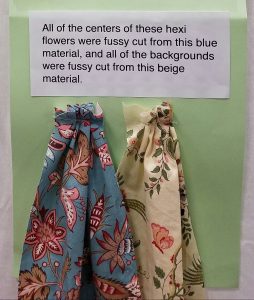
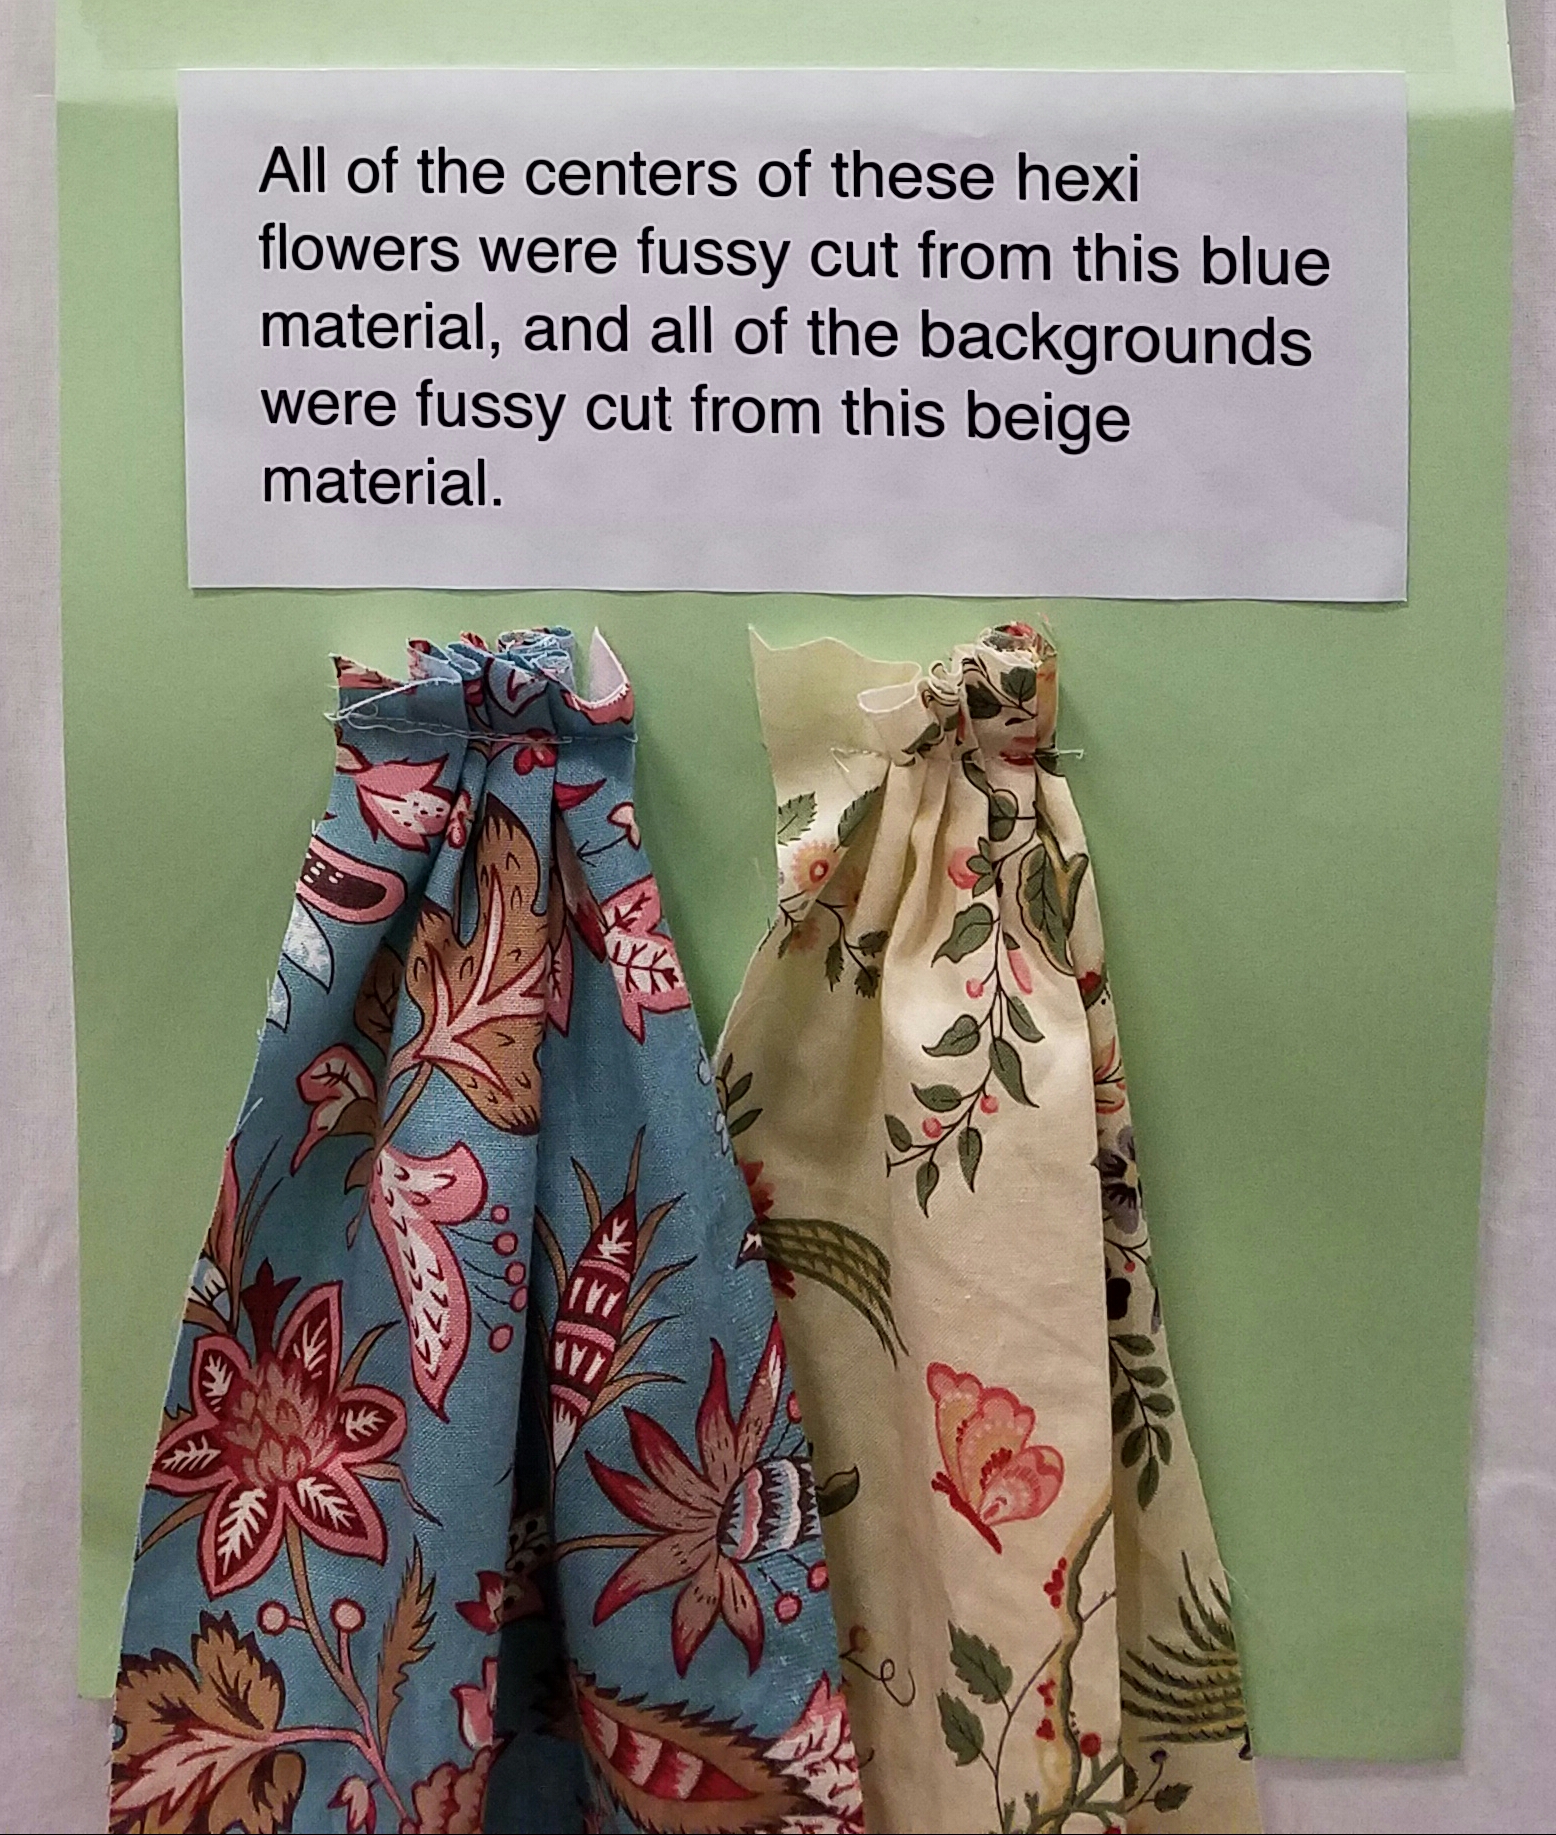
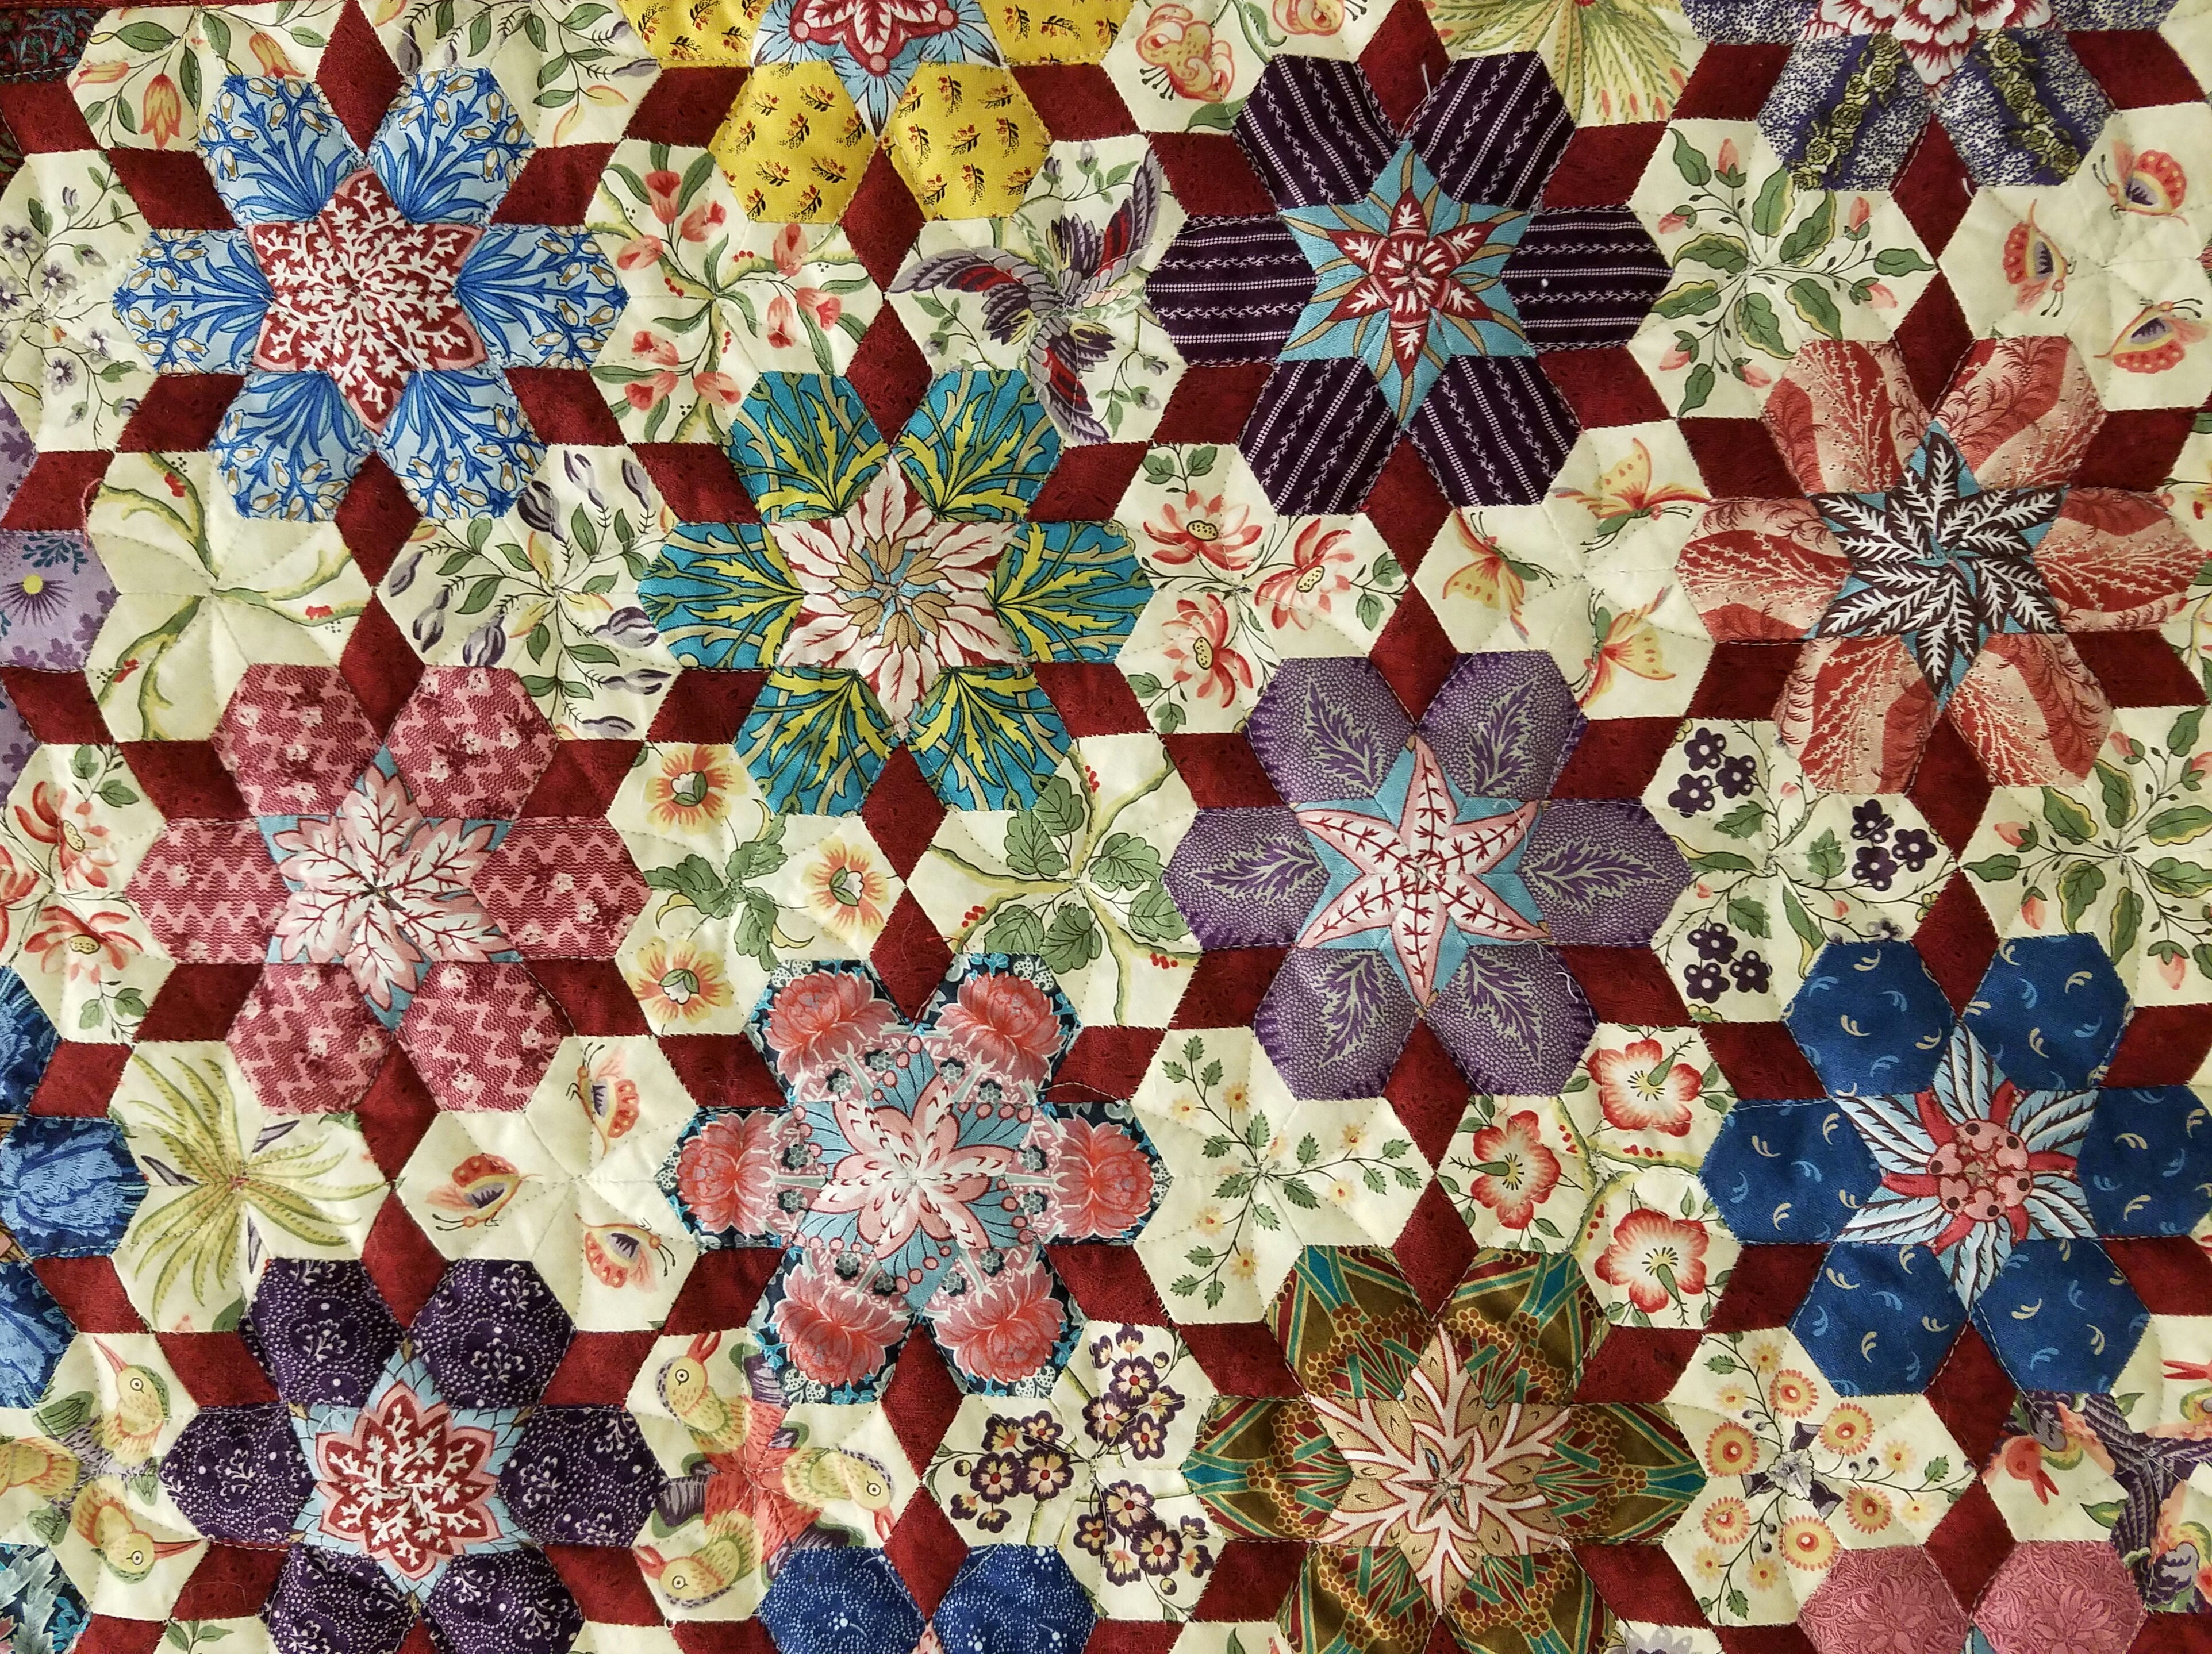
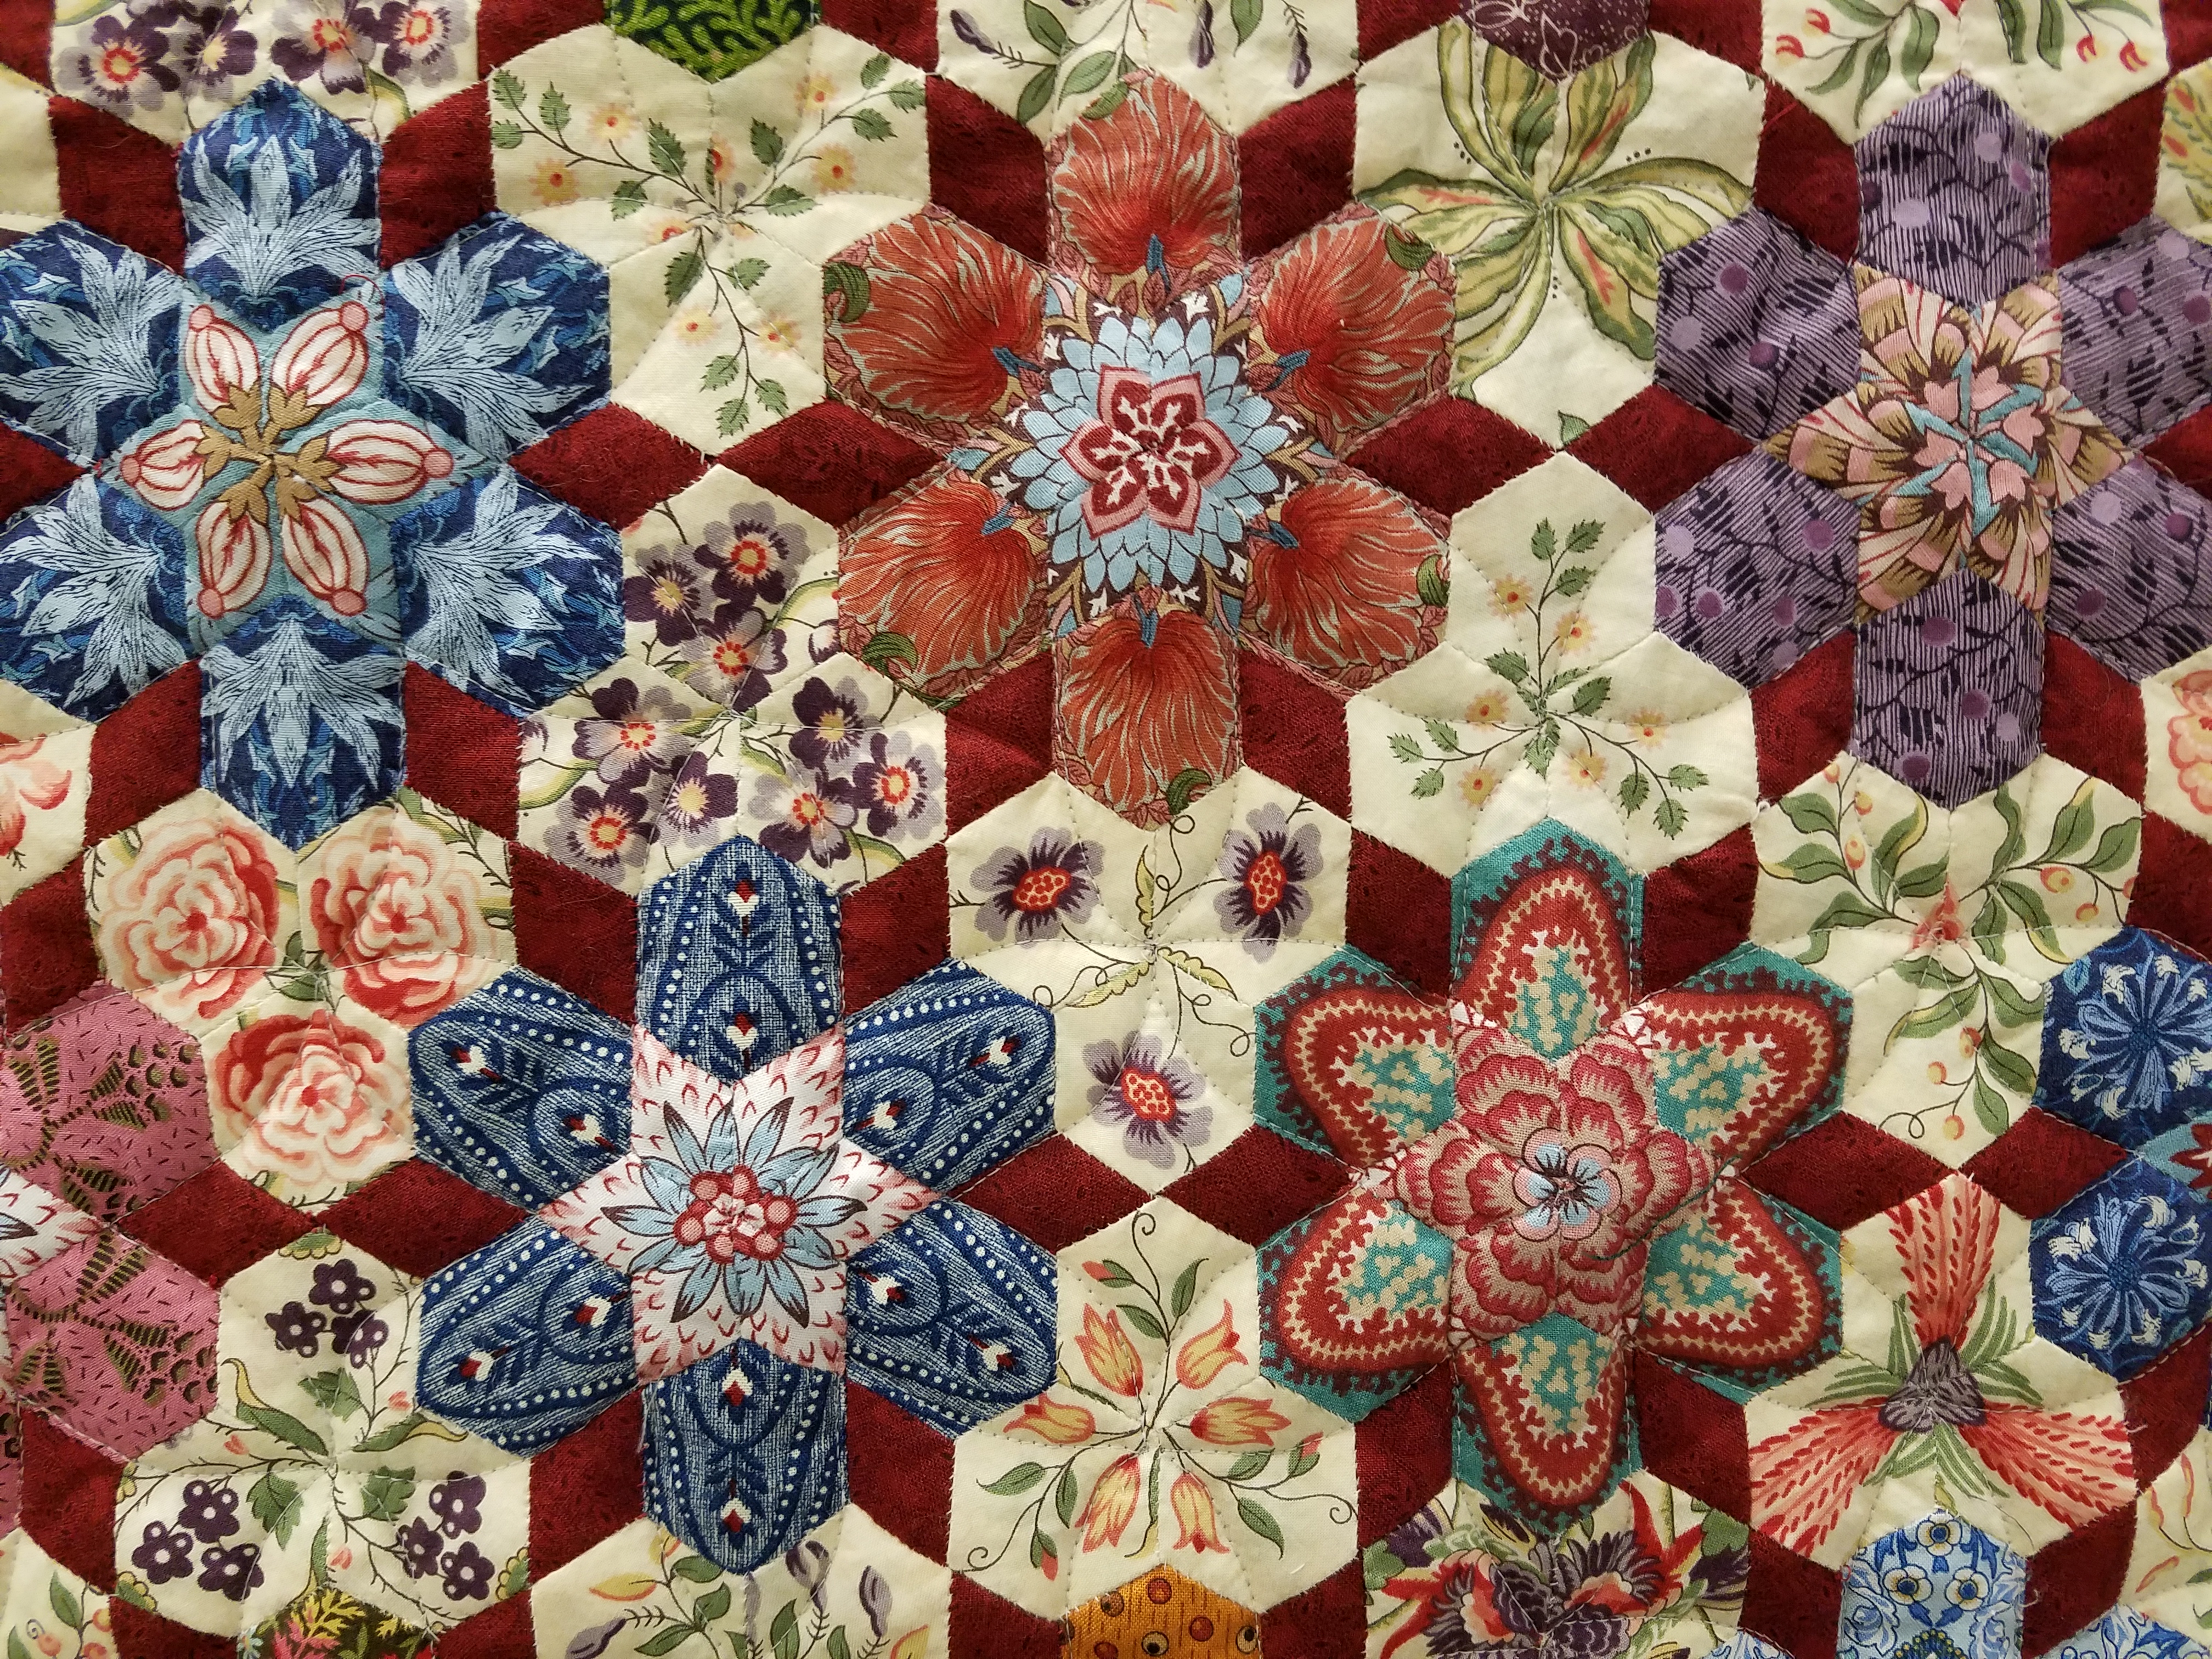
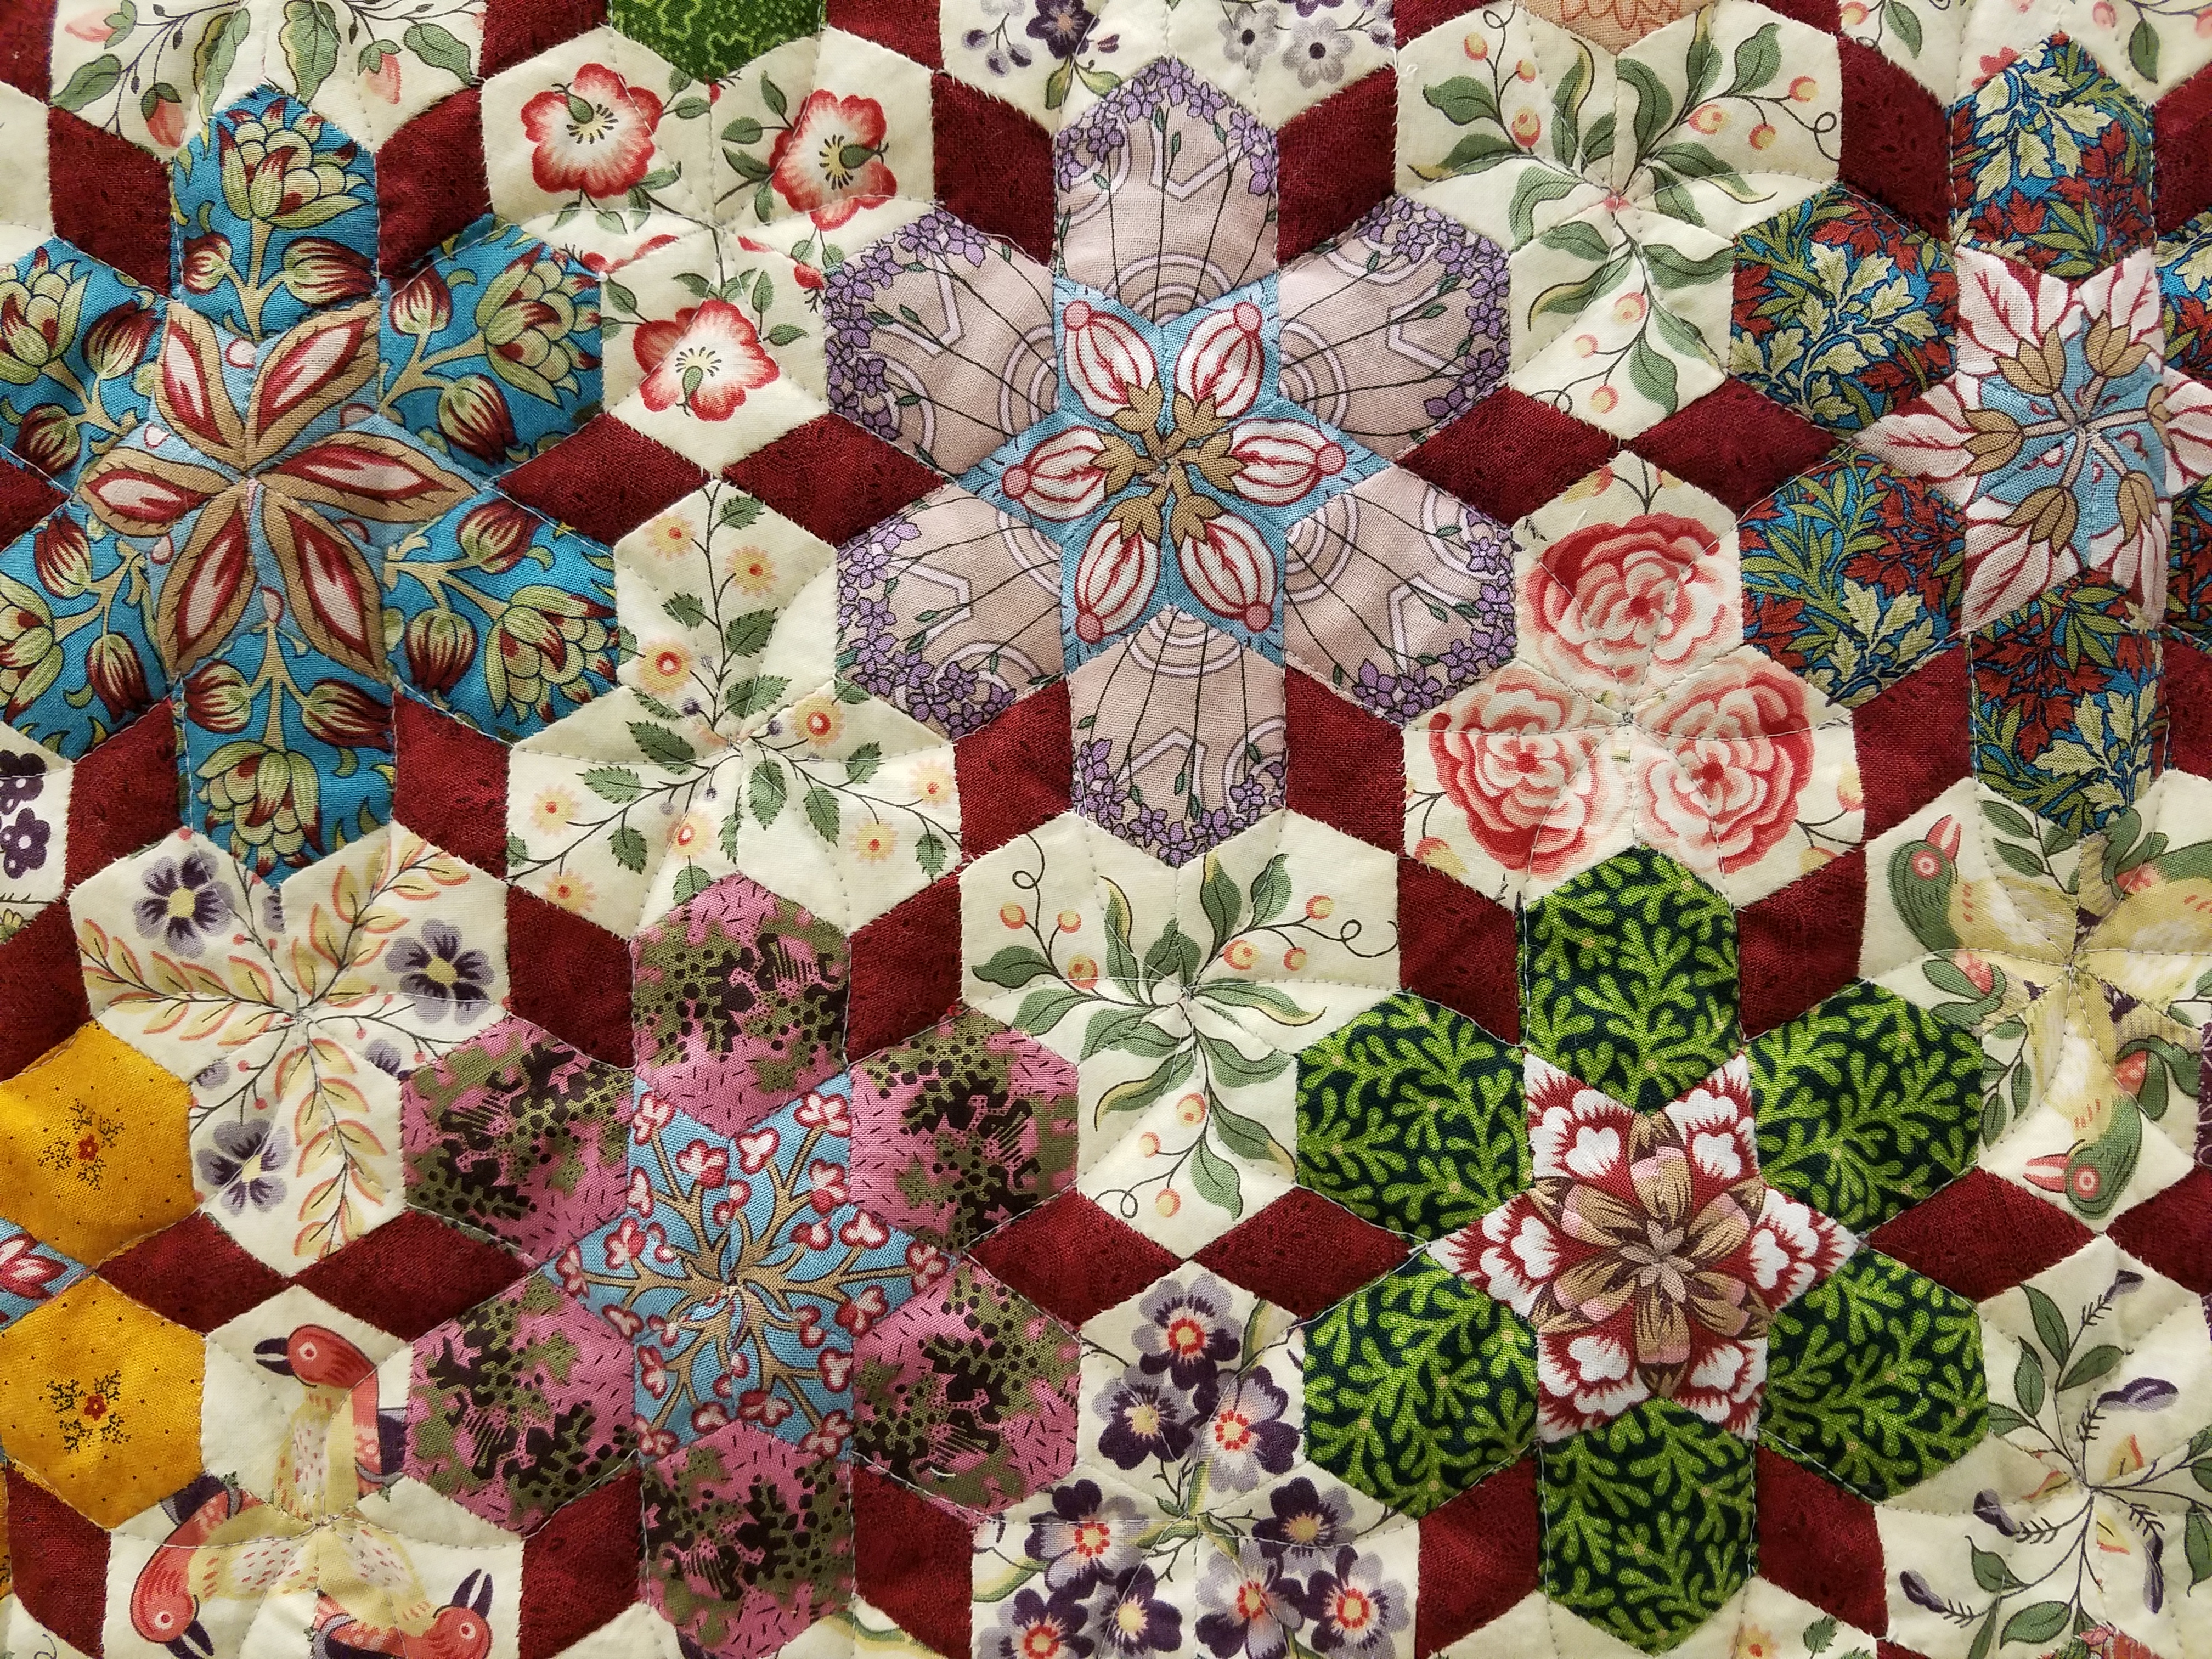
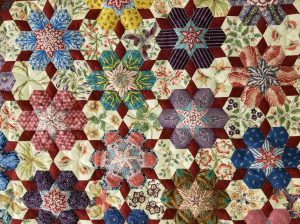
Remembering Donna, was made by Ann to honor one of our guild’s founding members, Donna Endresen, who passed away last year and is missed by us all. Donna loved reproduction fabrics and loved flowers. Take a look at the two fabrics and note that all the centers of the hexi flowers were fussy cut from the blue fabric and all the background fabrics in between the stars were cut from the beige material. It’s beautiful.

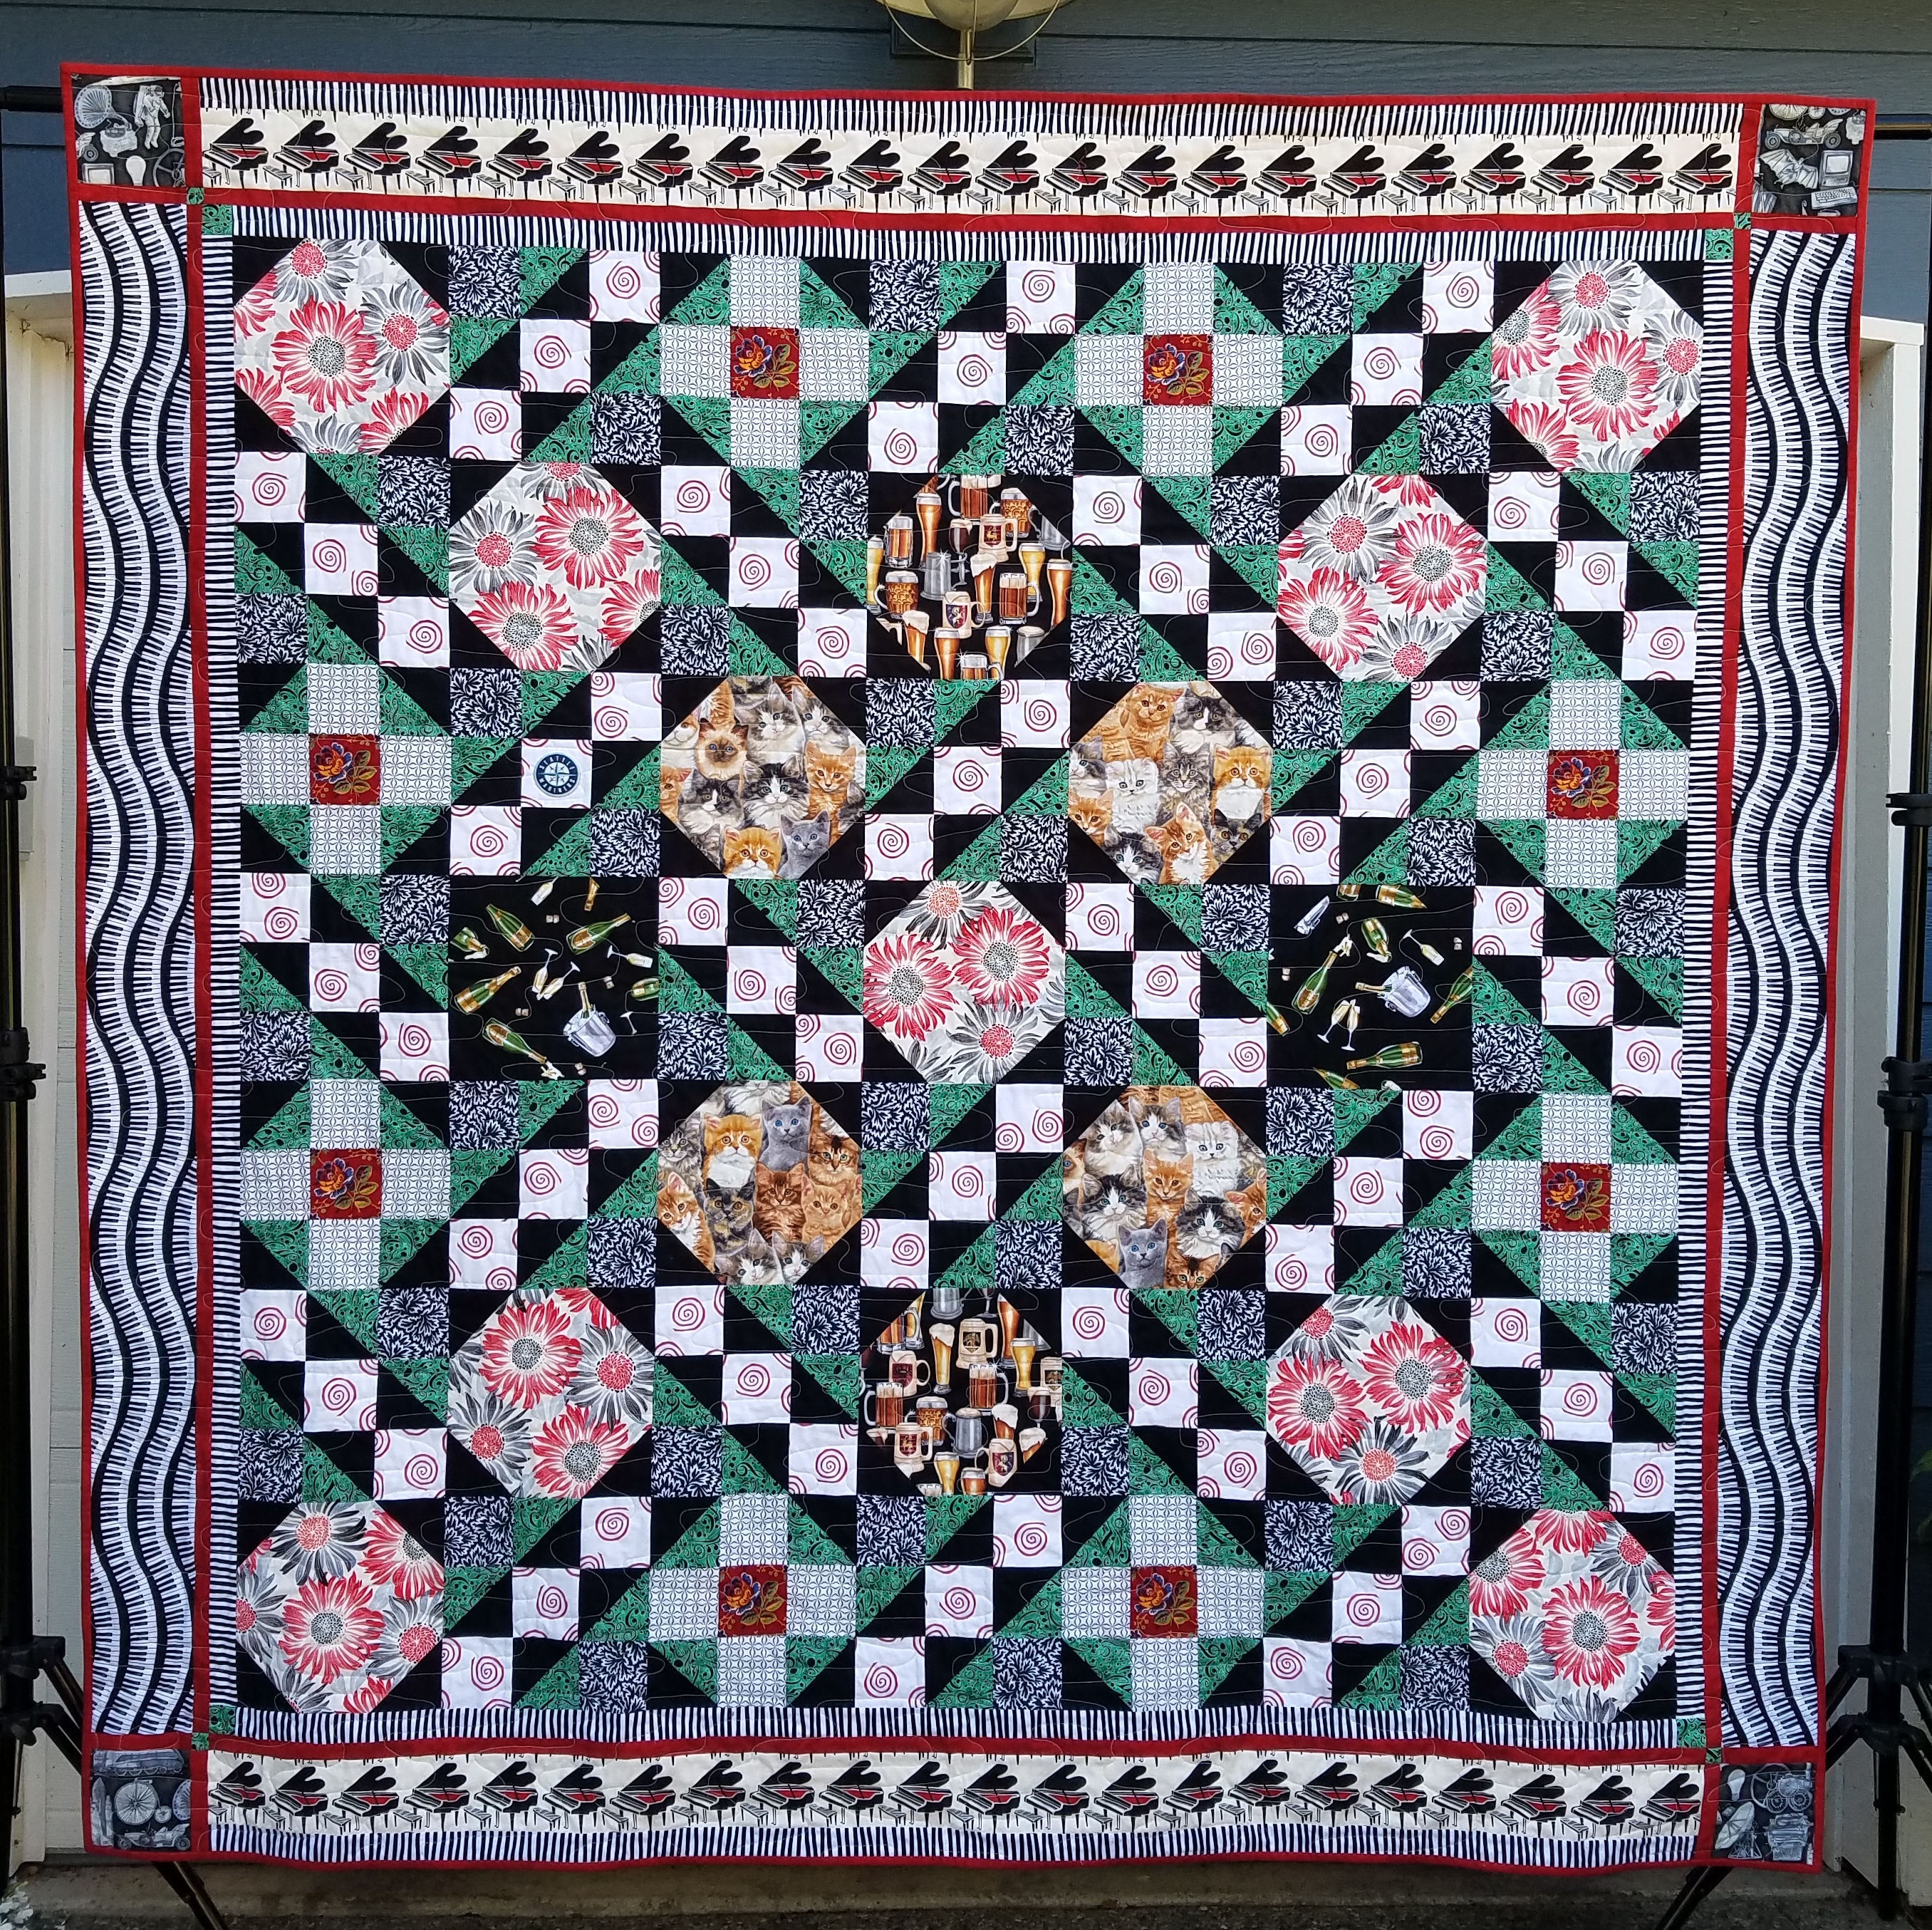
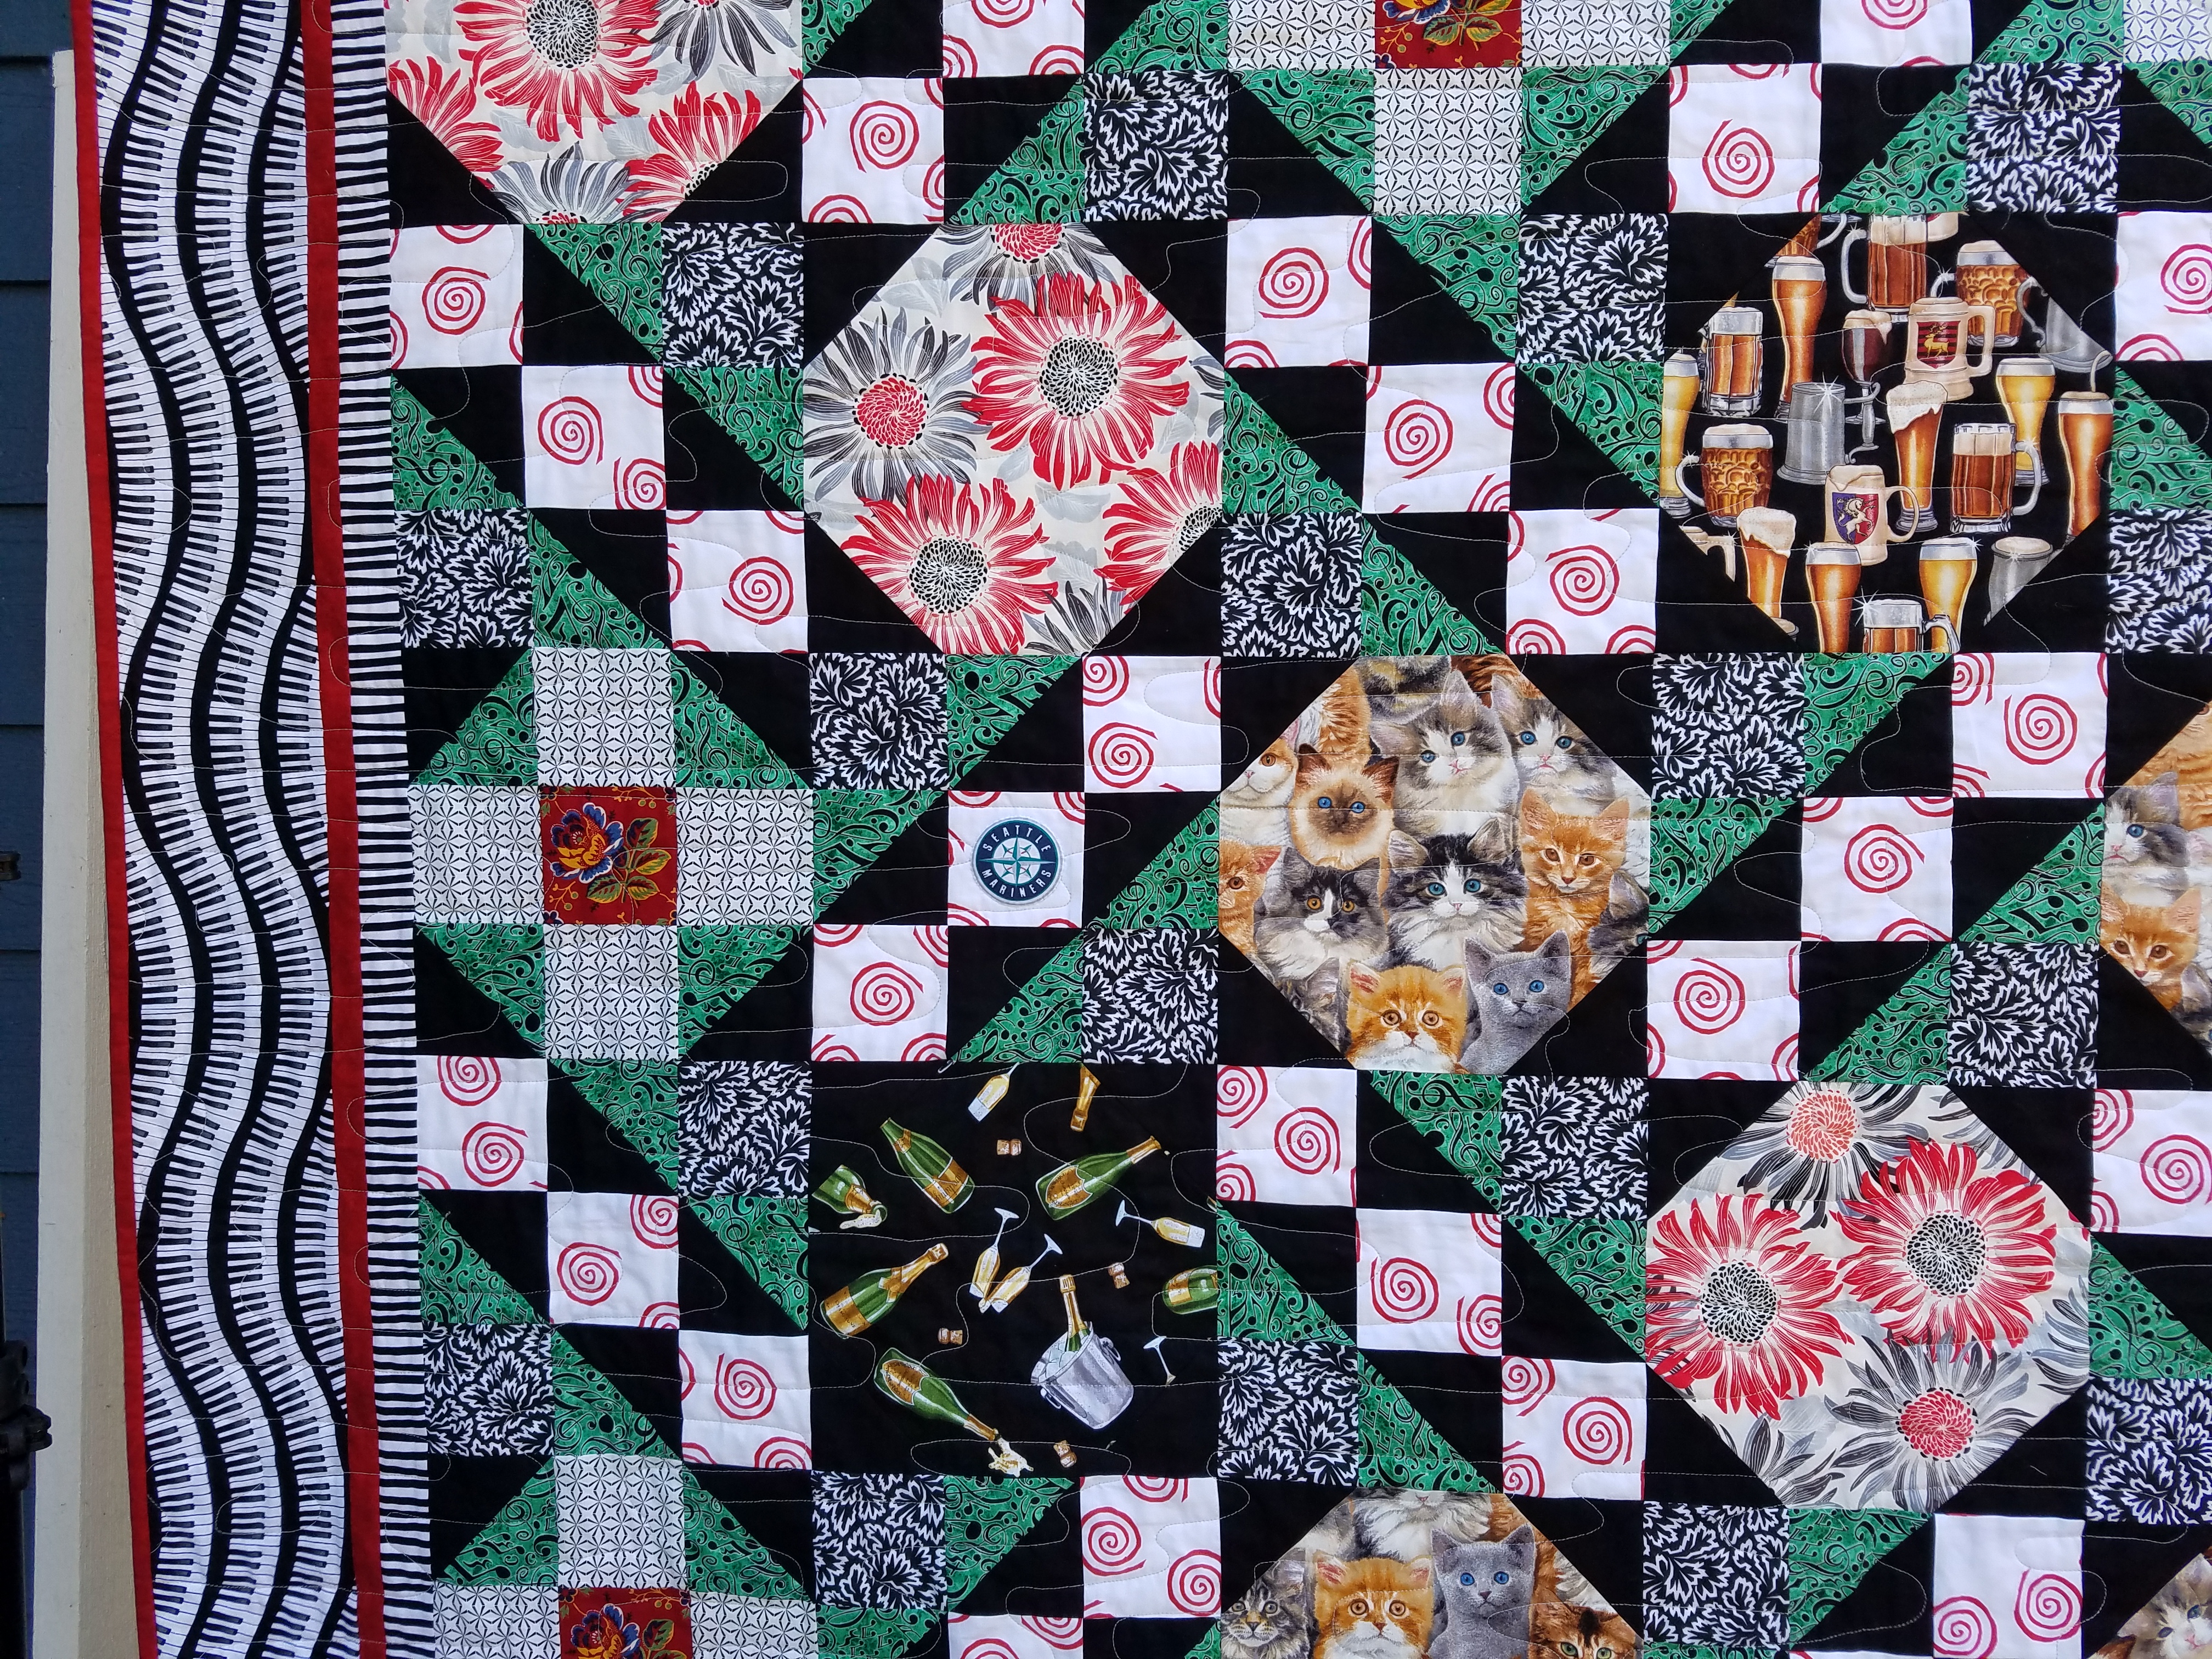
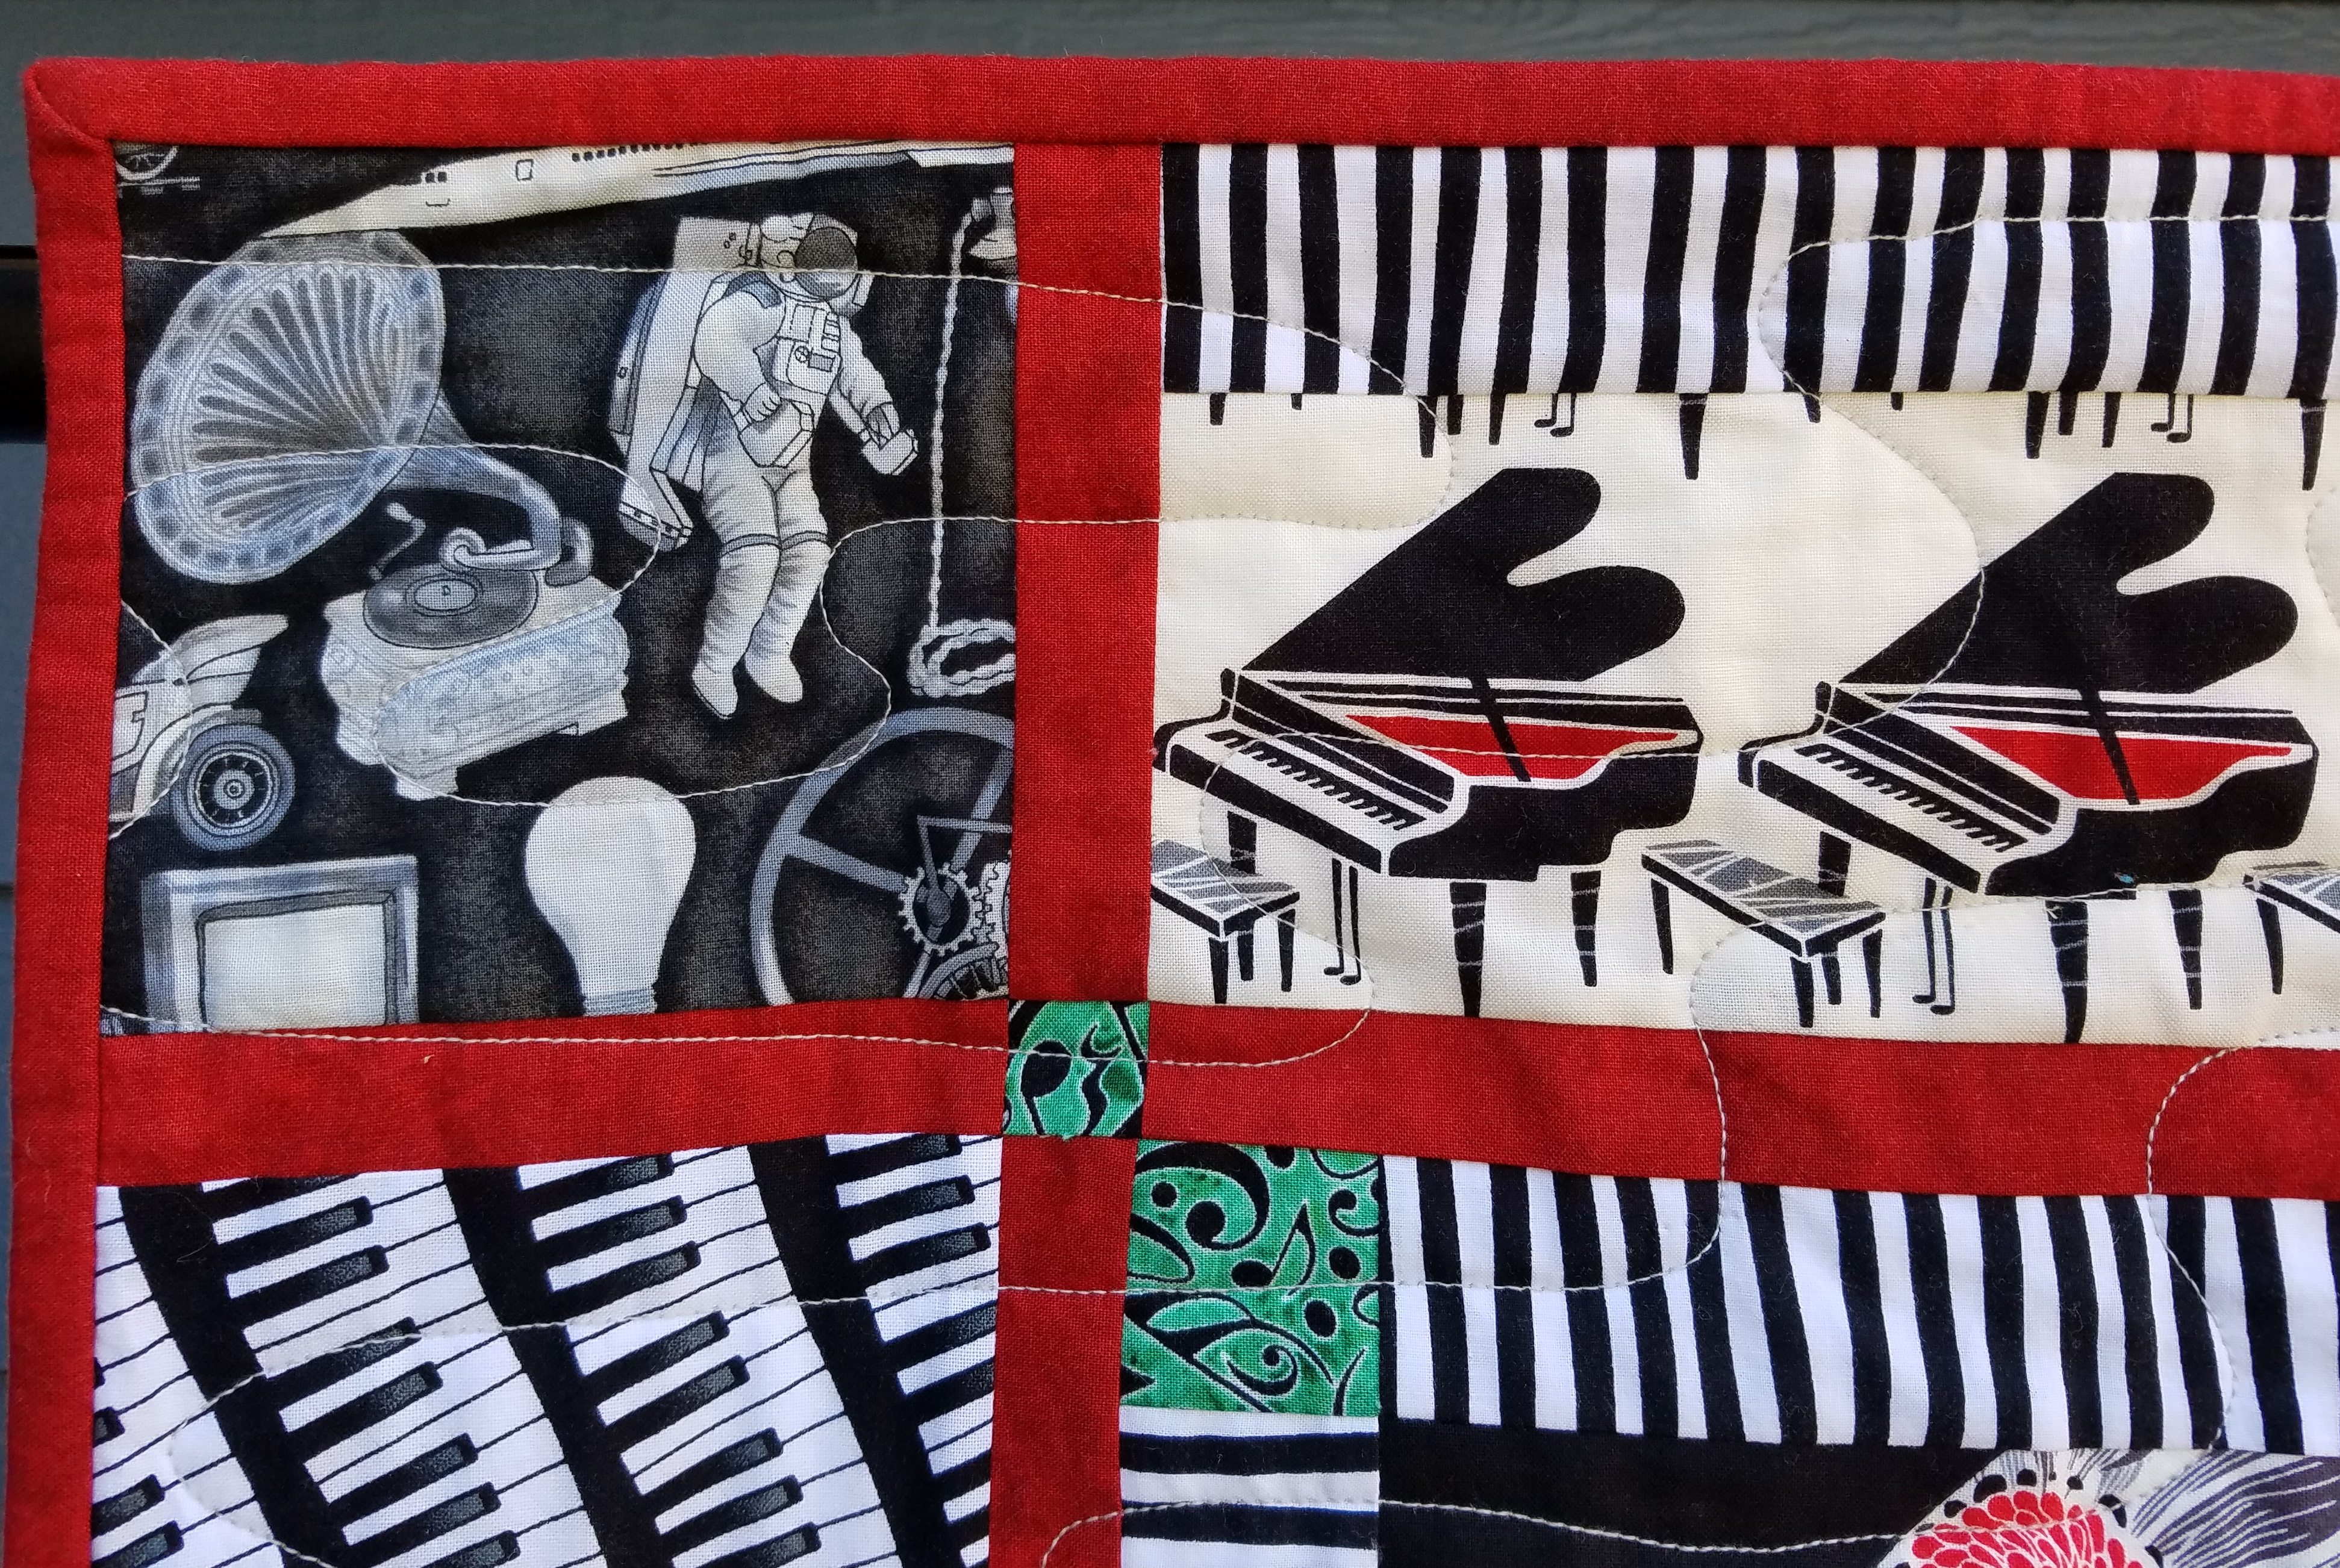
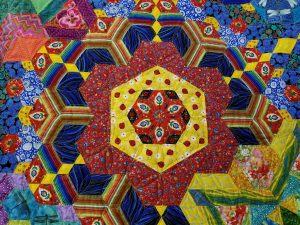
Ann used the pattern, Garden of Fortgetfulness, to make this quilt and it was quilted by Gladys Schulz.