Kaleidoscopic Pinwheels Class

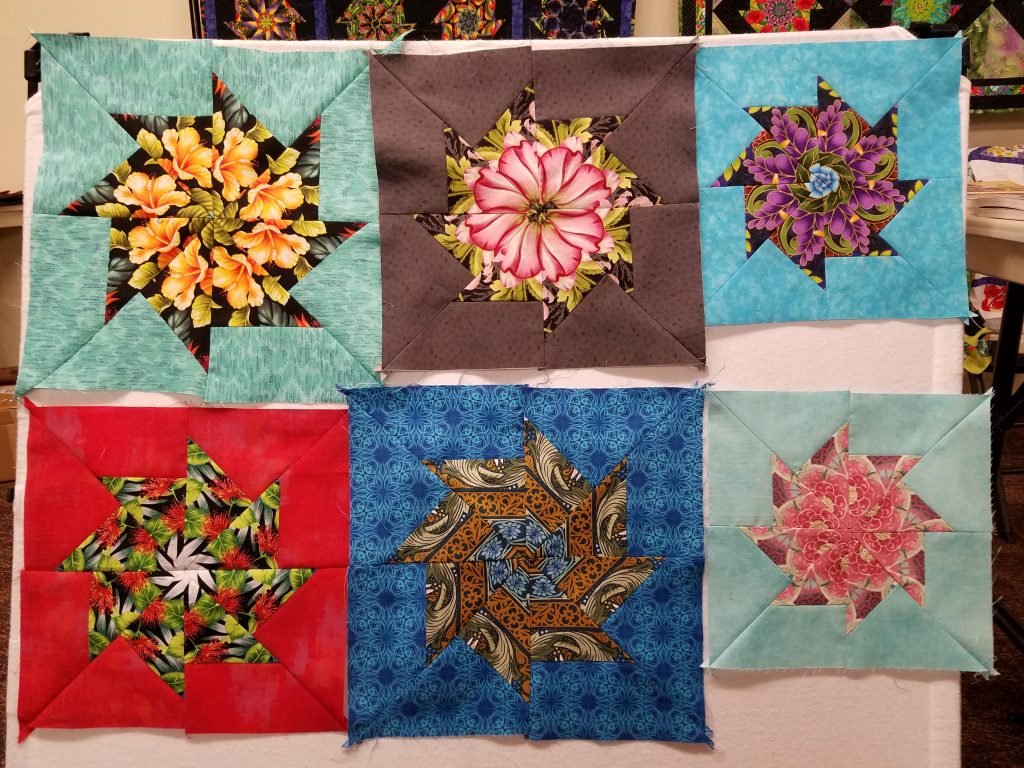
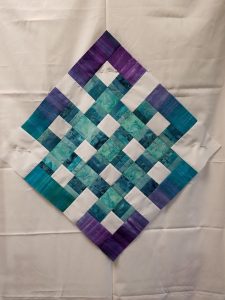
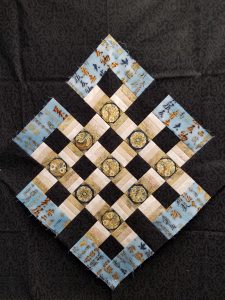
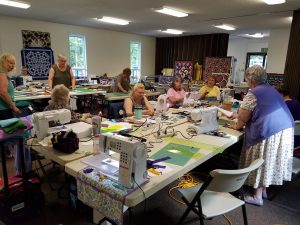
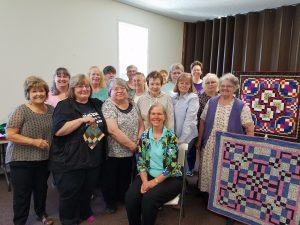
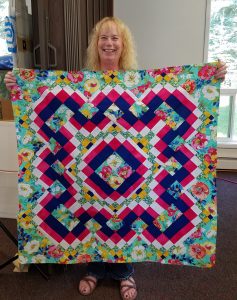
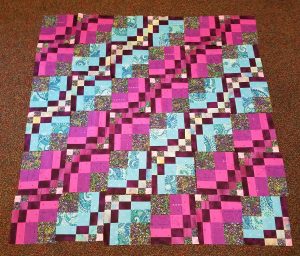
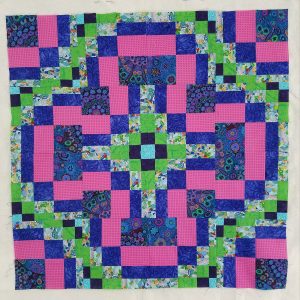
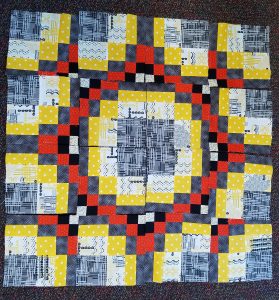
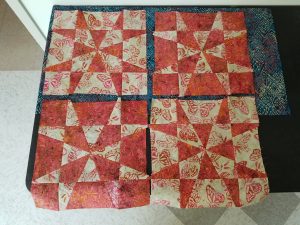
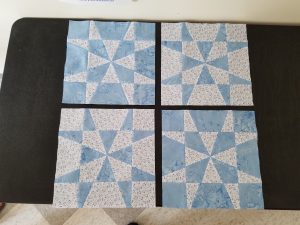
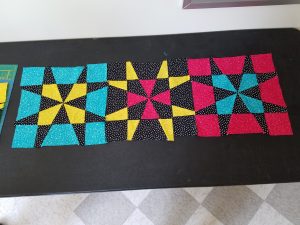
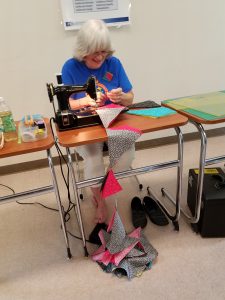
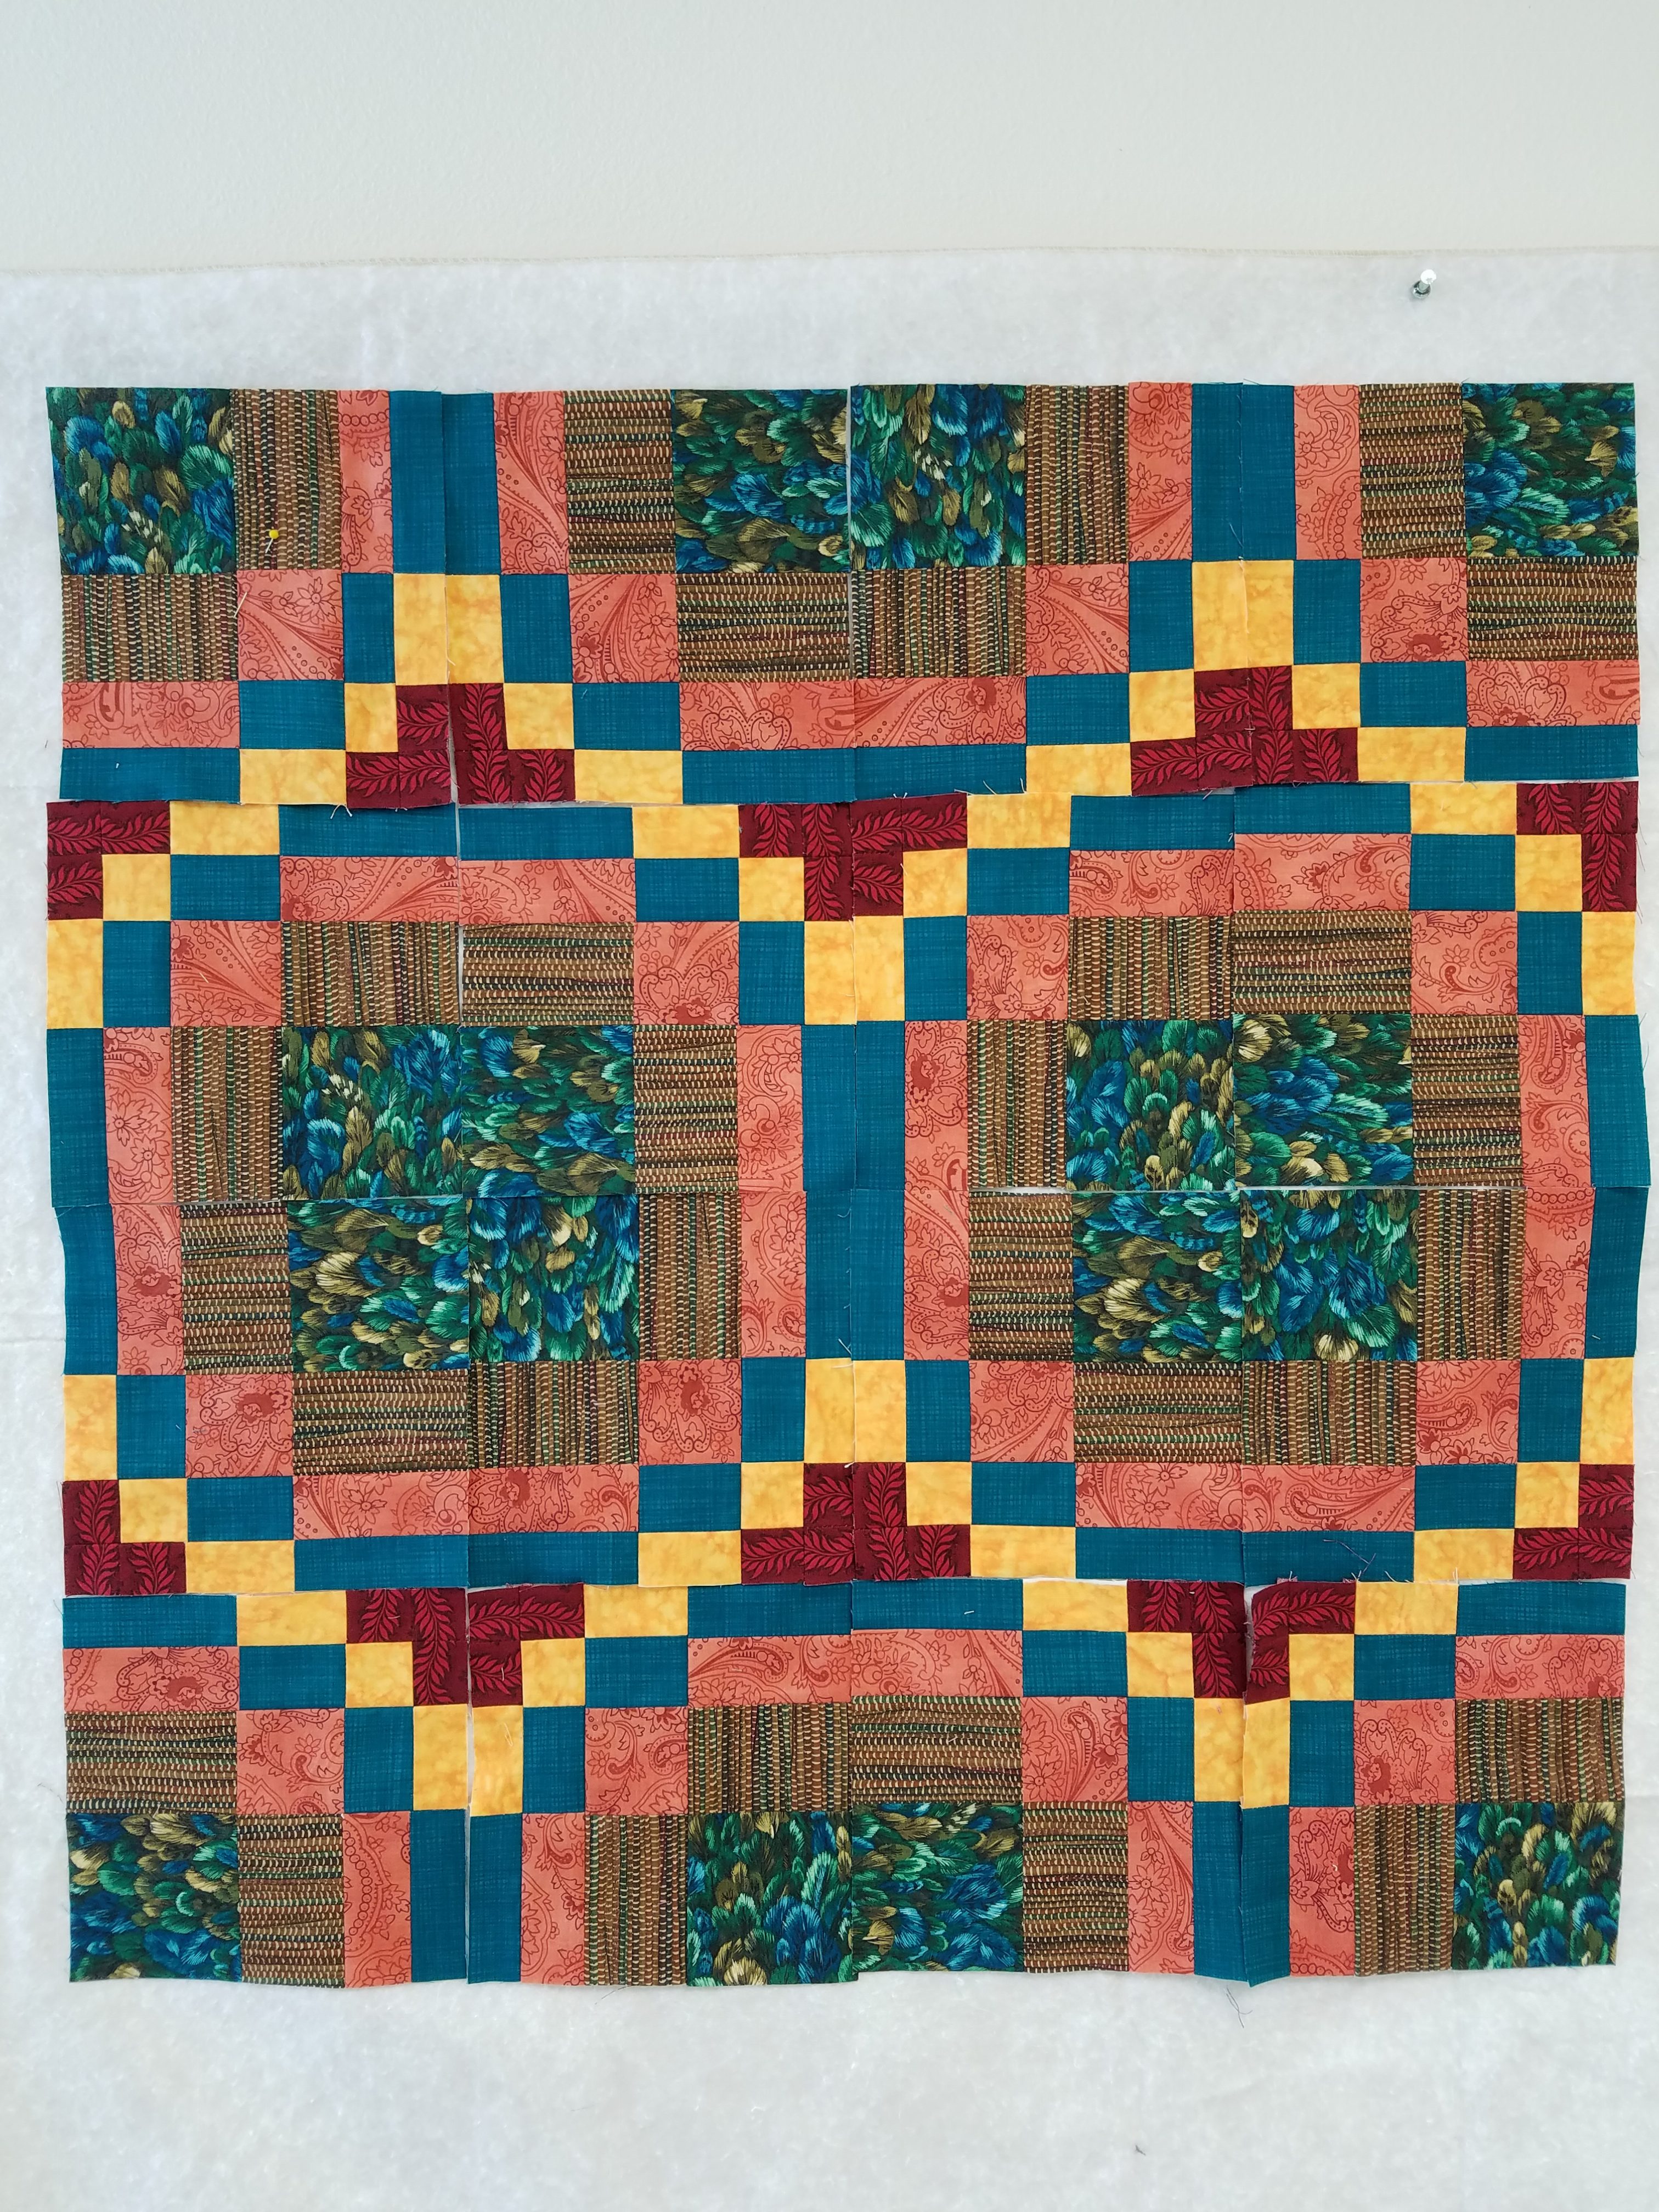
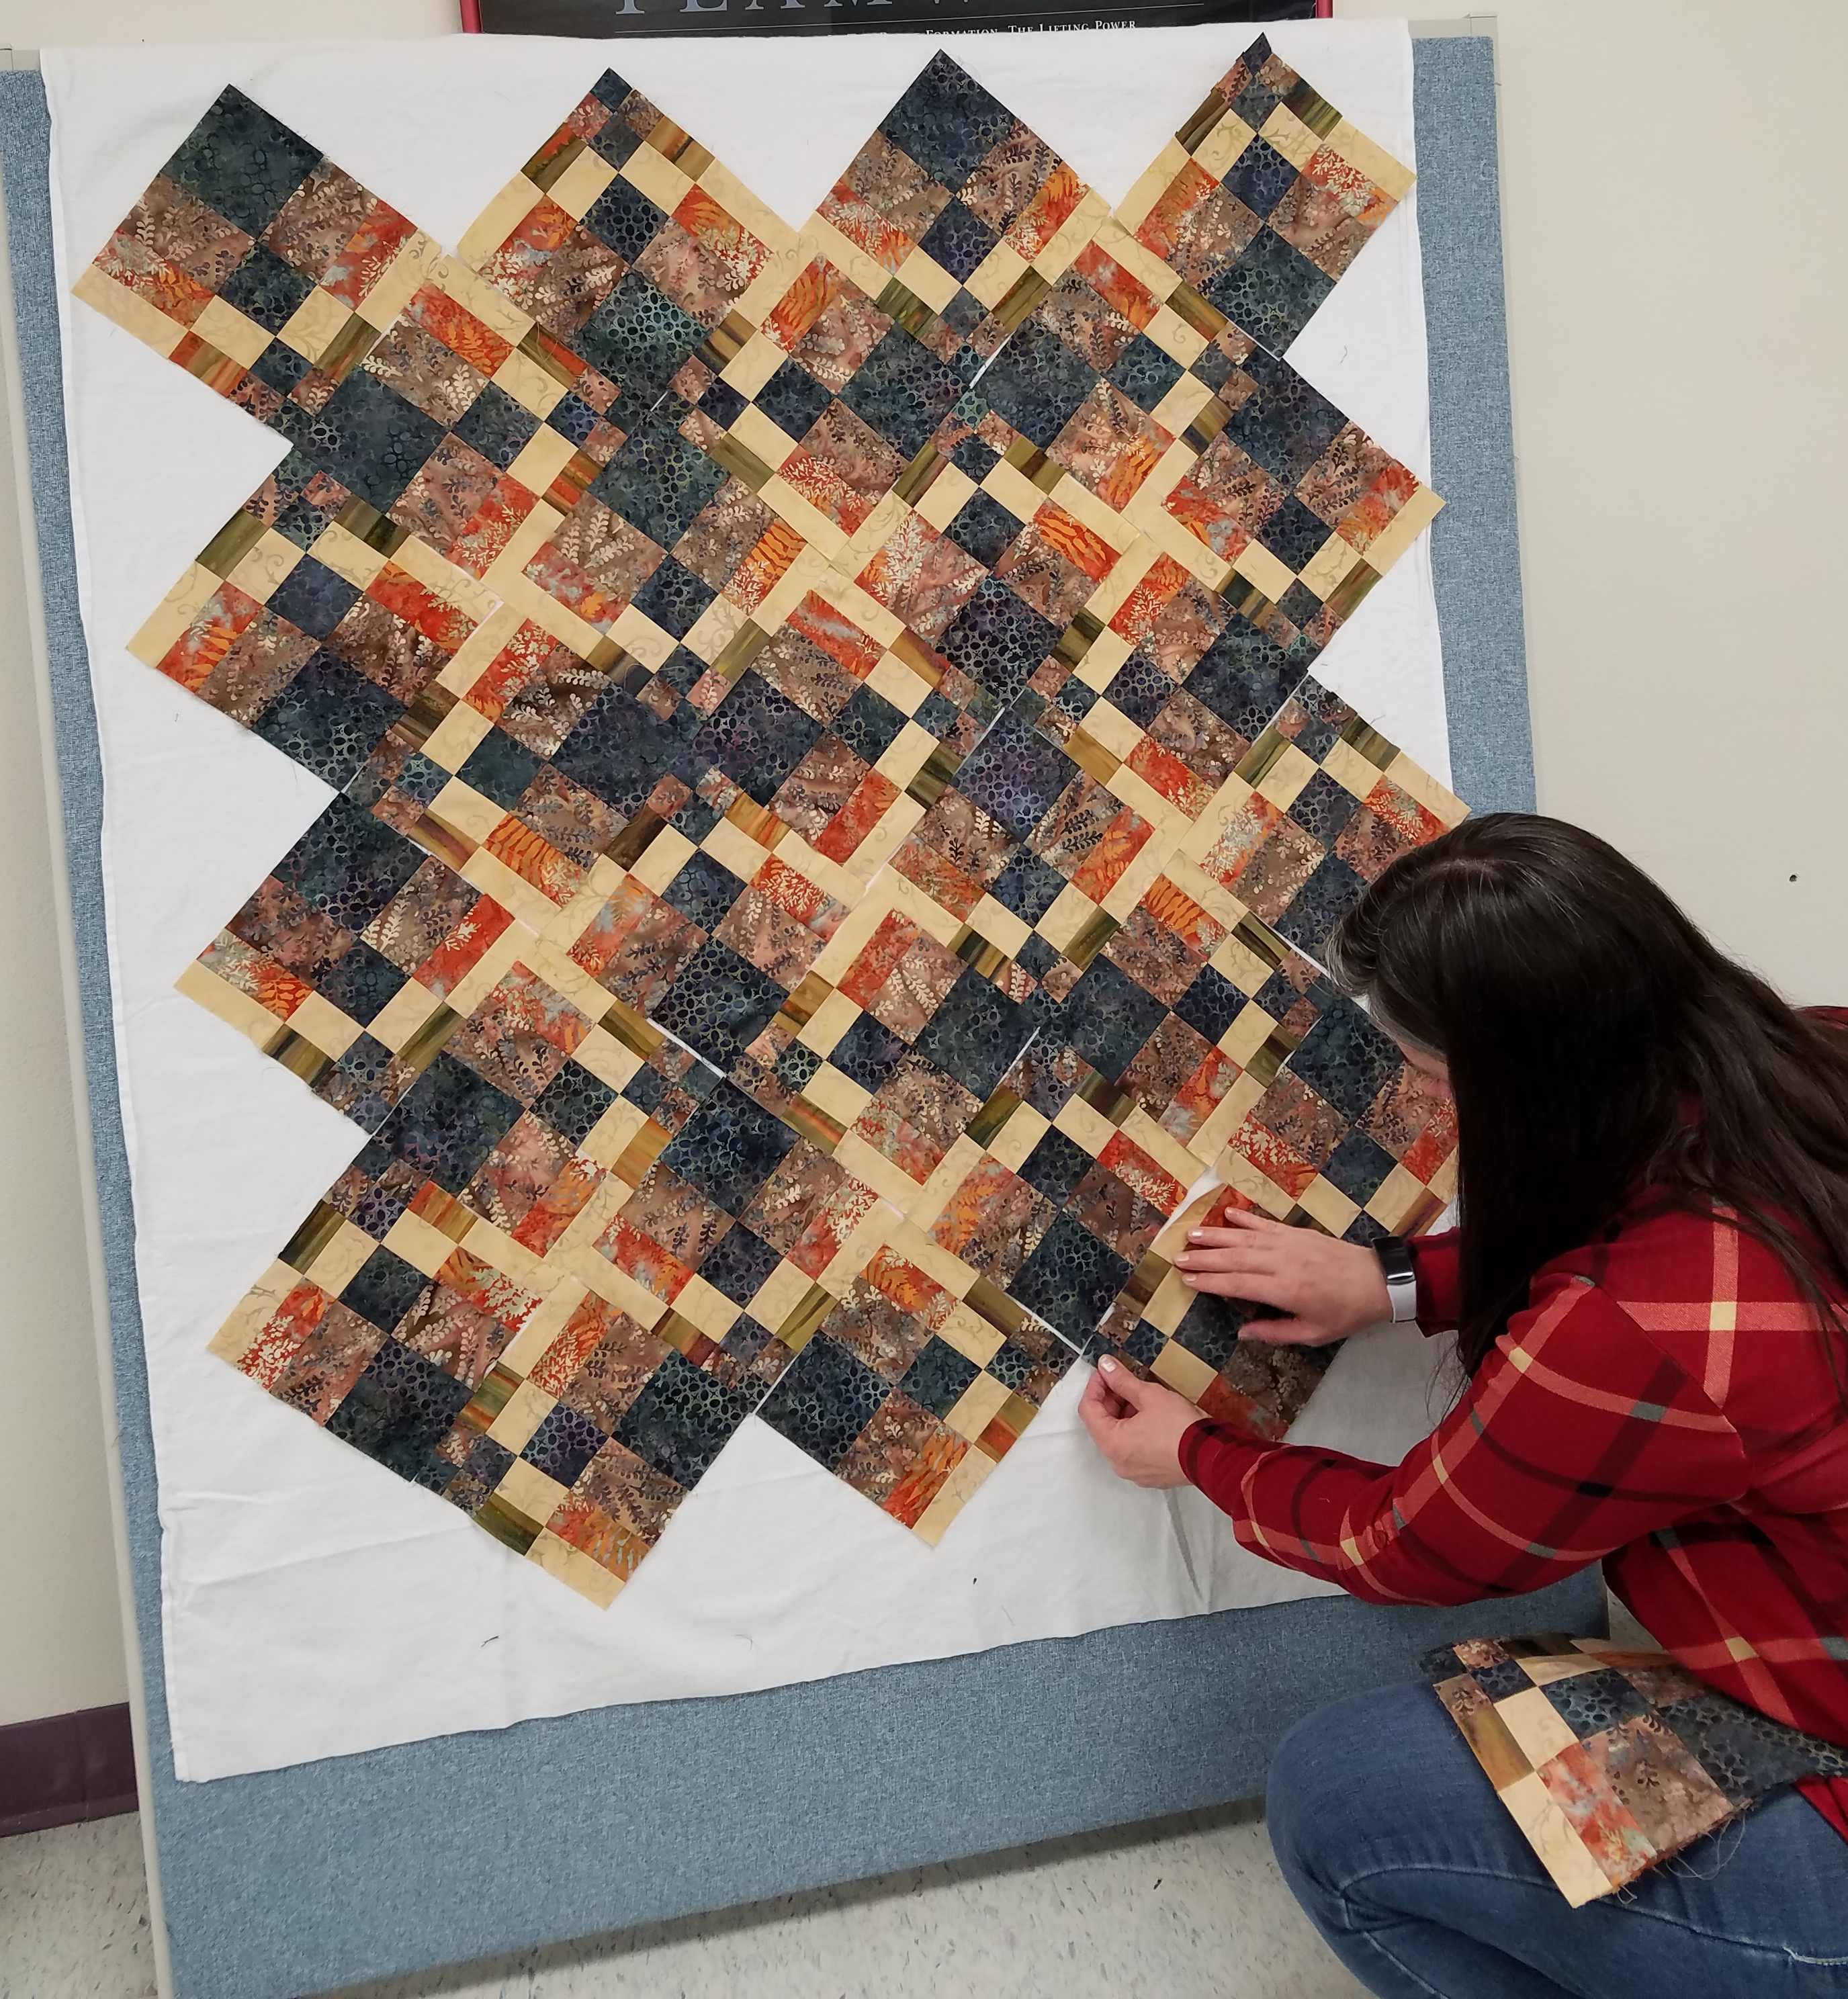
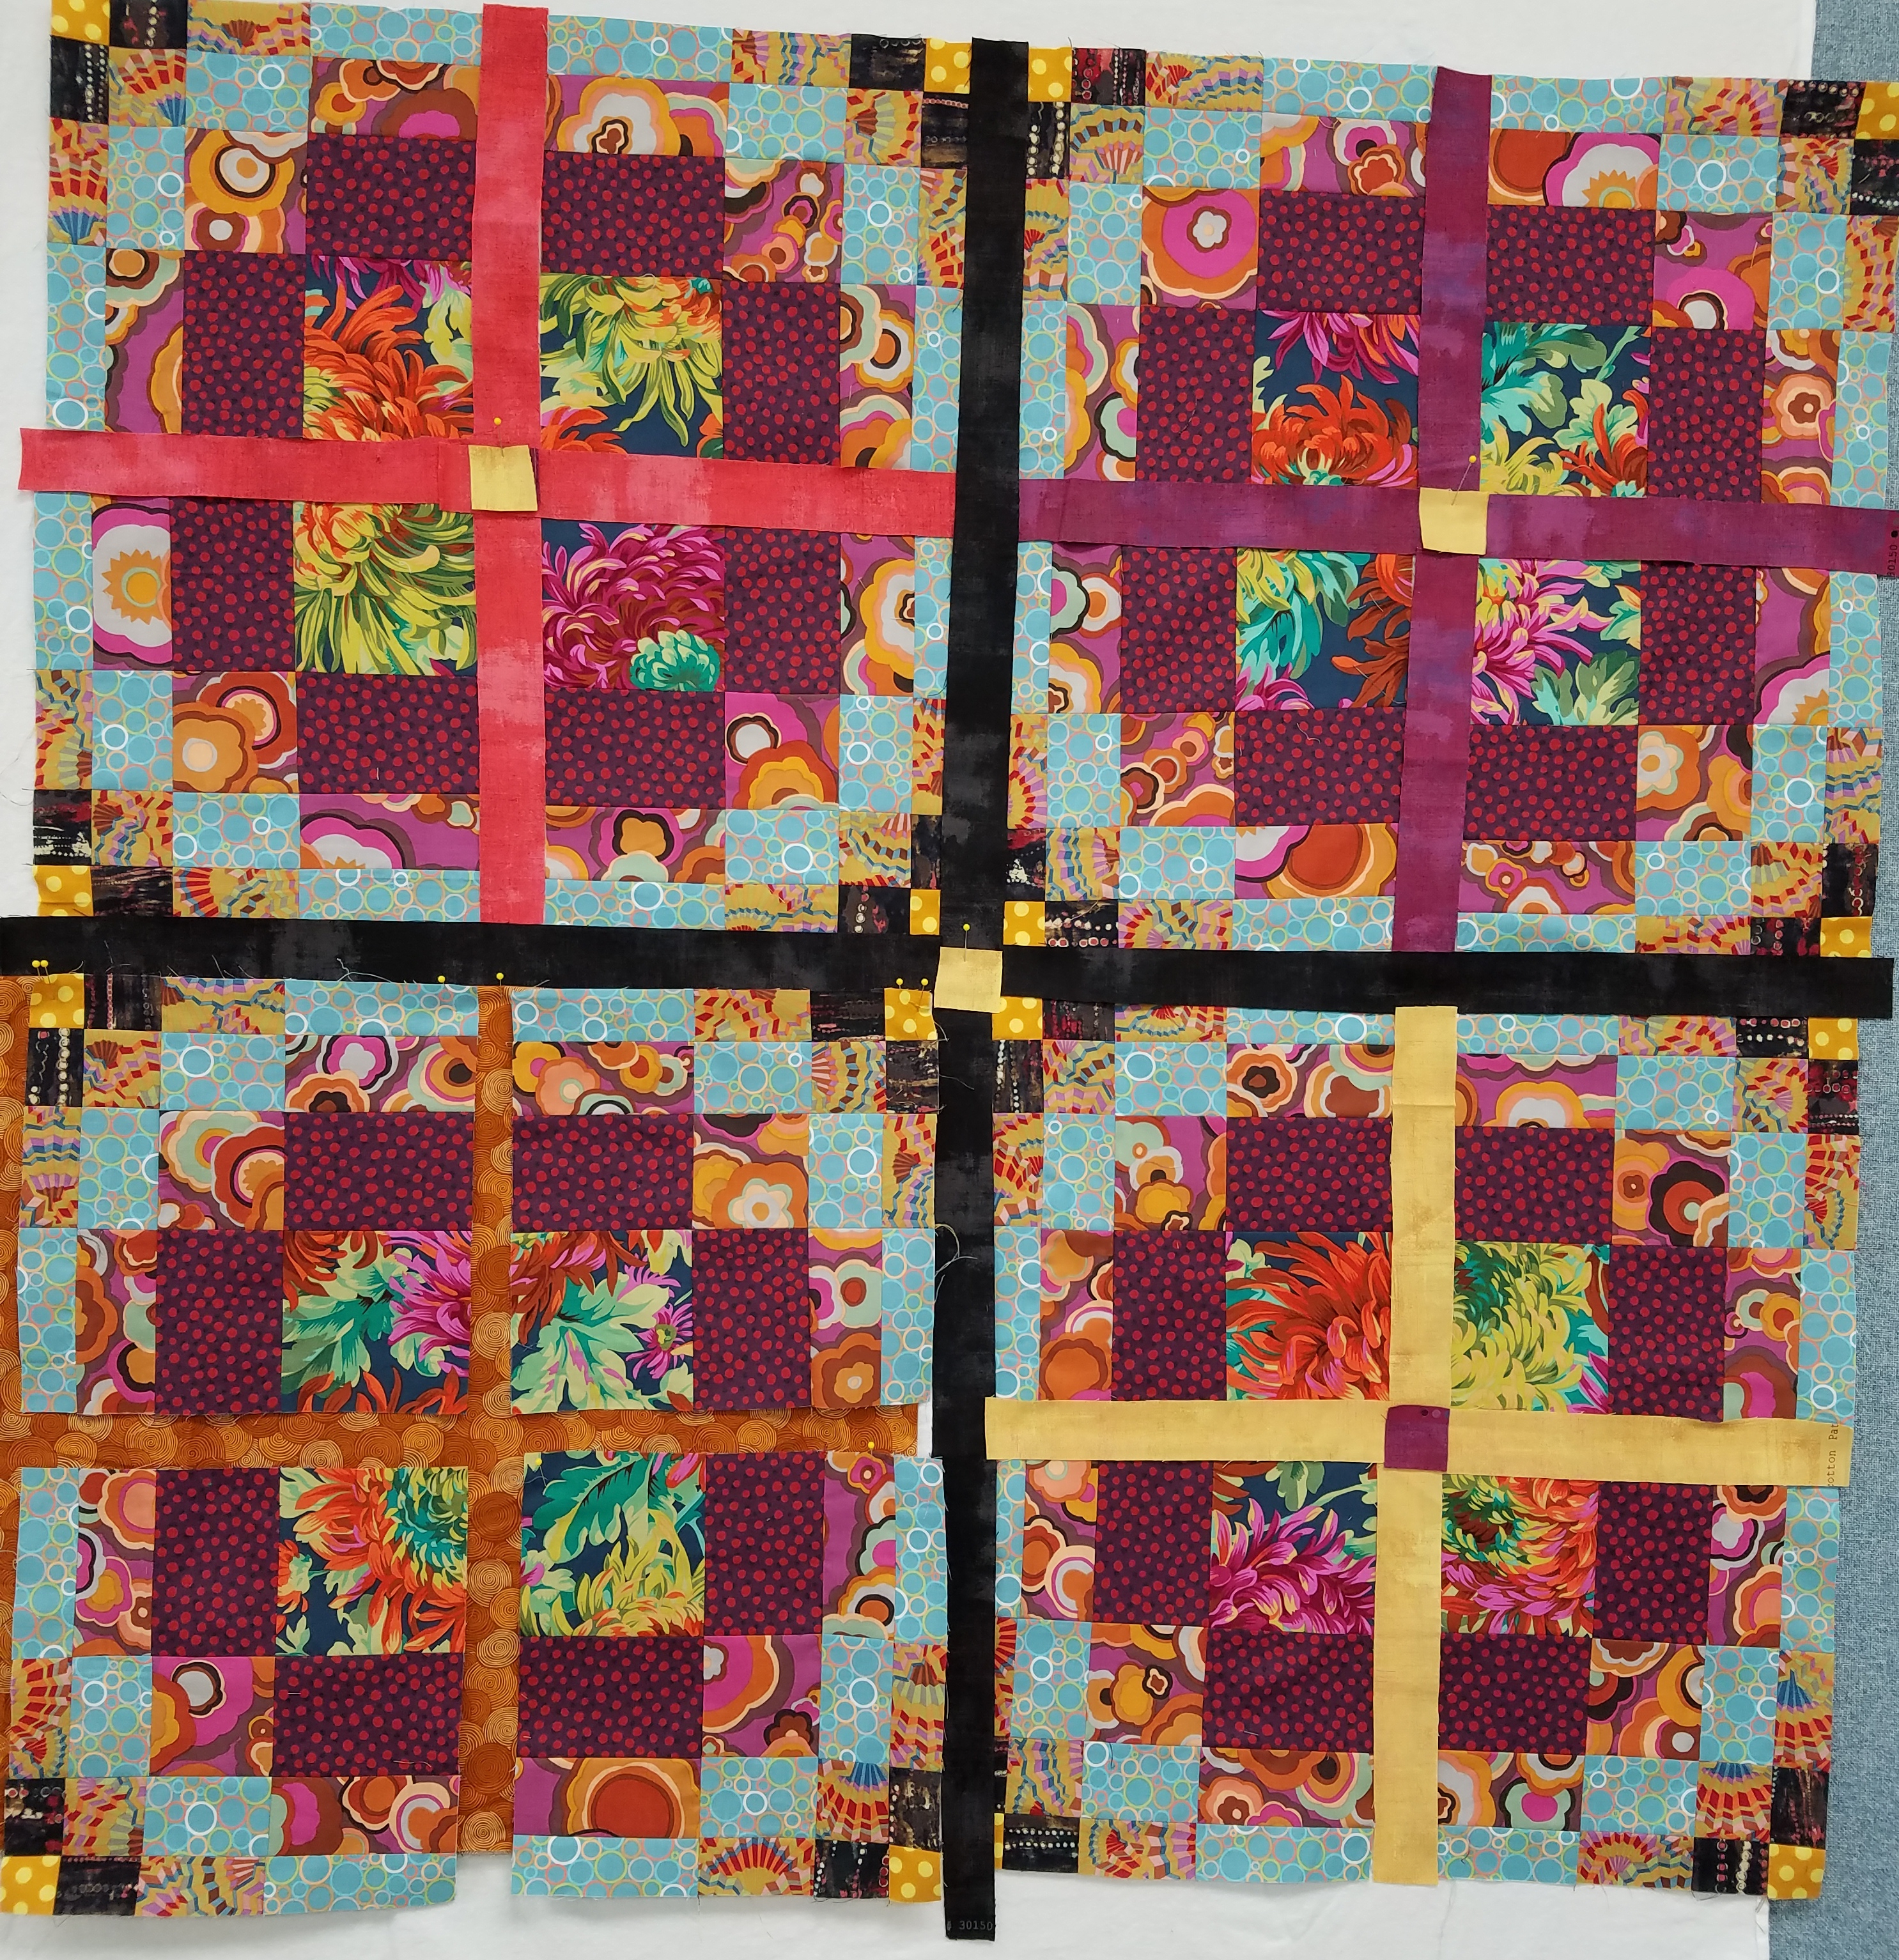
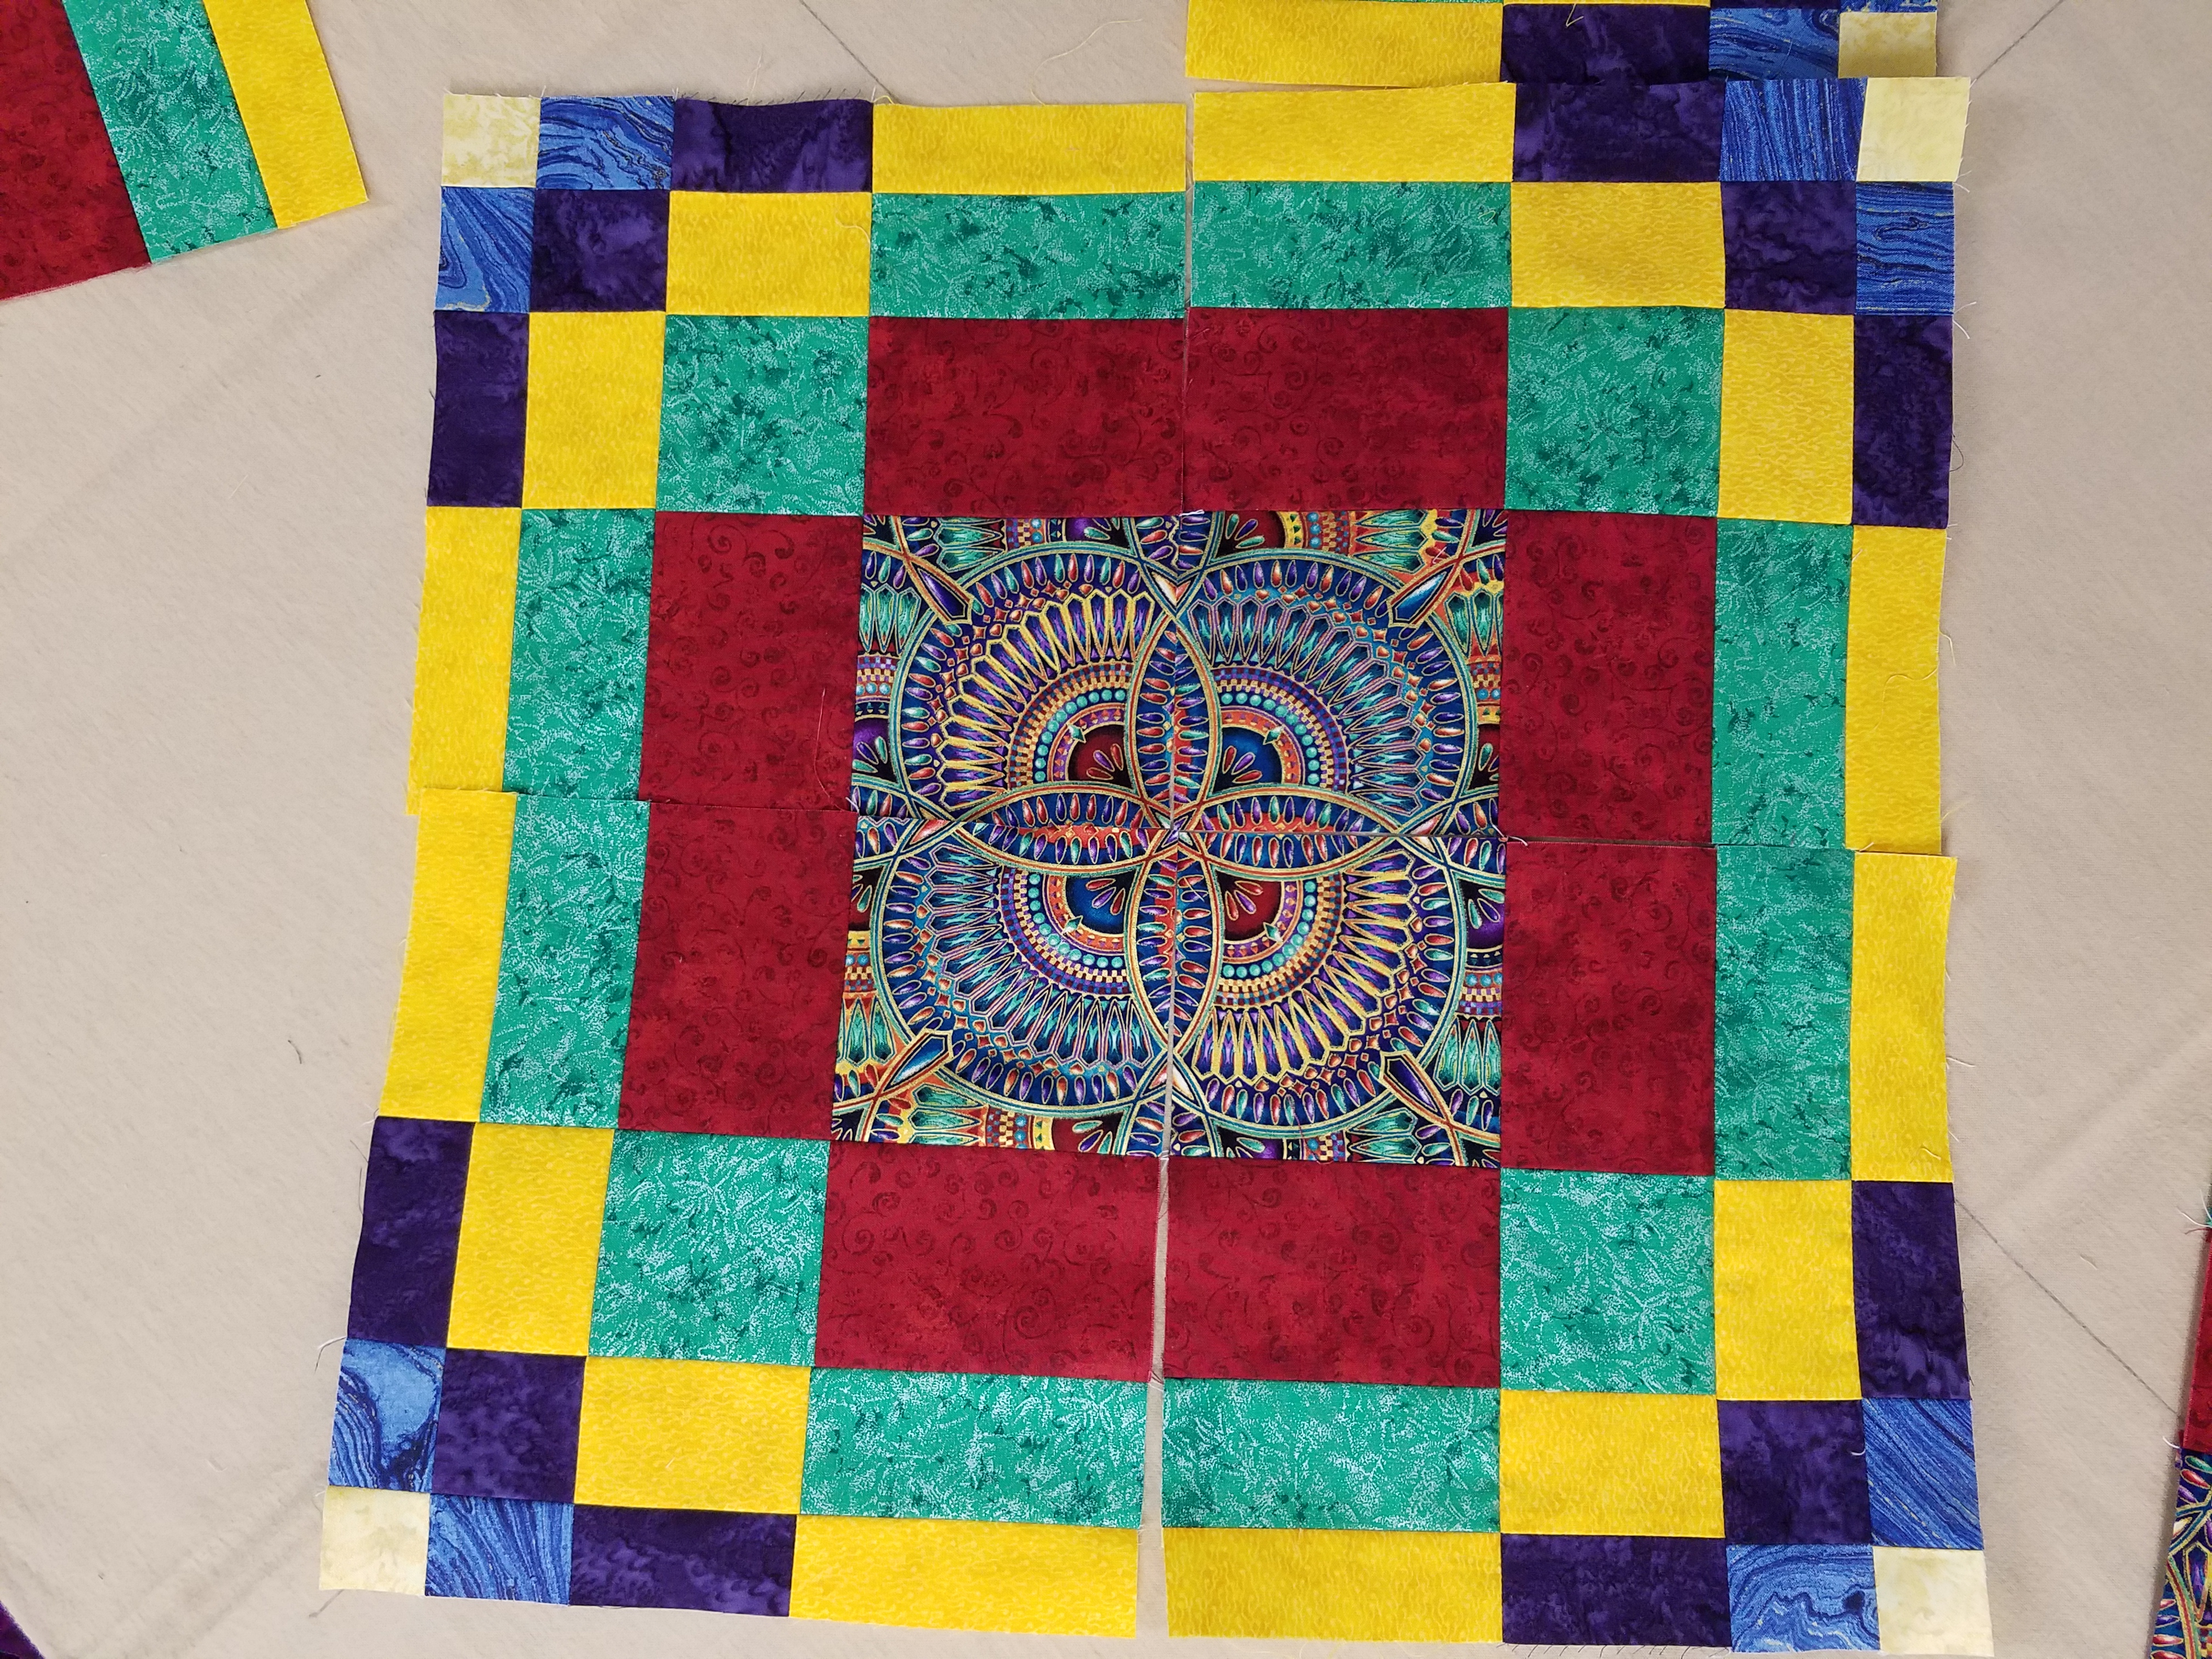
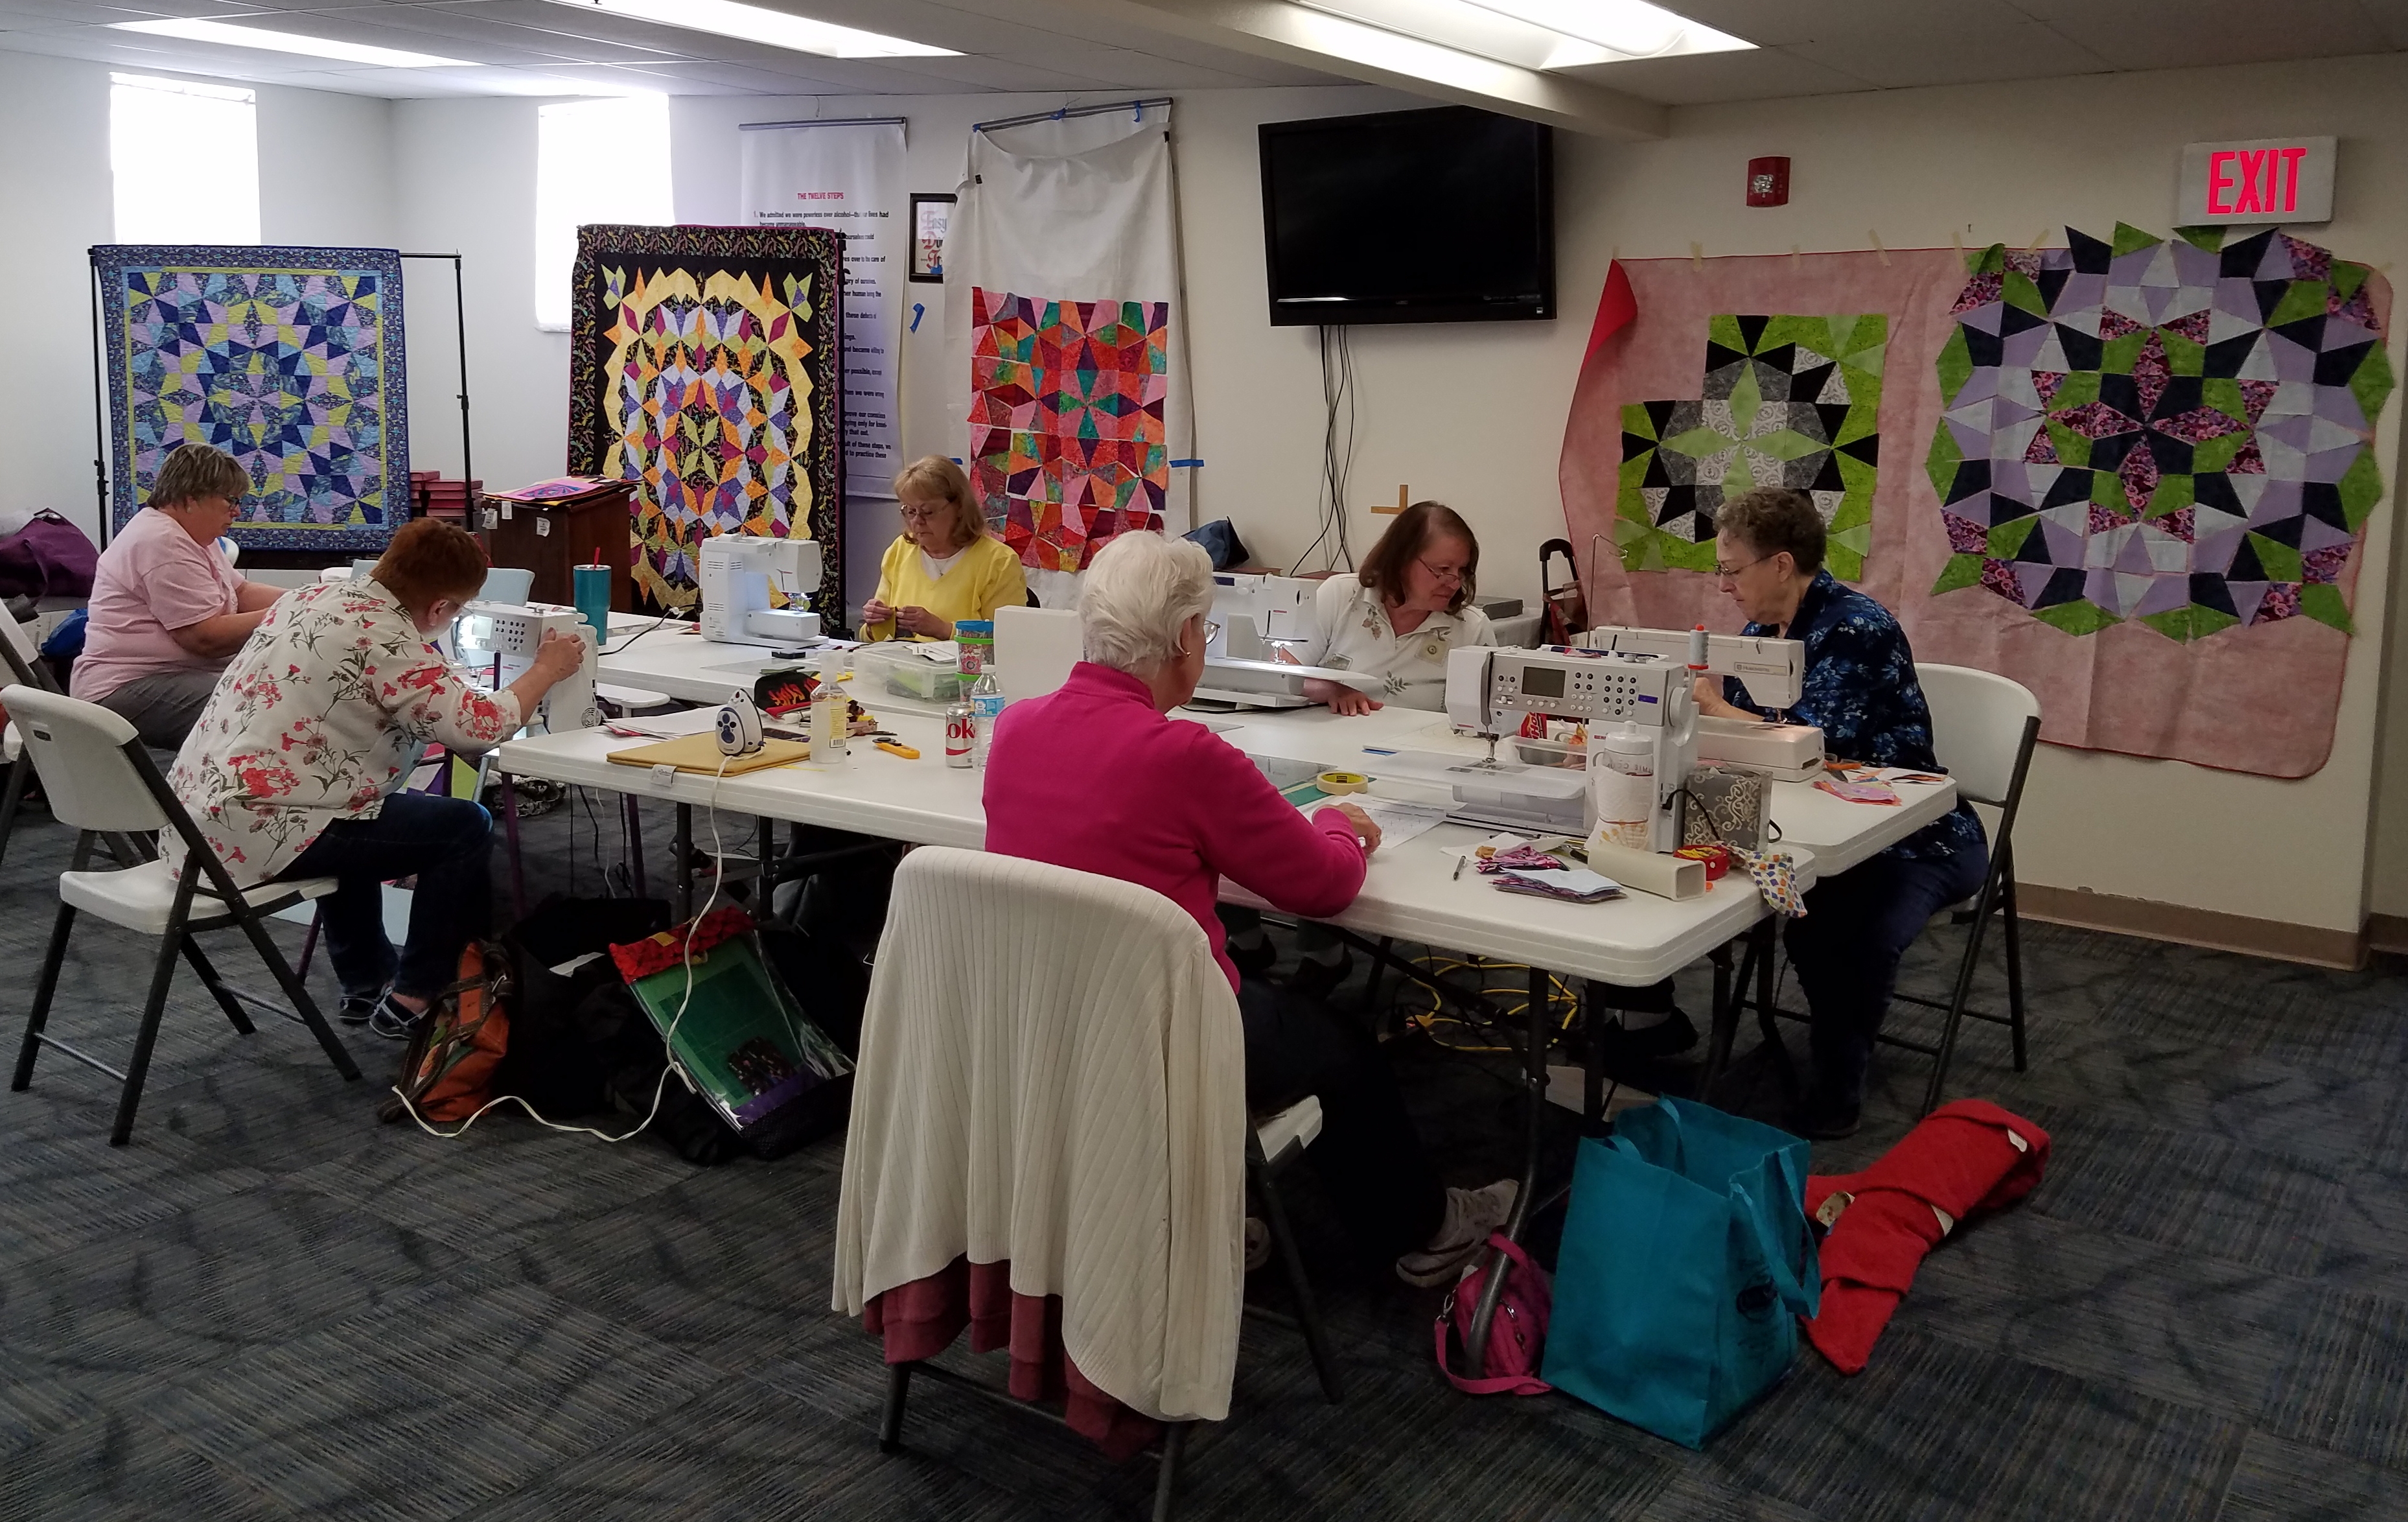
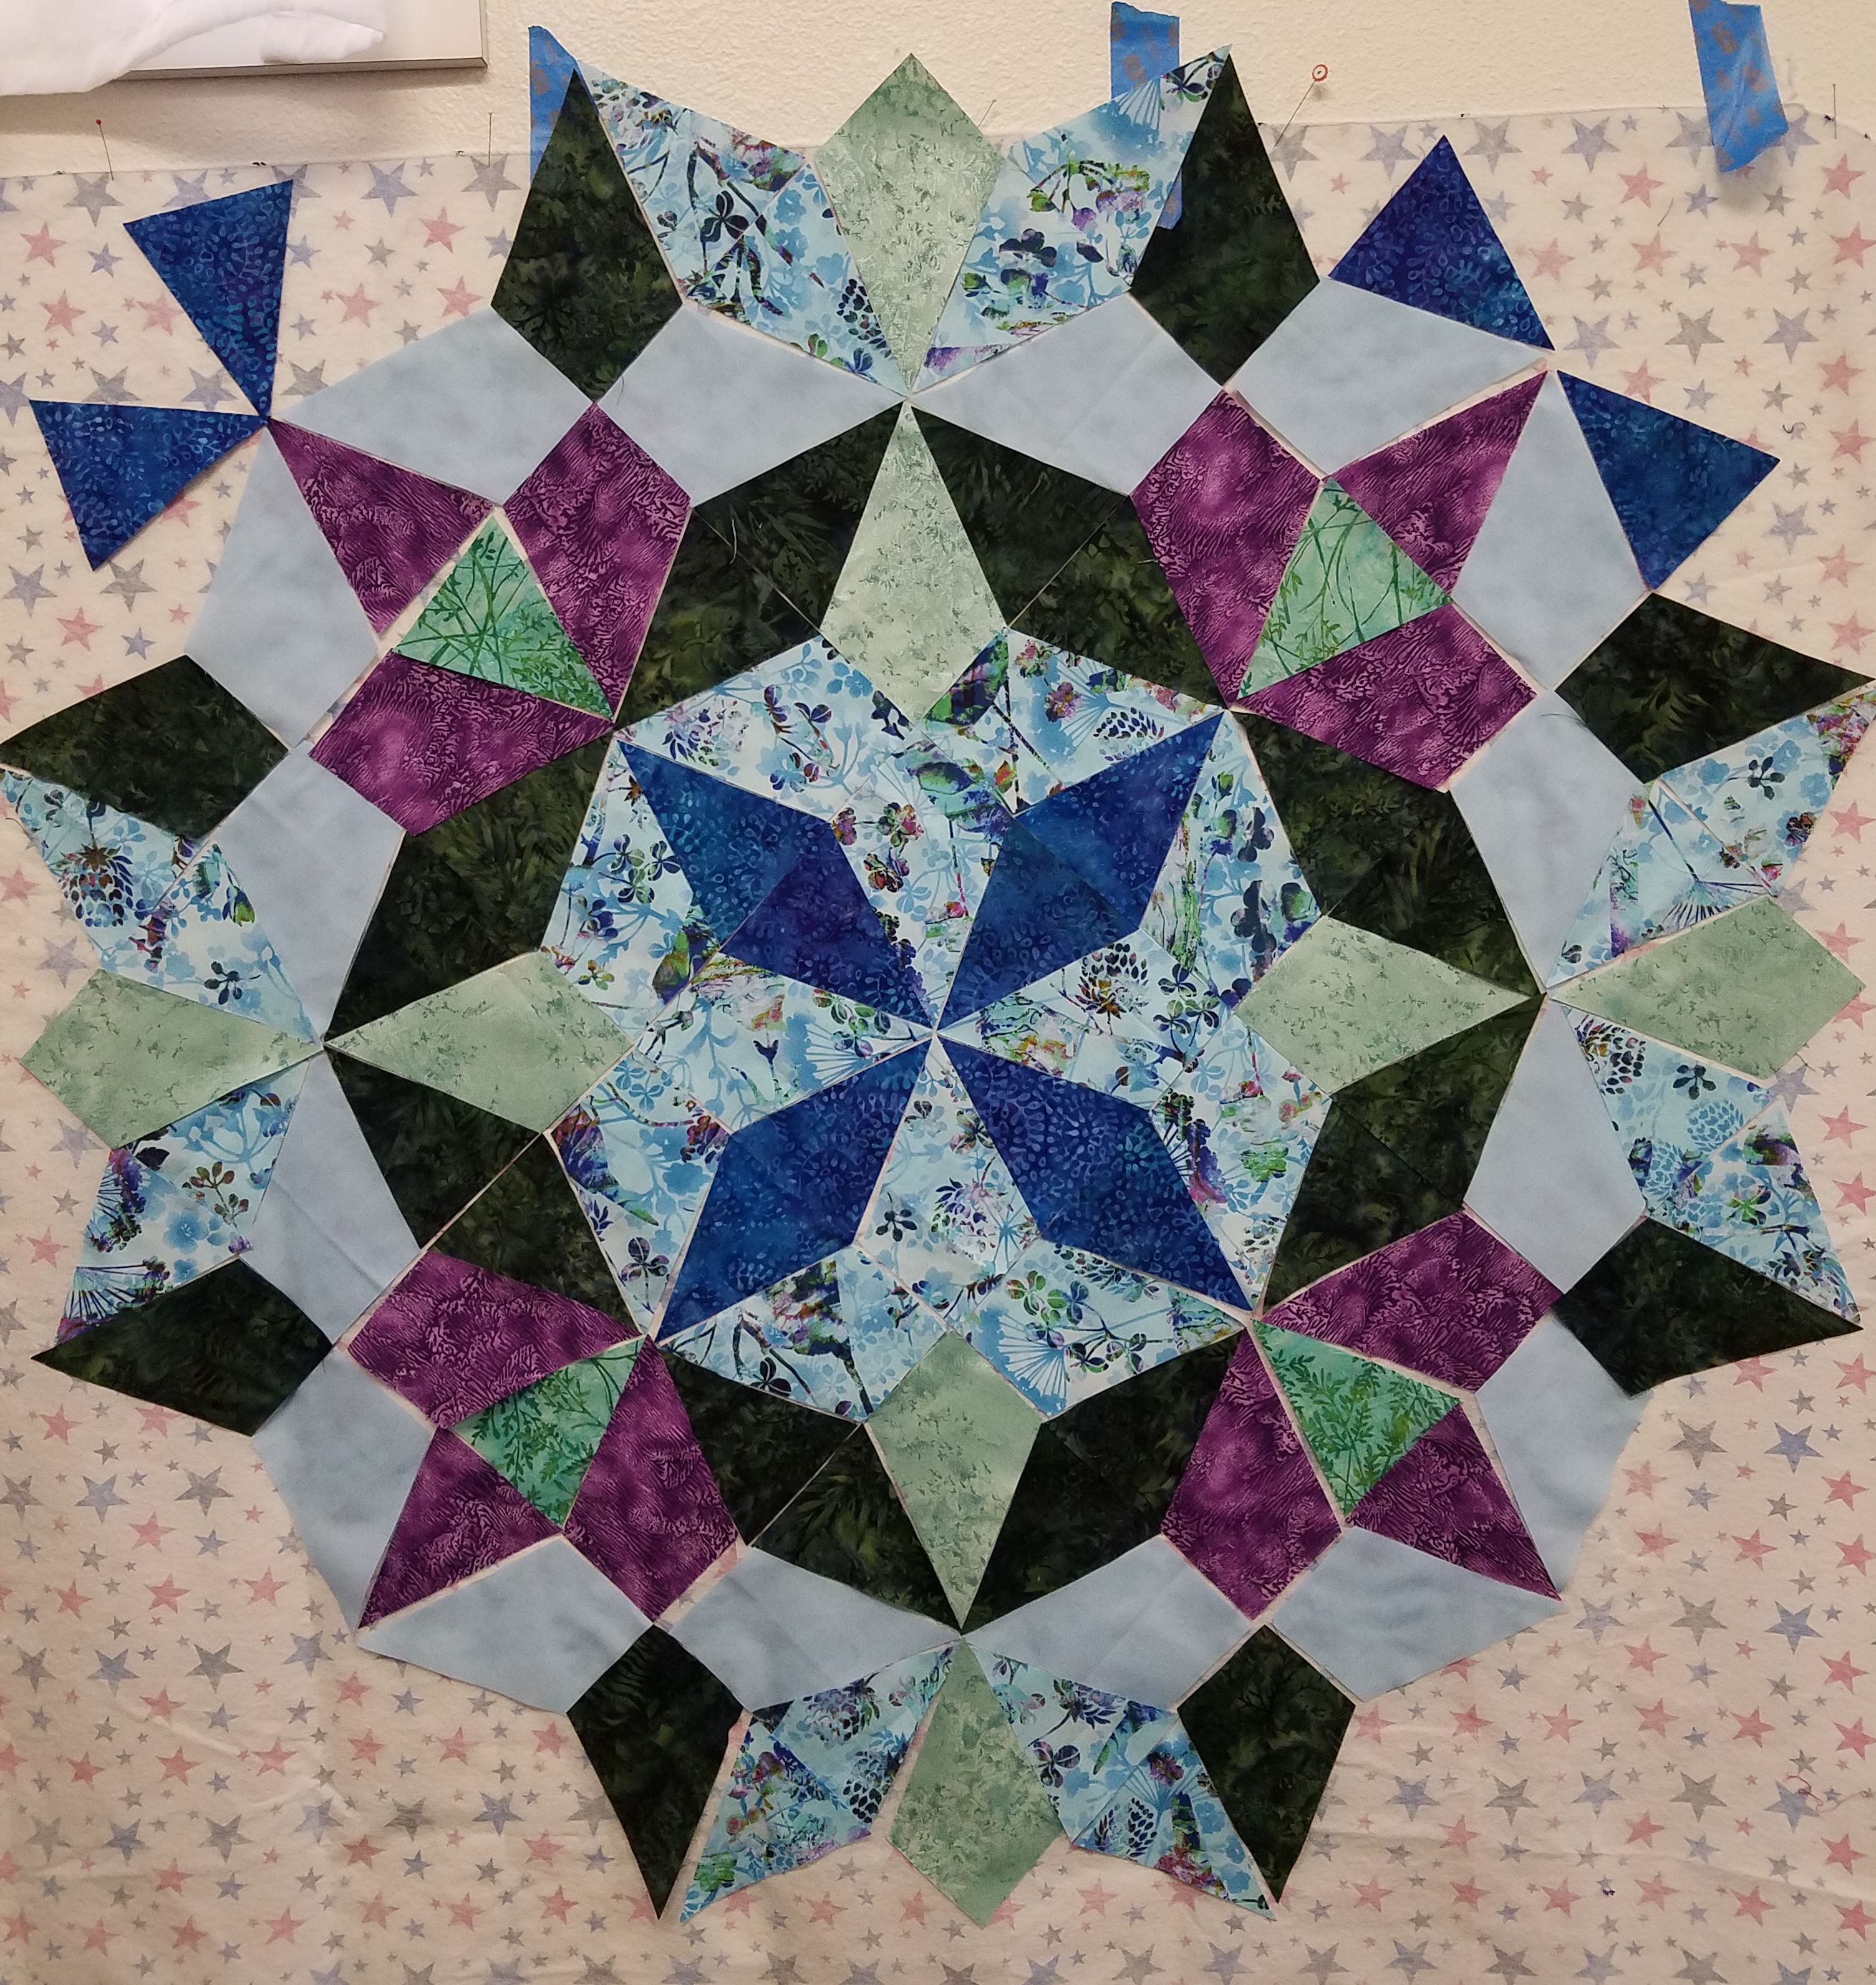
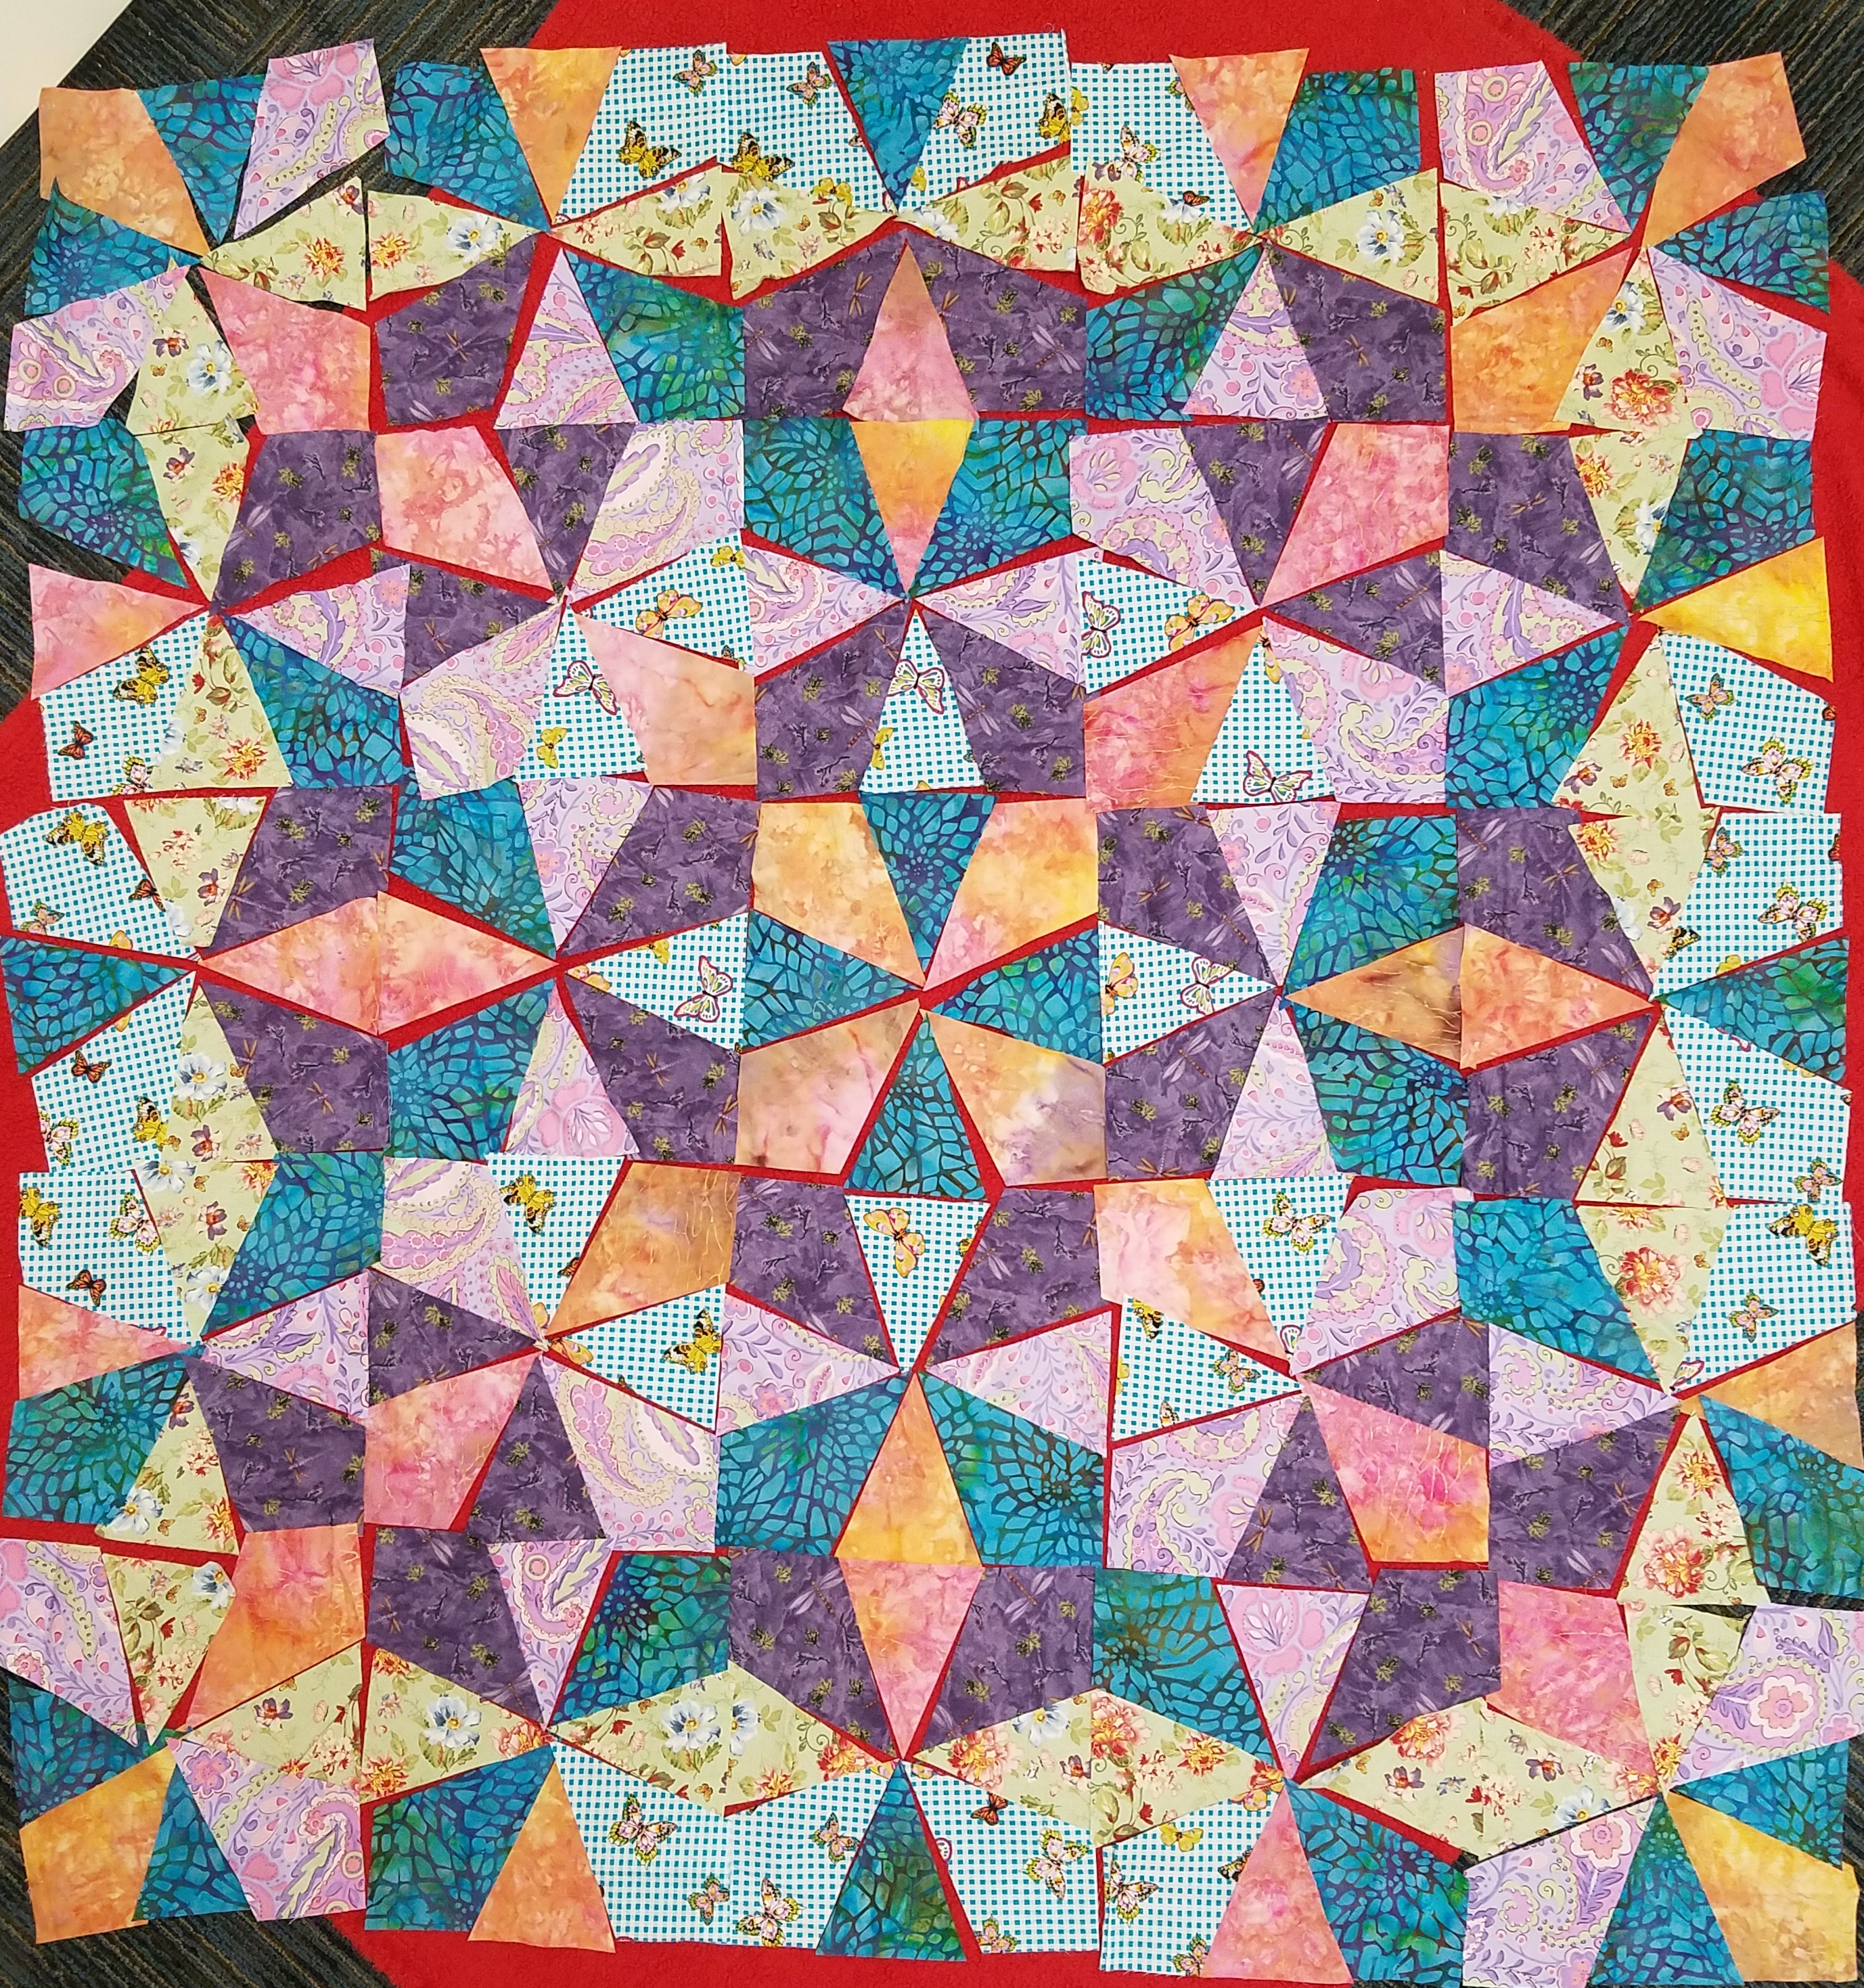
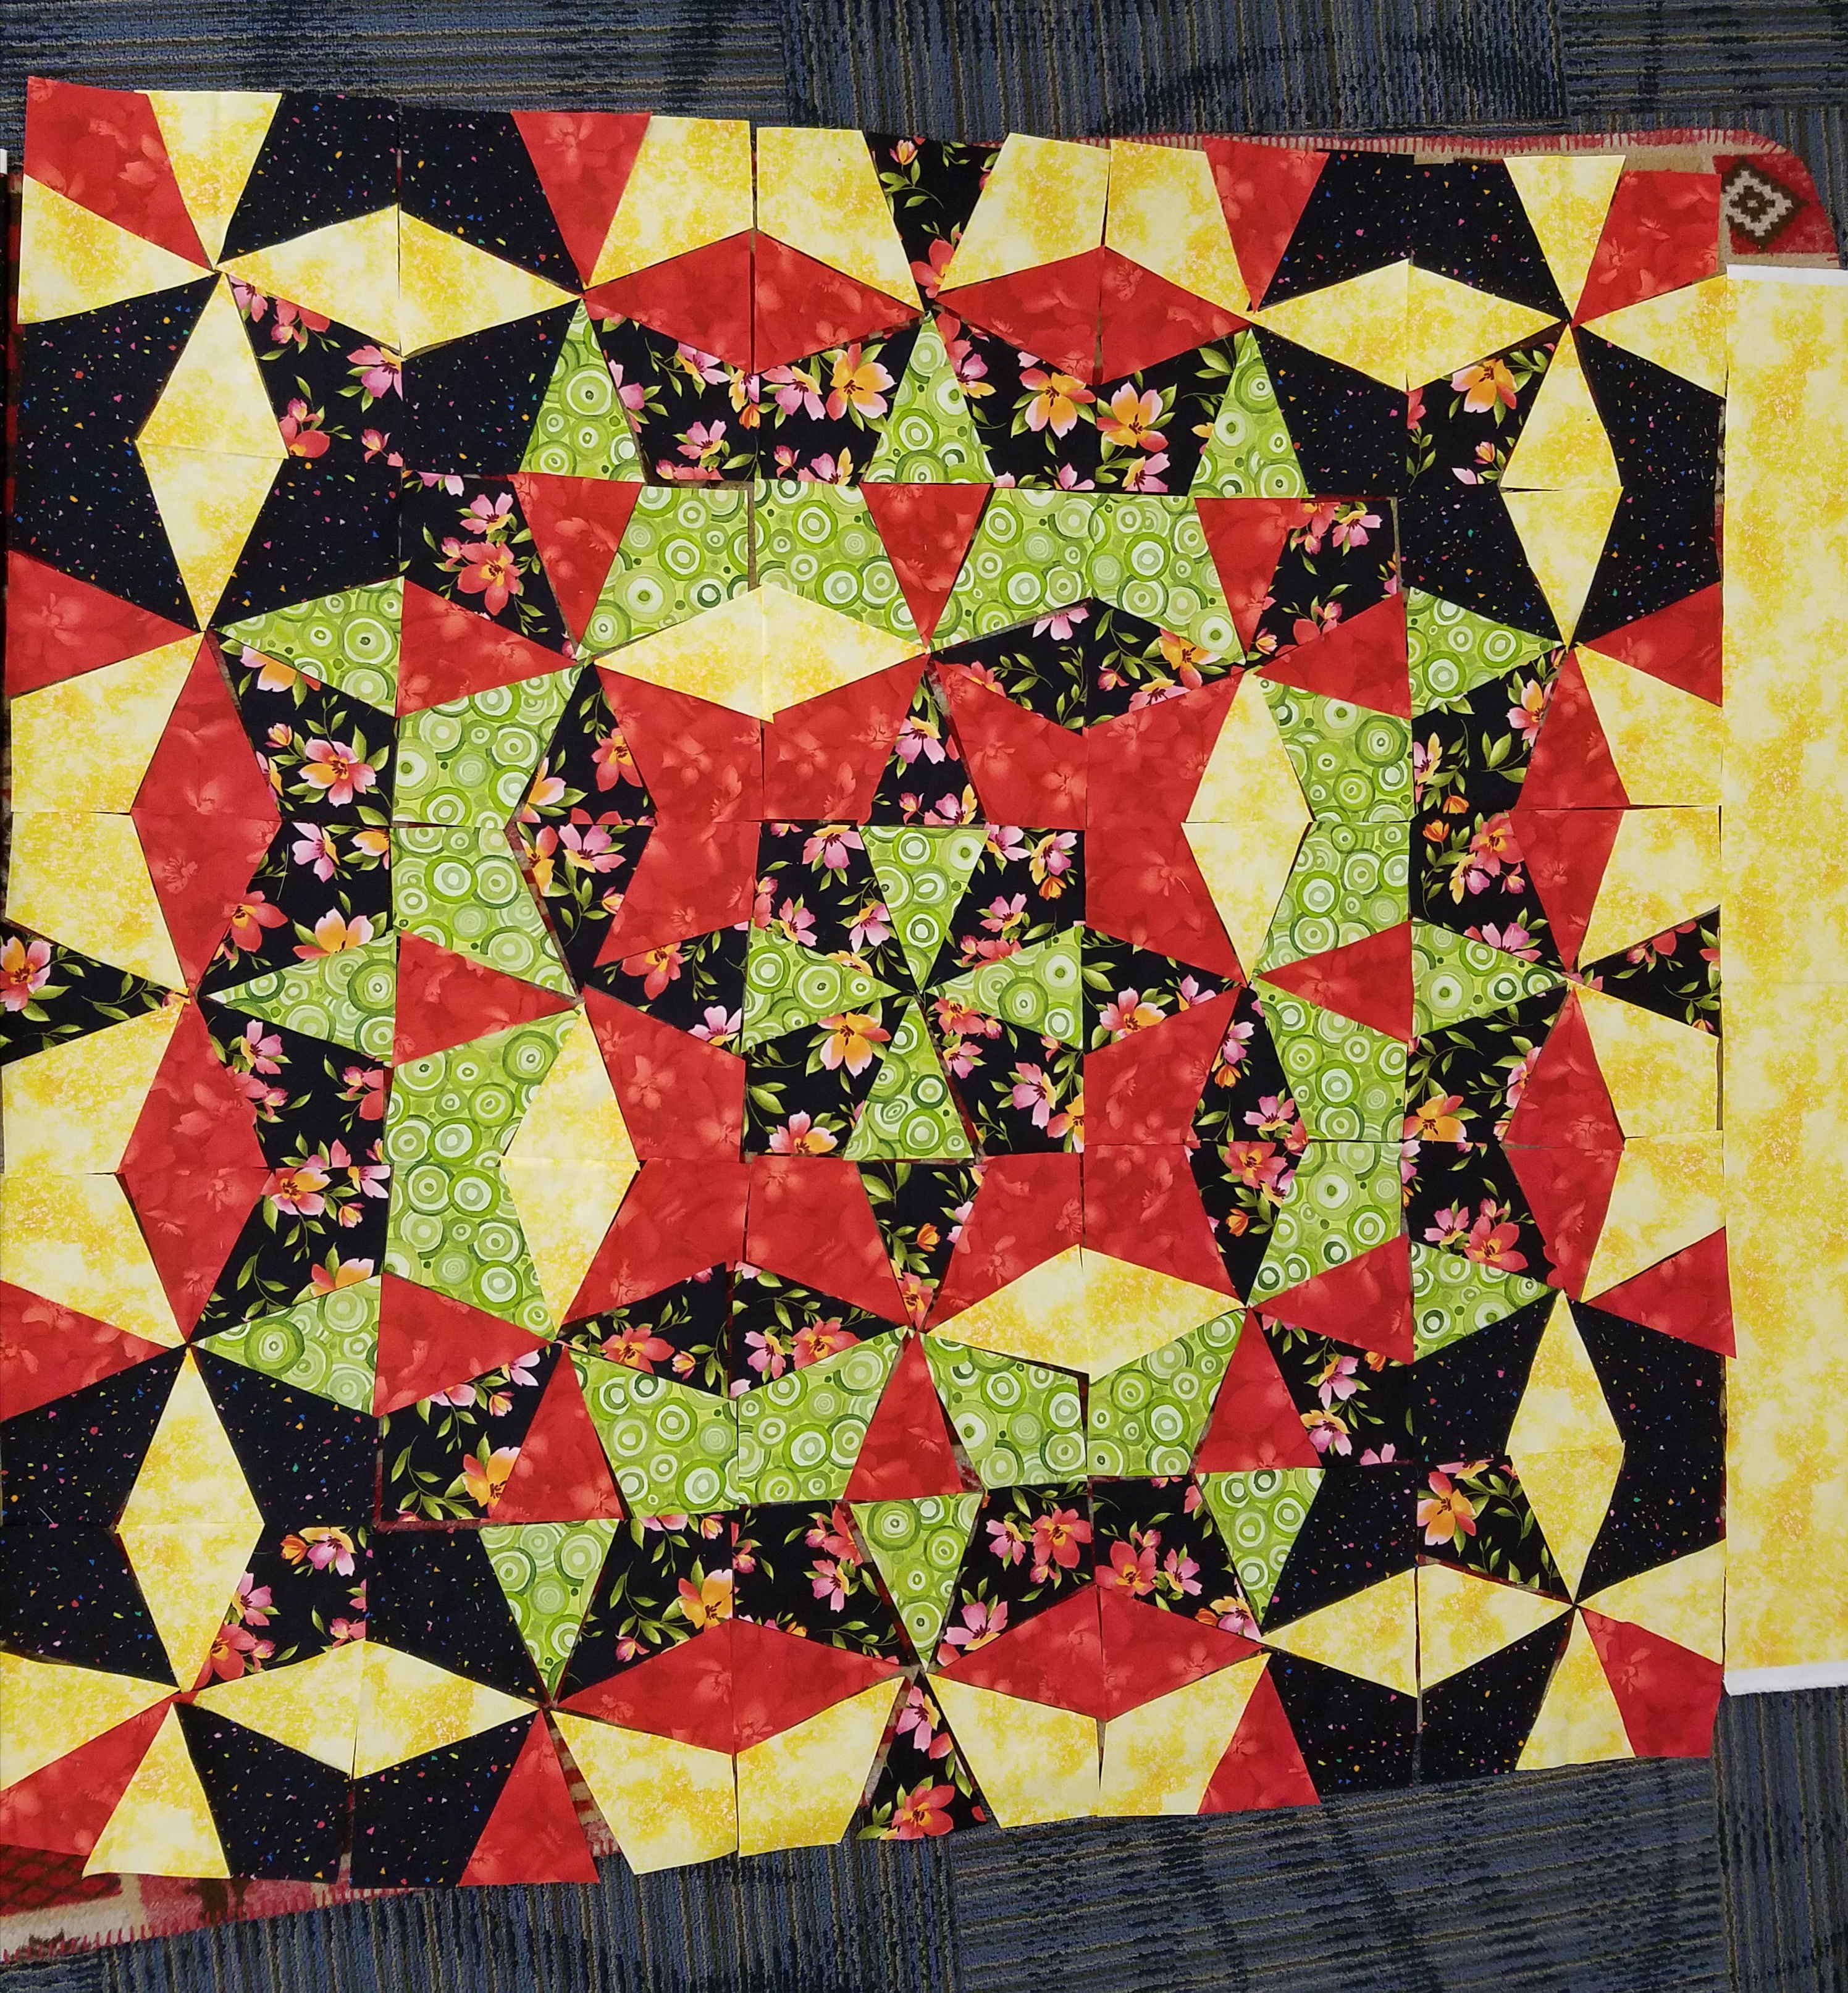
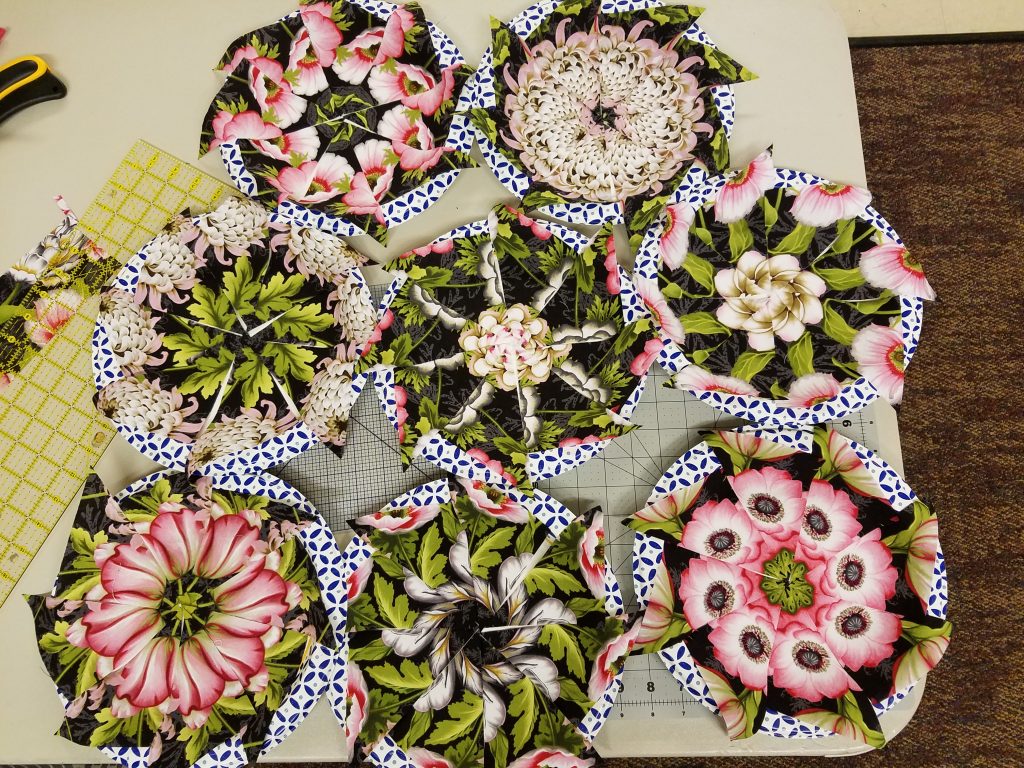
In April, I taught my Kaleidoscopic Pinwheels class for the West Sound Quilters in Port Orchard WA and also in March at the Emerald Valley Quilters’ Guild in Eugene, OR. My method is based upon Bethany Reynold’s Stack ‘N Whack technique which I modified so that the pinwheels float on the background rather than coming all the way to the edges of the blocks. This means that if there are inaccuracies around the outside of the blocks they may be trimmed to make all the blocks the same size without losing the pinwheel points. Everyone is successful and it’s easy for new quilters too. It’s a fun workshop in which students get instant gratification after cutting their eight identical squares into triangles and arranging the sets of eight triangles into pinwheels. You can’t predict how the pinwheels will turn out until you lay them out and it’s a delight to see what emerges. Here are some examples.


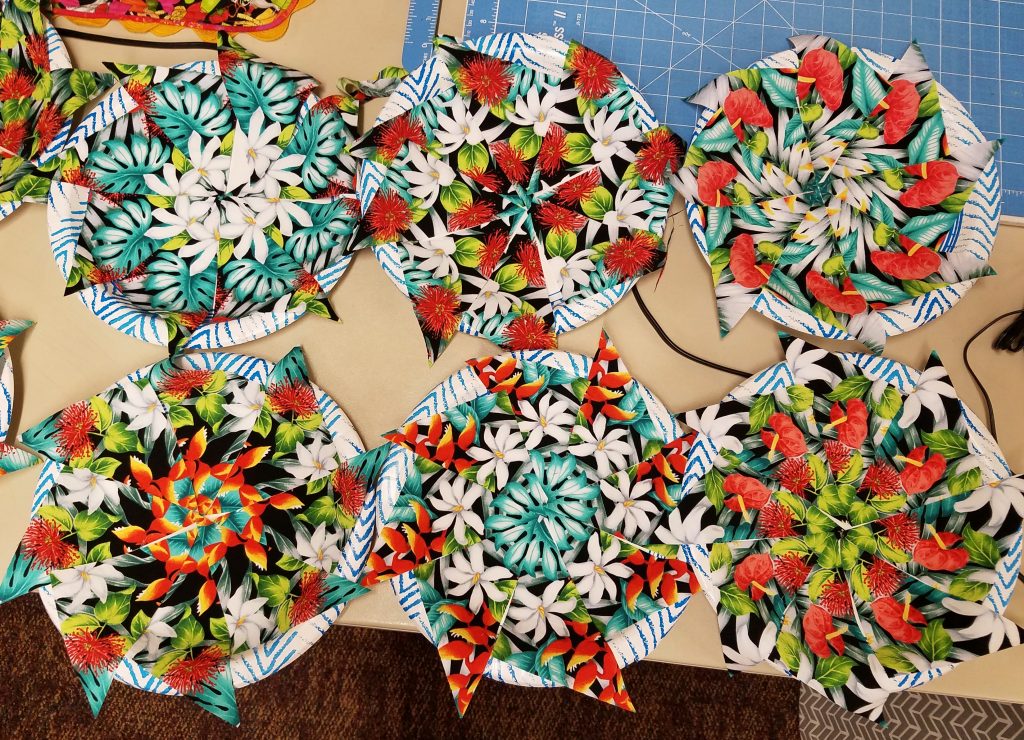
As you can see, the patterns created are beautiful and it’s hard to believe that each set comes from just one fabric. Here’s a selection of finished blocks made in the West Sound Quilters’ workshop. Note the float between the pinwheel points and the block edges, which makes the pinwheel pop even more. Aren’t they fun!

5th Grade Quilt Project (2)


Earlier this year, I spent time at Chestnut Hill Academy in Bellevue working with 5th Grade students to make two quilts. This blog features one, The Rain Forest, and my blog last week featured the other, The Ocean. In their science classes they were studying different habitats and each child selected an animal for detailed study. They made line drawings of their animals on 10″ quilt blocks and then spent 2-3 weeks hand embroidering.


We were delighted with the results and the enthusiasm with which the kids embraced this project. The embroidery was challenging for some, but they all enjoyed it and persevered. When the blocks were completed, I took my sewing machine to school and worked individually with each child as they machine stitched the block frames. They were proud of their work and so were we. Here are a couple of detailed shots.

The children determined the block layout and decided to arrange it according the height of rain forest which each animal occupied, hence the canopy dwellers are at the top of the quilt and the ground dwellers at the bottom. I assembled the quilt top and Wanda Rains machine quilted it. The quilt was auctioned at a school fundraiser the proceeds of which go towards special projects and field trips to enhance the curriculum. The two quilts raised just over $5,000! For me, the educational value was enormous and the money generated at the auction was just the icing on the cake.

5th Grade Quilt Project (1)

Earlier this year, I spent time at Chestnut Hill Academy in Bellevue working with 5th Grade students to make two quilts. This blog features one, The Ocean, and my blog next week will feature the second, The Rainforest. In their science classes they were studying different habitats and each child selected an animal for detailed study. They made line drawings of their animals on 10″ quilt blocks and then spent 2-3 weeks hand embroidering.

We were delighted with the results and the enthusiasm with which the kids embraced this project. The embroidery was challenging for some, but they all enjoyed it and persevered. When the blocks were completed, I took my sewing machine to school and worked individually with each child as they machine stitched the block frames. They were proud of their work and so were we. Here are a couple of detailed shots.

The children determined the block layout and decided to arrange it according the depth of ocean which each animal occupied, hence the surface dwellers are at the top of the quilt and the deeper dwellers at the bottom. I assembled the quilt top and Wanda Rains machine quilted it. The quilt was auctioned at a school fundraiser the proceeds of which go towards special projects and field trips to enhance the curriculum. The two quilts raised just over $5,000! For me, the educational value was enormous and the money generated at the auction was just the icing on the cake.

Sew Teach Me – Youth learning to sew for free

In July, I visited QuiltWorks, a wonderful quilt store in Bend, OR. Marilyn Forestell, the quilt store owner, has founded a non-profit organization, Sew Teach Me. Their vision is to match trained and screened mentors with youth to learn to sew at no cost in a safe and nurturing environment supported by a community with the necessary tools, skills and projects for a successful sewing experience.

Marilyn’s team of volunteers teach youth basic sewing skills at her store and want to share their love of sewing with the next generation. The Sew Teach Me website provides a wealth of information and the opportunity for you to set up your own team at your local store. You will receive full guidelines for the projects to help you get started. To learn about becoming more involved, you can also contact Marilyn at marilyn@quiltworks.com.

The four beginning sewing sessions teach basic sewing skills, while creating simple and fun projects, within a one to two-month time period. These classes are free. Materials, including sewing machines that have been donated by the local sewing community.
The four sessions are:
1) Getting to know your sewing machine and making a name tag
2) Making a pillowcase
3) Making a sewing tool caddy
4) Making a pillow pal
The mentors are volunteers who have gone through a background check, and a training session to be prepared to work with students. There are many donation opportunities from donating funds to helping build the program to donating pre-cut kits for the various projects.

I applaud Marilyn for initiating this project which has already introduced over 100 youngsters to the joys of sewing. I encourage you to work with kids. Even if you can’t develop a full program like this, you may have the opportunity to work one-on-one with an eager young person who wants to learn to sew. Start with a small project that may be easily completed, before moving on to larger more time consuming ones. My books, Creative Quilting with Kids and Patchwork and Quilting with Kids have a wide range of projects for individuals and groups. The books are out-of-print, but second-hand copies are available on Amazon.


Students’ work: Gateway to Mongolia

I’ve had a busy schedule of teaching over the last couple of months. Here are photos of the beautiful Mongolian Ölzii blocks which some of my students made during my Gateway to Mongolia classes at the North Central Washington Quilt Guild in Wenatchee and at the Baltimore Heritage Quilt Guild, MD. The pattern is available at my on-line store. Students are always excited when they complete the block and we display it on the background fabric where it comes to life. I love the variety from all the different fabrics. Some really pop and others are soft and subtle.

Teaching at Kenai Peninsula Quilters, Soldotna, AK

In July, I taught a two-day workshop for the Kenai Peninsula Quilters in Soldotna, AK.We did Bargello Quilts with a Twist  making my 16-piece Bargello blocks and then designing with them. I love to teach this as a two-day class because students have enough time to complete a good number of blocks and reach the creative part of arranging them to generate many patterns. It was a big group with 18 students. We had a wonderful time and they delighted in seeing the variety of blocks and layouts from all the different fabric choices.

We began by making 16 blocks, but some students had time to make extras for a larger quilt. One lady even completed her quilt top of 24 blocks on-point with setting triangles. Here’s a selection to give you some idea of the many possibilities from working with this block.

Teaching at the North Carolina Quilt Symposium

At the beginning of June, I was a faculty member for the North Carolina Quilt Symposium, hosted this year by the Asheville Quilters’ Guild in Asheville on the campus of the University of NC. It was a wonderful four day event with 17 national teachers and 350 attendees. I taught two full-day workshops and one half day. It’s always a joy to see my students’ work develop and there is such a variety of fabric choices making for very differing results. Here’s a sampling from my Op-Art Kaleidoscope class, where students made large Kaleidoscope blocks, cut them into nine pieces and rearranged the parts to create these new blocks. This technique works well for batik fabrics, as shown below.

The multicolored scrambling of the block parts rather than only using two fabrics, made for an interesting variety of blocks. This student went to town on her assembly-line piecing and created quite the pile of kite and wedge pairs! Another student from my other full-day class, the Gateway to Mongolia, worked in the dorm room to complete the whole quilt top which she brought to show me at the end of the symposium. I love the enthusiasm of these ladies and thoroughly enjoyed my time there.

Gateway to Mongolia

I recently taught my Gateway to Mongolia class at the Metropolitan Patchwork Society in Beaverton, OR. The pattern is available from my on-line store. Here is what one of my students made. This beautiful Ölzii is made from one fabric.

When I first saw the fabric choice that this student brought to class, I wasn’t sure how the fabrics would work together. However, she was able to fussy-cut from selected areas of one fabric to create the desired effect and it is very successful. She used motifs in the pattern for the intersecting squares of the Ölzii design and sections of fabric that changed from lighter to darker green instead three different fabrics for a color gradation. The fabric in the outer edges of the Ölzii also came from this fabric. It really pops on the black background and we were delighted with the results. Here are another two, one on a light background and the other on a dark background. Both students did a fine job on achieving the woven effect with a good gradation of colors.

Teaching in Torrington, WY: Bargello Quilts with a Twist

In late April, I taught at the Goshen County Quilt Guild in Torrington, WY. This is a small farming community with a population of under 6,000, but the quilt group is thriving and active. I had a huge class of 22 students for my Bargello Quilts with a Twist class. I was concerned about teaching such a big group, but they were wonderful and all did really well. I loved teaching this as a two day class and snowy weather didn’t deter anyone from showing up on the second day. Having the second day allowed everyone enough time to complete a good number of blocks and to play with the orientation to design their quilt tops. There were so many options and a great variety of different fabrics. Here’s a sampling.

For the purple one, the large squares in the blocks were cut separately so that the little mountain scenes and trees could be fussy-cut and their orientation manipulated to the right way up. The striped fabric in the other one adds to the secondary patterns created when the blocks are put together. Both of these have 16 blocks.

The elongated pattern made from 16 blocks is an interesting design. On the right, this lady made 32 blocks and this was her first ever quilt!

These last two are made from the larger 9-1/2″ block size. On the left, we were auditioning different sashing fabrics to see which ones worked best. On the right, the large squares were cut separately, creating a lovey kaleidoscope design in the center.

Teaching in Cheyenne, WY: Kaleidoscope Puzzle Quilts

In late April, I taught at the Cheyenne Heritage Quilters’ Guild in Cheyenne, WY. It was a large class of 19 ladies and each designed their own unique Kaleidoscope Puzzle quilt. It’s always fun to see the patterns emerging and the variety of fabrics that the students bring to class. They learn a great deal by looking at the fabric combinations used by their fellow students and also the importance of choosing a variety of values, (contrast between the different fabrics), so that the patterns they create are easily visible. They could design squarely set or on-point quilts. Here’s a sampling of their work.